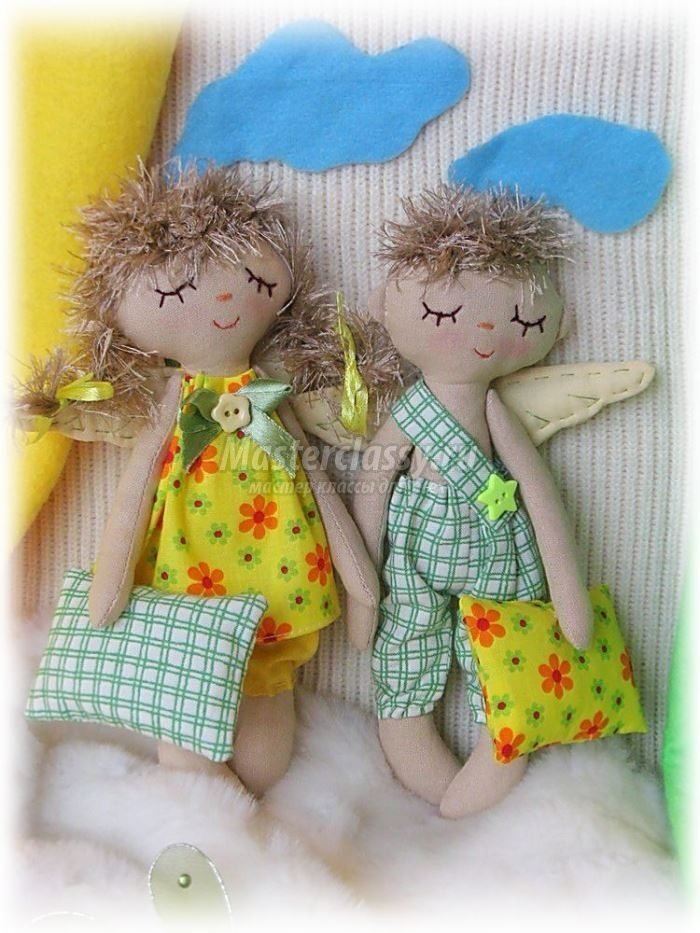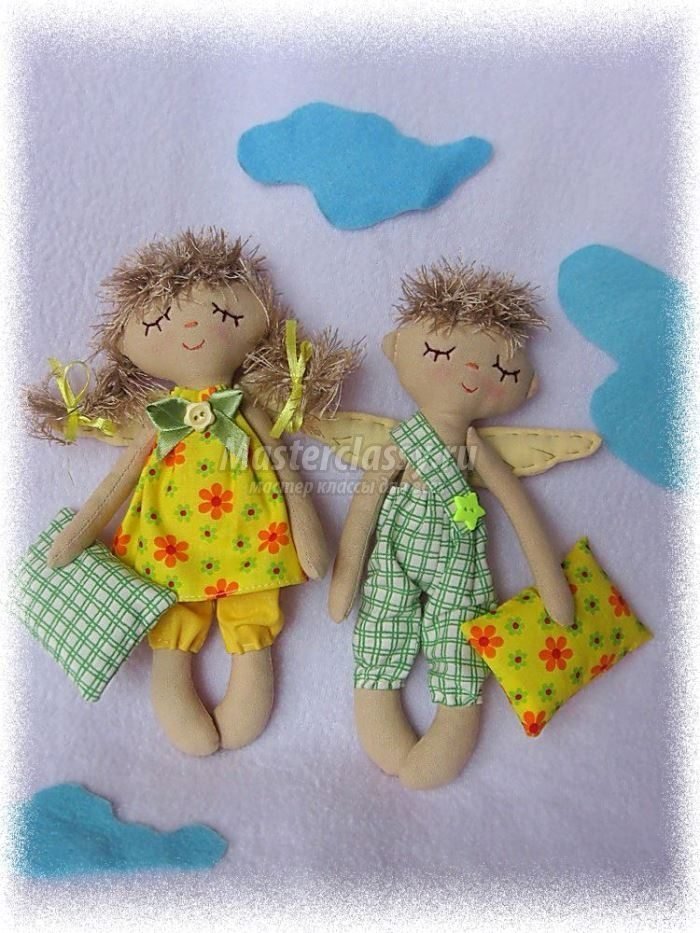
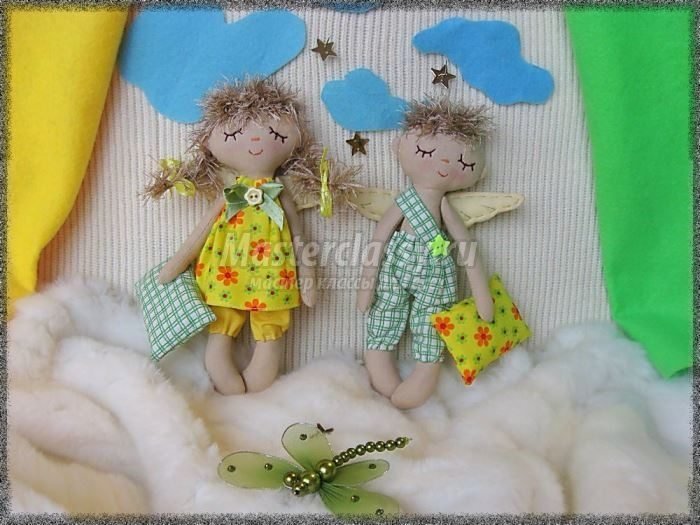
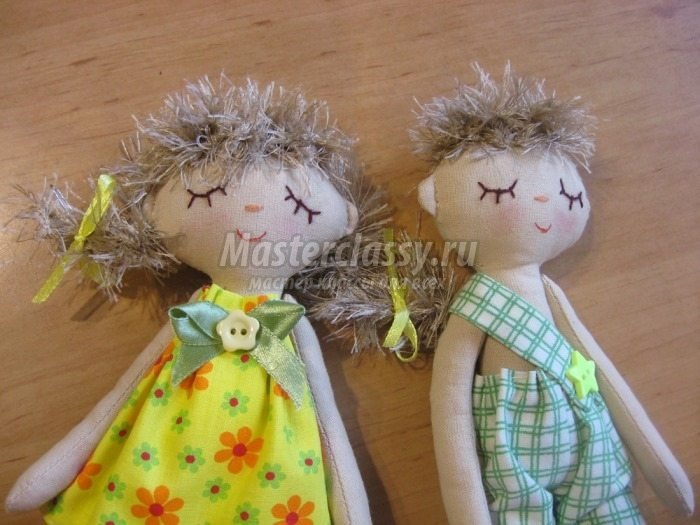
We discard our vanity on the eve of holidays and let us relax, sew beautiful couple sleeping angels . They can settle the children’s room, bedroom or even in a cozy little corner near the fireplace.
So, let’s get together and start working – sew angels with their hands . To sew two sleeping angels, we need:
- Four small denim segment,
- sintepon,
- Satin ribbon dresses,
- Narrow satin hair ribbon,
- Buttons,
- hair yarn “grass”
- Binding wire,
- Wool thread for embroidery,
- Threads,
- Paint,
- Brush et al.

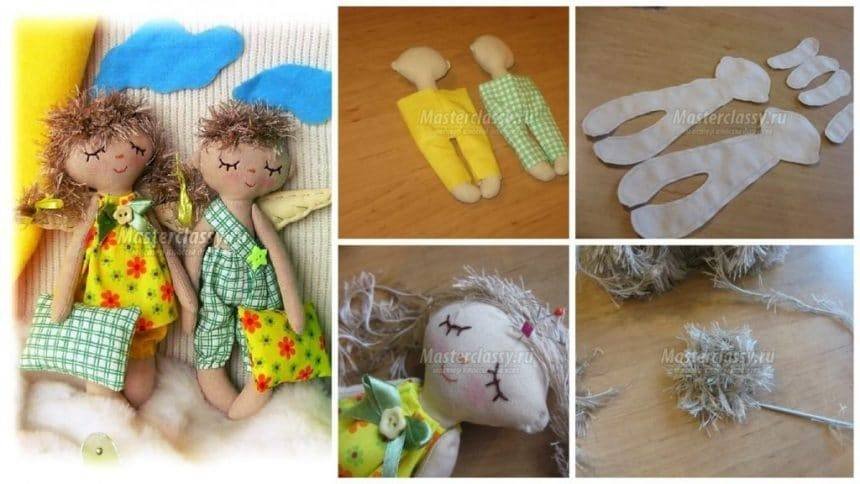
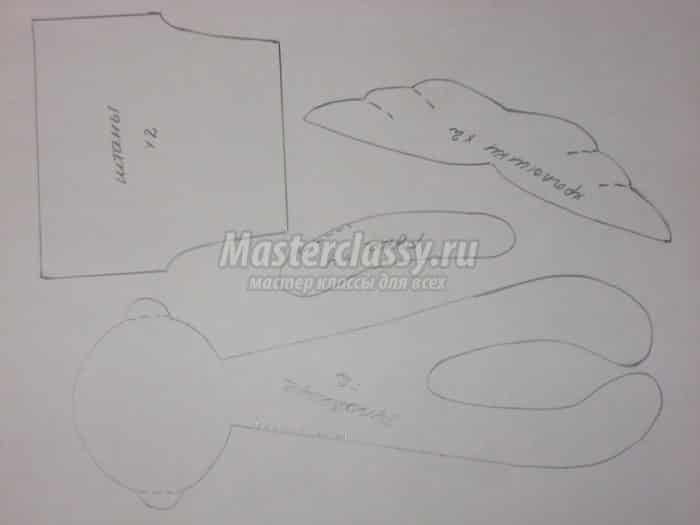
On a piece of paper draw all the details angel. Specify the number of parts. This we will pattern of sleeping angels .
Sew we simultaneously by two angels. Prepare a beige fabric. Fold it in two layers.

Spread pattern and pinned them to the fabric.

Pencil transfer the circuit patterns on the material. Exposed to a reversing parts on the front side, are labeled.

According to the planned lines to grind down the details of the machine stitching.

Cut parts with small margins.
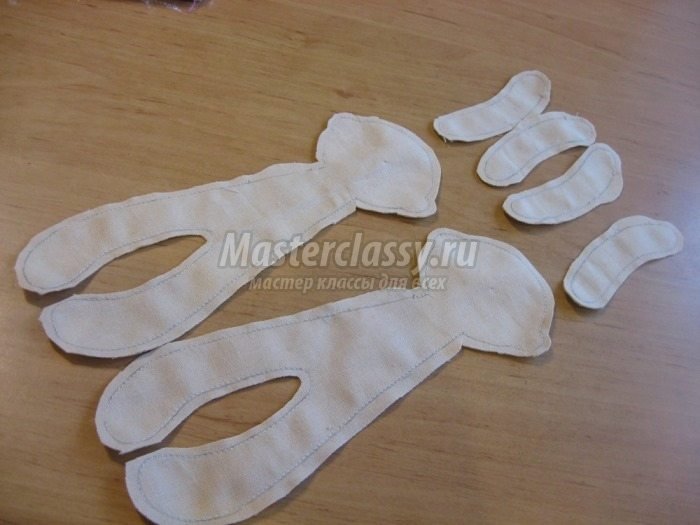
According to the width of the tips of the scissors make allowances notch. This will give us the ability to easily turn out the details and get smooth seams without corners.

Through the holes left by using a wooden stick to turn out the details on the front side. Straightening seams.

Through the open areas densely fill the details of synthetic padding.
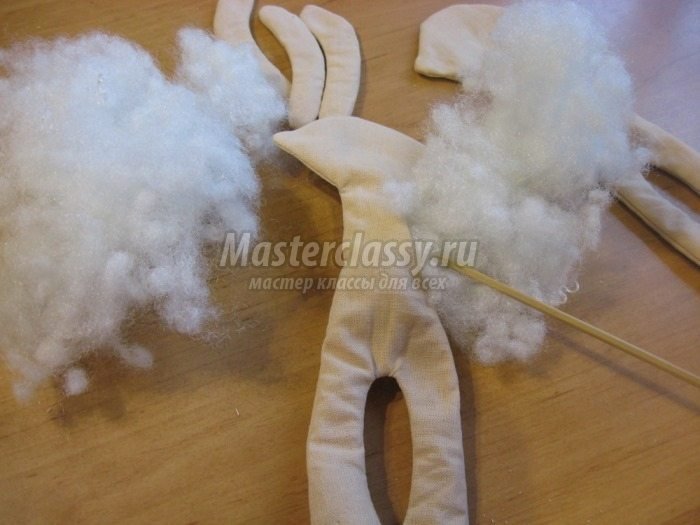
Ears of shear pins. 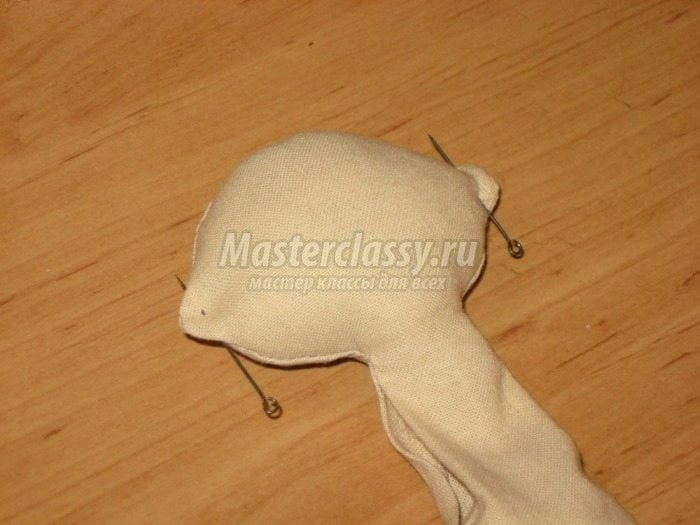
Sews through small hand stitches.

Sew up the opening of the trunk and arms invisible hand stitches.

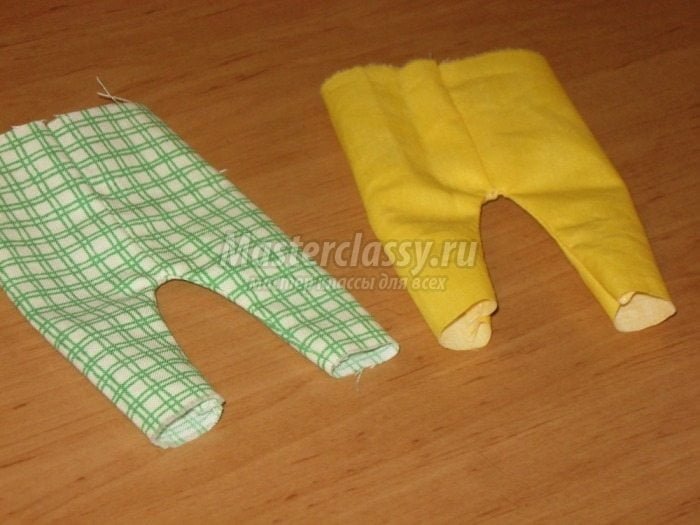
To prepare the fabric of clothing. Fold it in two layers.

Spread the pattern on the fabric of panties and pins pinned her.
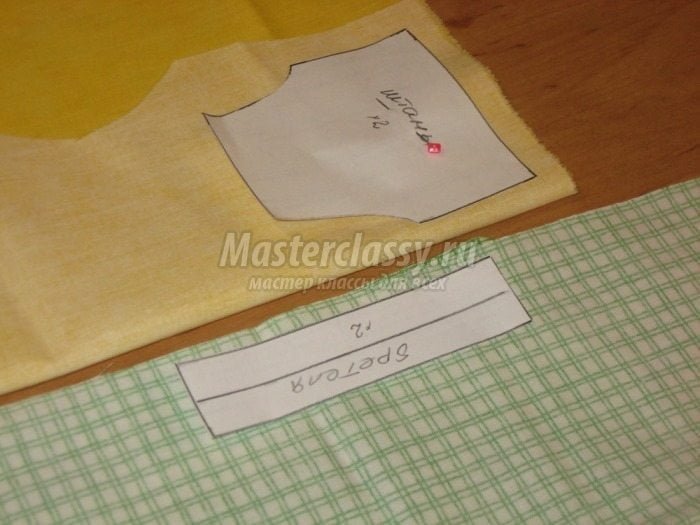
Pencil transfer the circuit patterns on the material.

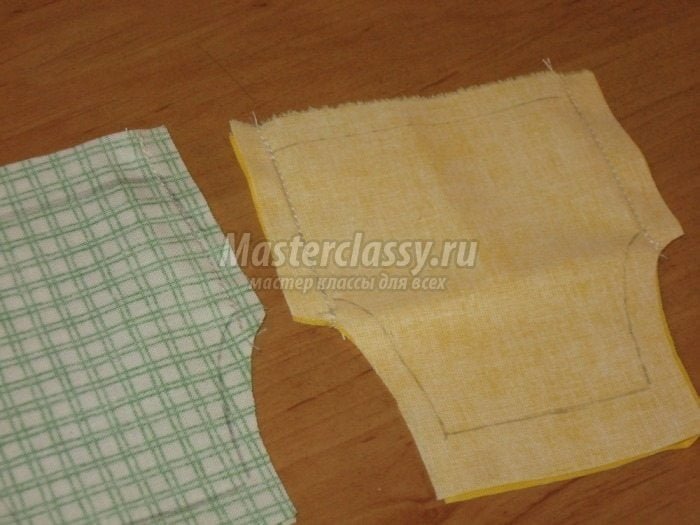
Cut parts of pants with small margins. Shear pins front and rear sections of the pants.

We grind the seams stitching machine.
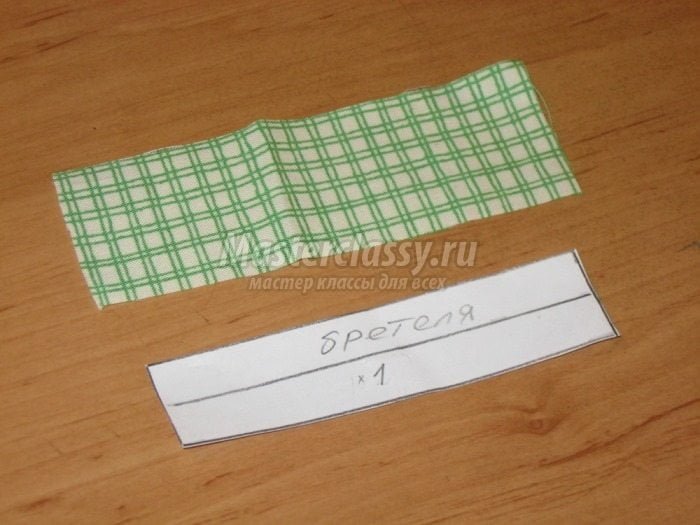
Cut one piece straps.
Fold pants parts together, combining the front and back seams. We shear pin them inside cutoff.
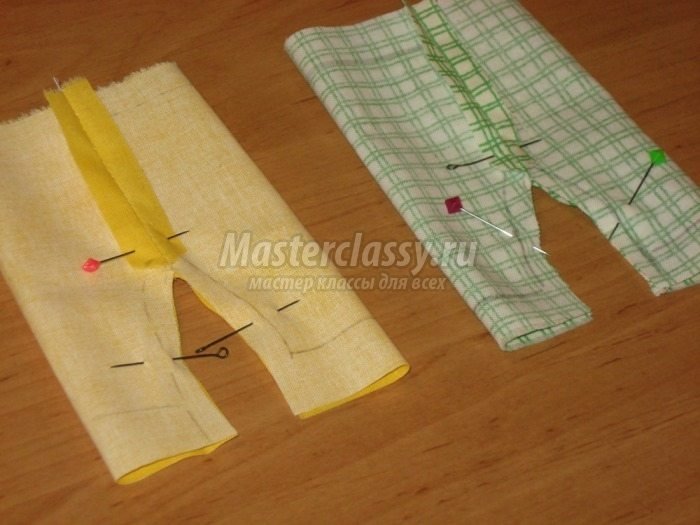

Wrenched the front of the pants.
Fold strap along the center. Pins shear cuts.
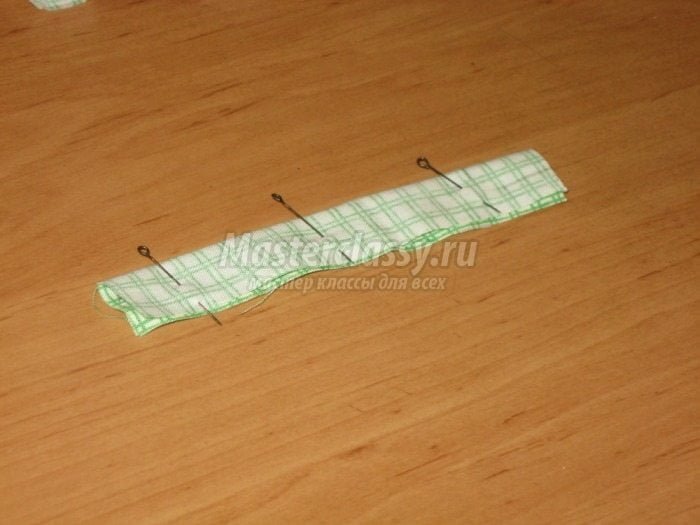
Grind strap machine stitch length and a cross-section.

With the help of a wooden stick to turn out on the front of the strap.

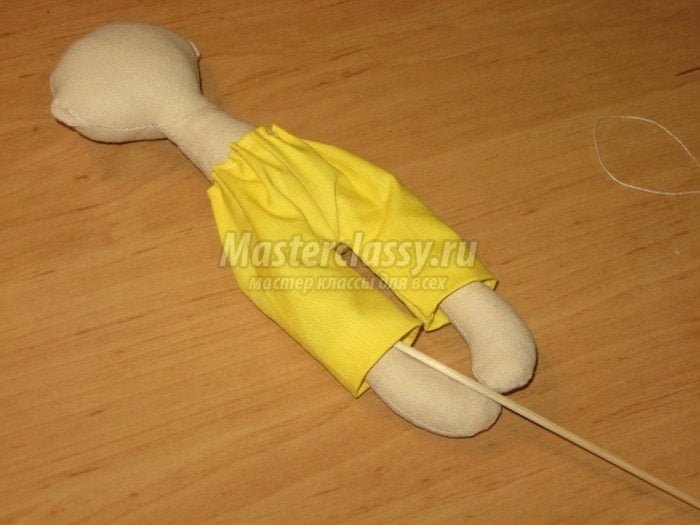
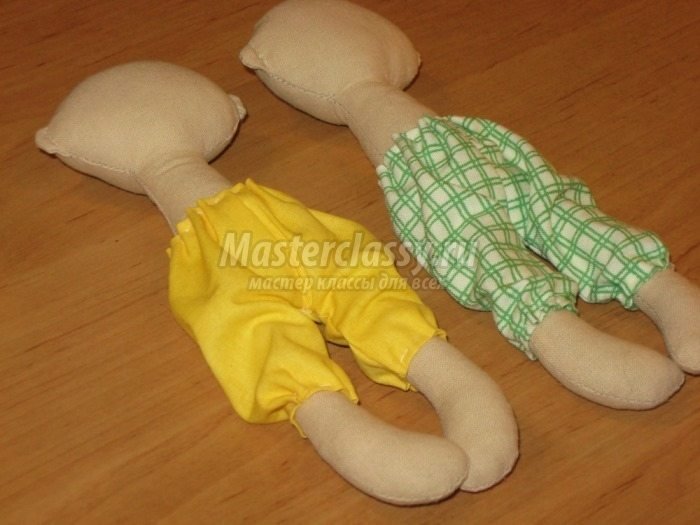
We put on pants angels.

The upper sections folded the pants inside at 0.5 cm and pins pinned hem.
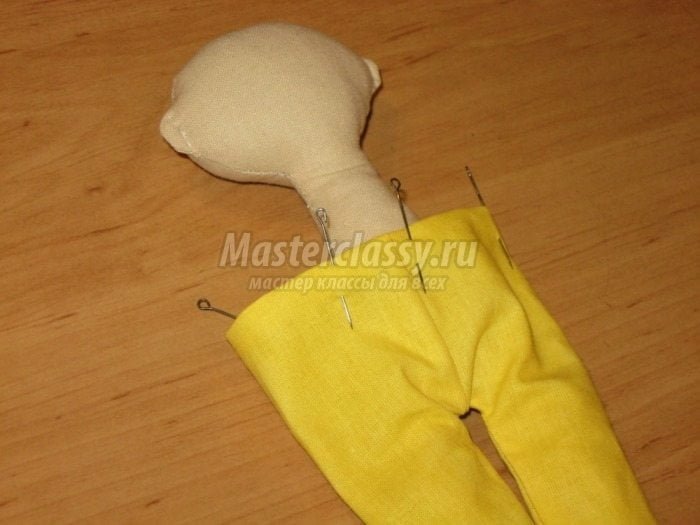
By paving the fold hand stitches for assembly.
Contractible thread assembly. Manual stitch sew waist pants to the body of an angel.

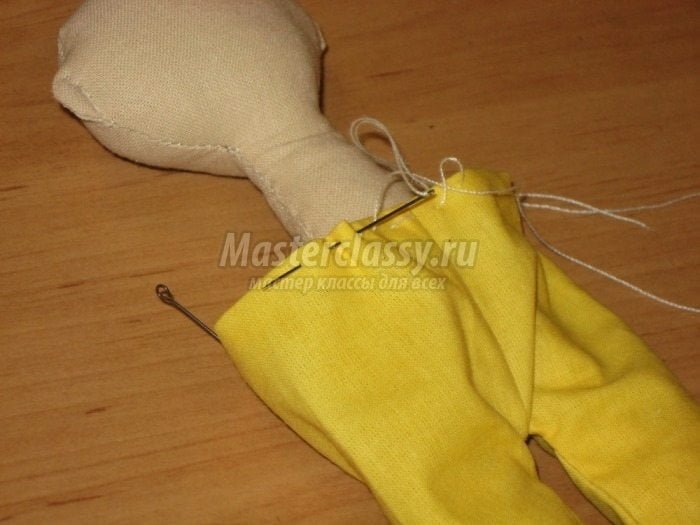
Bottom of pants folded the inside with a wooden stick. Angels Pair will perfectly dressed.
Downgraded as paving the hand stitches. Contractible thread assembly.
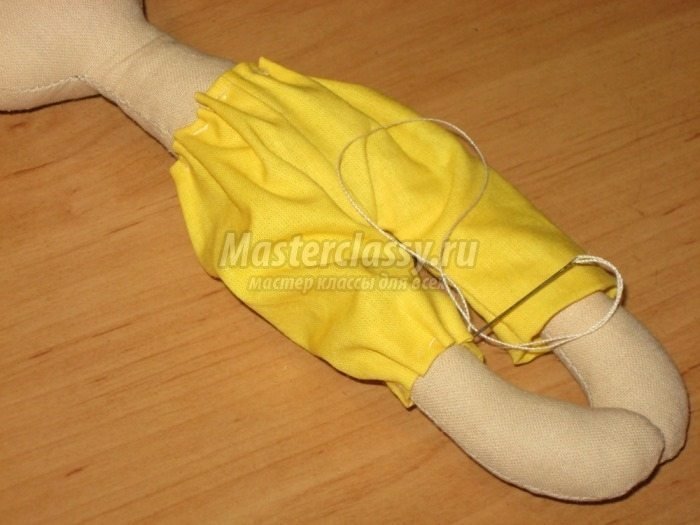
We sew the bottom of the pants to each leg in a circle.
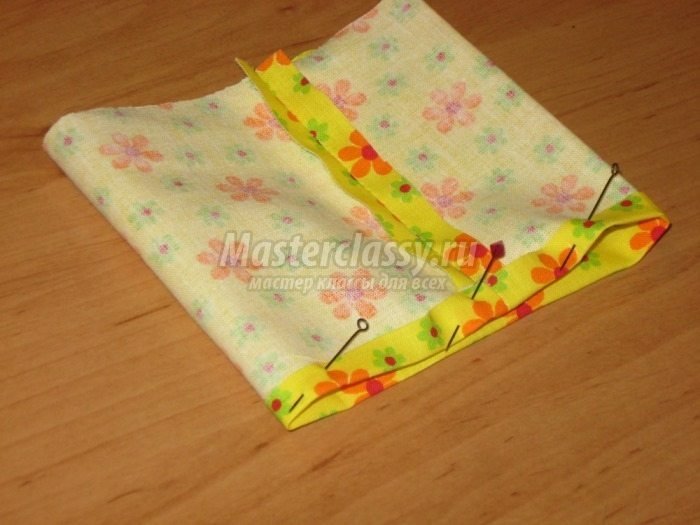
Go to sew dresses. Prepare tissue.

Cut the fabric rectangle 24cm x 10cm.

Fold the cloth across. Pins shear cuts.

Grind seam stitching machine. Iron out allowances in different directions.

The bottom of the dress folded the 1cm. Pins slaughtered hem.
Otstrachivaem hem stitching machine at 0.1 cm from the edge.

Top dress folded the 1cm. By paving the hem stitches for manual assembly.

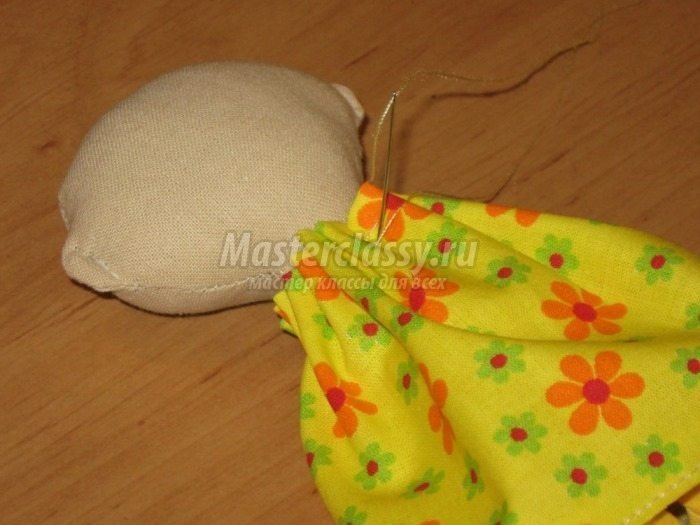
We put on a dress on a girl – angel.

Well, now we need a little rest, postpone the work will not be in a hurry – in our case it is important to do everything in a measured and carefully.
We continue to ” sleeping angel master class .” We have already done a lot, there is still a little bit and as a result we get a perfect pair.
So, our final step was that we put on the dress angel girl. Contractible thread assembly. Manual stitch sew neck dress to the body.
From satin ribbon make a bow.

Decorate dress in the middle of the ribbon bow.

On top of the bow sew a button.

By the torso pin pinned handles.

Pens hand sewn stitches through.

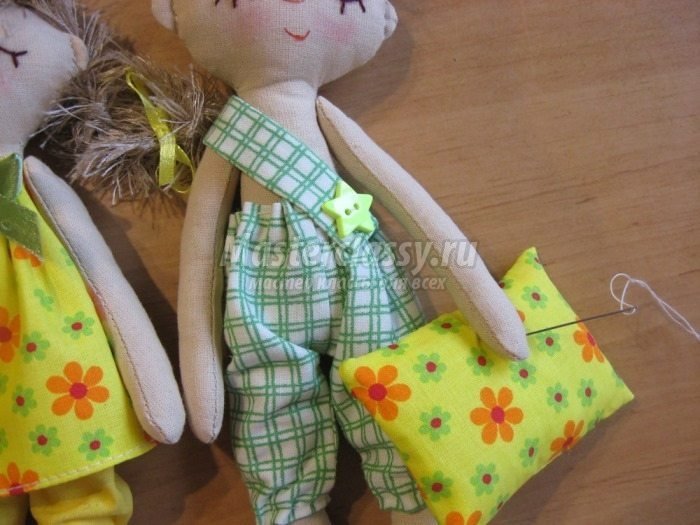
Boy pin pinned strap on pants.

We sew on a button on the front strap.

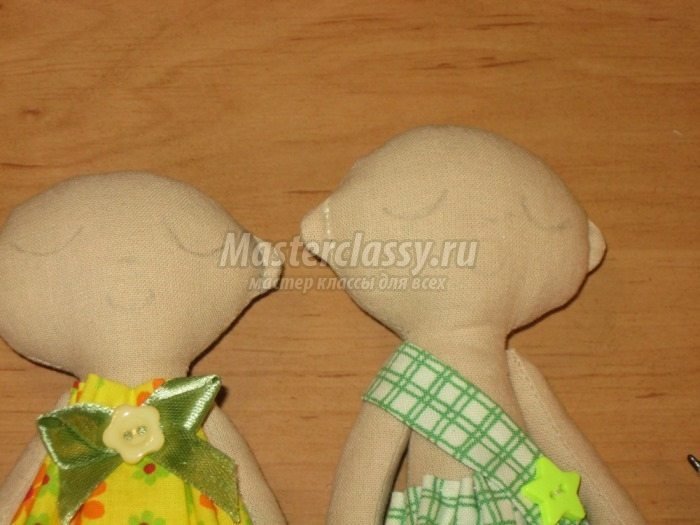
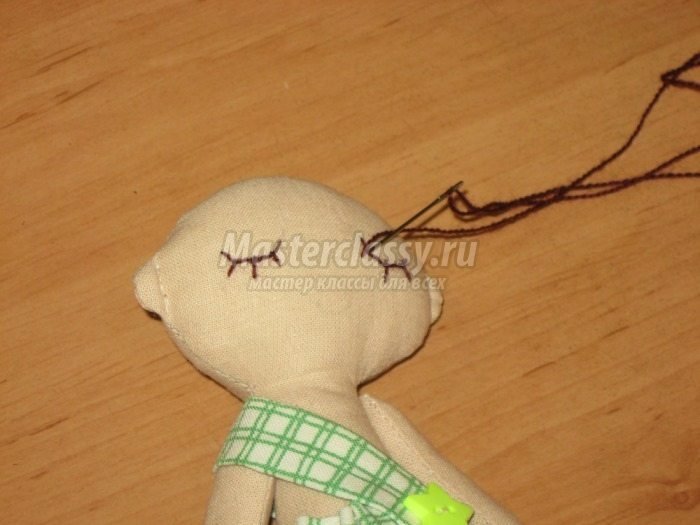
Slim pencil draw sleeping eyes, nose and mouth.
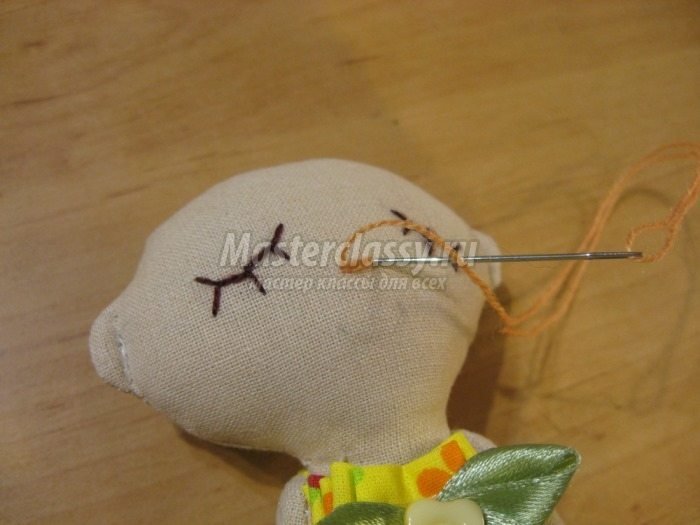
Eyes embroider woolen thread.
A few stitches yellow woolen thread embroider nose.
Mouth will draw a fine brush, red paint.
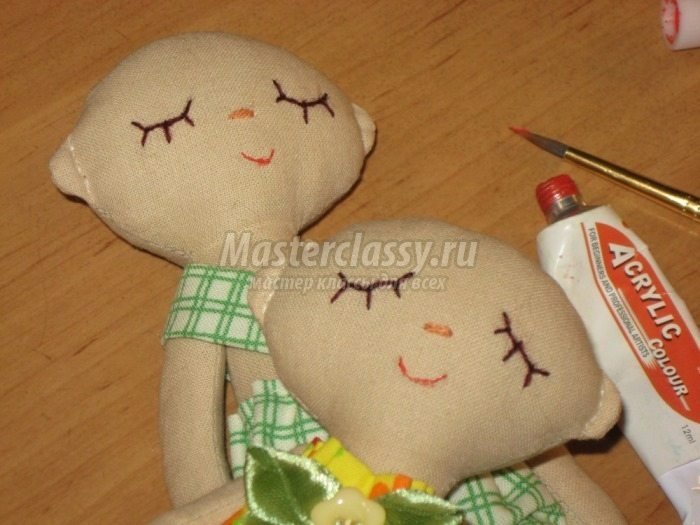
On the faces inflict blush.

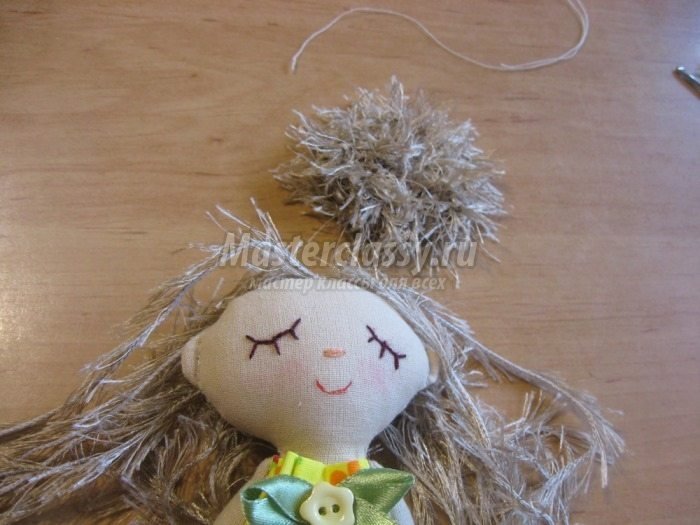
From yarn to make hair.

Cut the yarn required length of approximately 15 cm (7 – 8 strands). Pins pinned on top of the head. Manual stitch sew the hair on the head of the center.

On top of using a linked circle from the same yarn.

Hook recruit chain, connect it and several rows provyazyvaem. Ready to sew the circle to the top of hand stitches.
Cut the binding wire. It is, we need to mount braids.
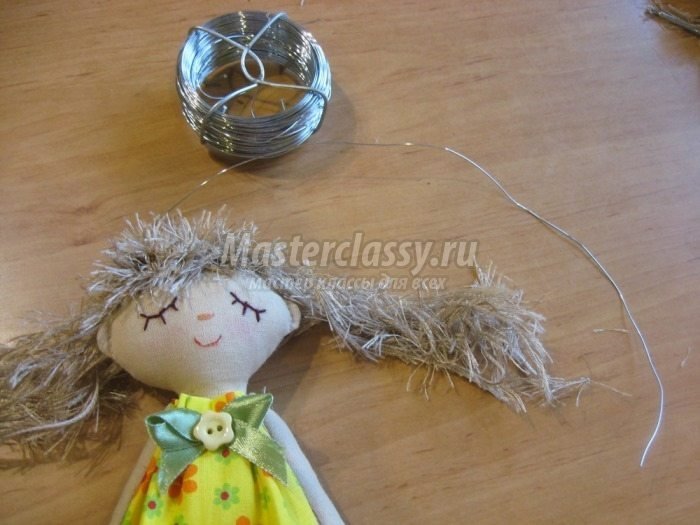
Pierces the wire head in the ears.
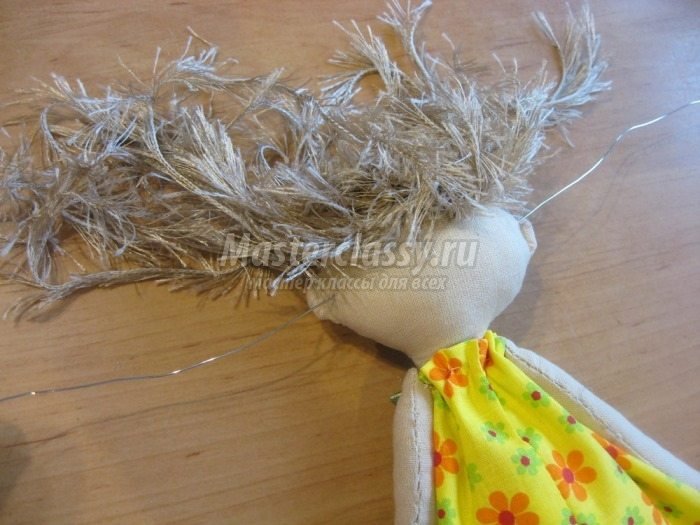
On the wire weave two braids. Knotted bows and with the help of wire twirl braids as we want.
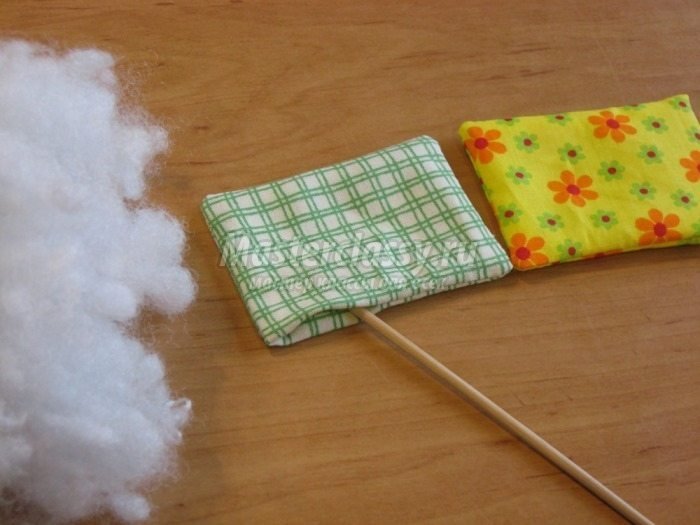
rectangles cut the fabric for the manufacture of airbag 16 cm x 7 cm.

Fold the fabric and pin shearing sections. We grind the seams stitching machine. In the corners leave openings for eversion.

Through the holes left by the gut-wrenching pads on the front side and fill them with synthetic padding.
Sew up the open areas invisible hand stitches.
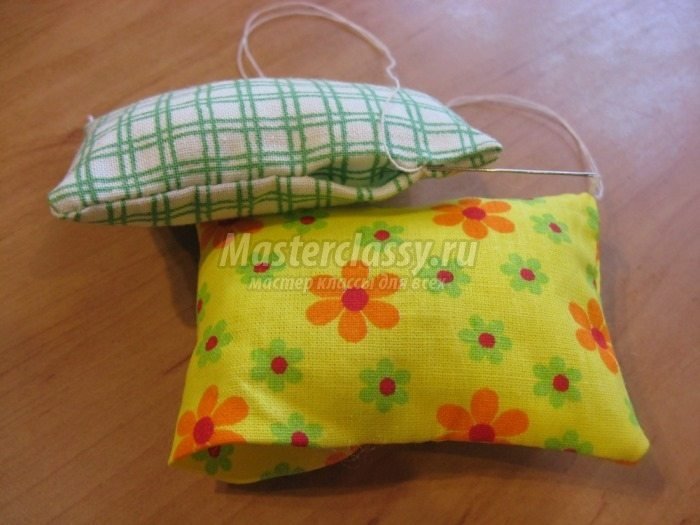
A few stitches to sew the handles cushion.
To add up wings in two layers of fabric.

Pins pinned the pattern. Pattern sleeping angels you provided.
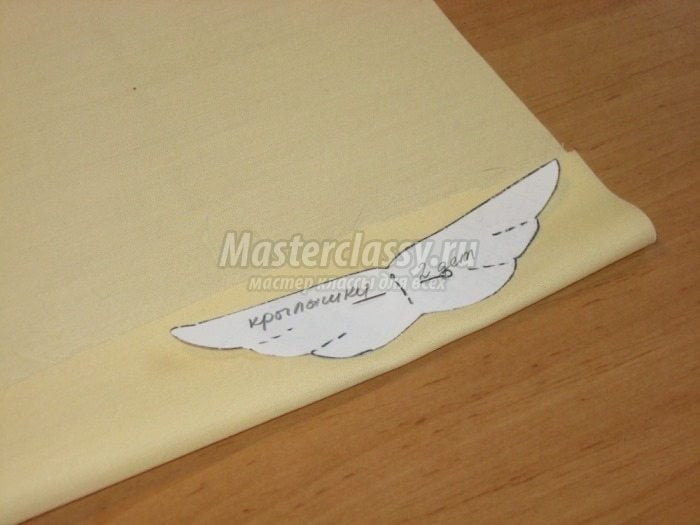
Pencil transfer the contour of the wings.

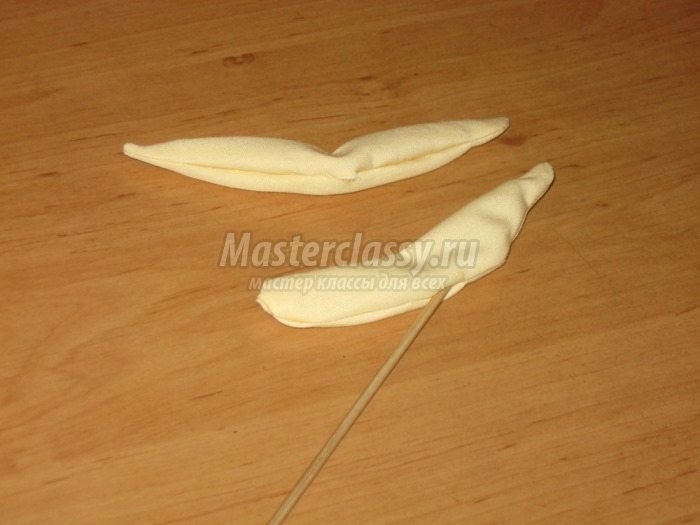
We grind machine stitching details. We leave open areas.

Cut parts with small margins. According to the width of the notch make allowances.

Wrenched wings on the front side.
Fill them with synthetic padding.
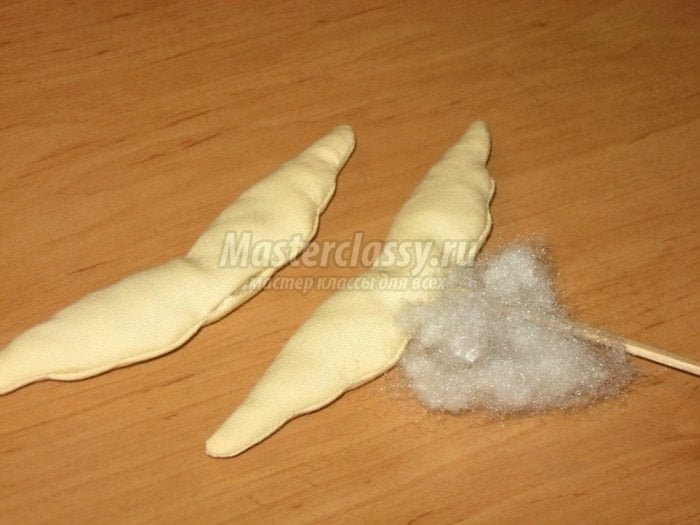
Wings sewn on the edges with hand stitches.

At the center of the wings pinned loops of satin ribbon.

Sewn eyelets and wings to the backs of our angels.

A pair of angels ready!