This is one of my favorite pieces of jewelry, and I wear it often. I used a picture of my daughter to make a sweet photo glass pendant that I absolutely love to wear. You could easily change the picture to match any of your loves or interests. Wouldn’t this make an awesome Valentine’s Day gift?


(This post first appeared at Crafts Unleashed, where I am a member of their fabulous Design Team.)
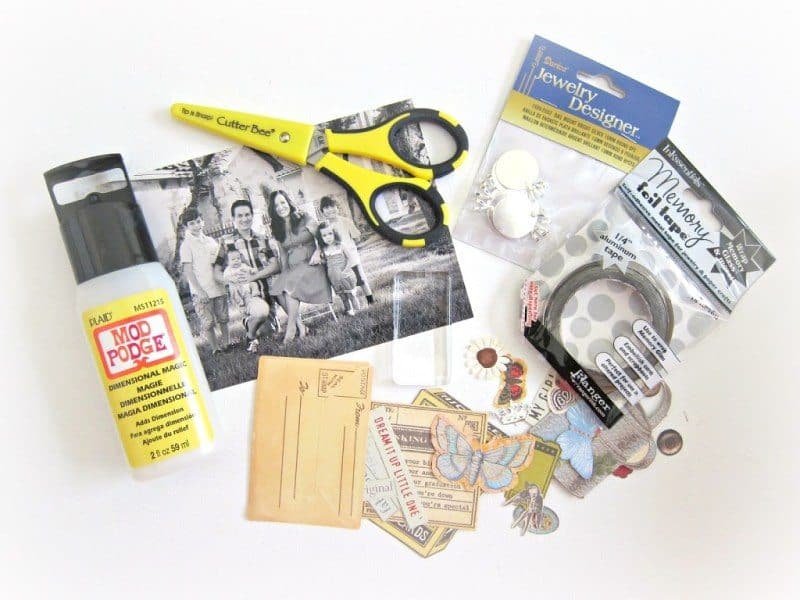
Supplies Needed:
Glass Tile Rectangle
Scrapbook Paper or assorted die cuts
Dimensional Magic
Memory Foil Tape
Bail
Aleene’s Jewelry Glue
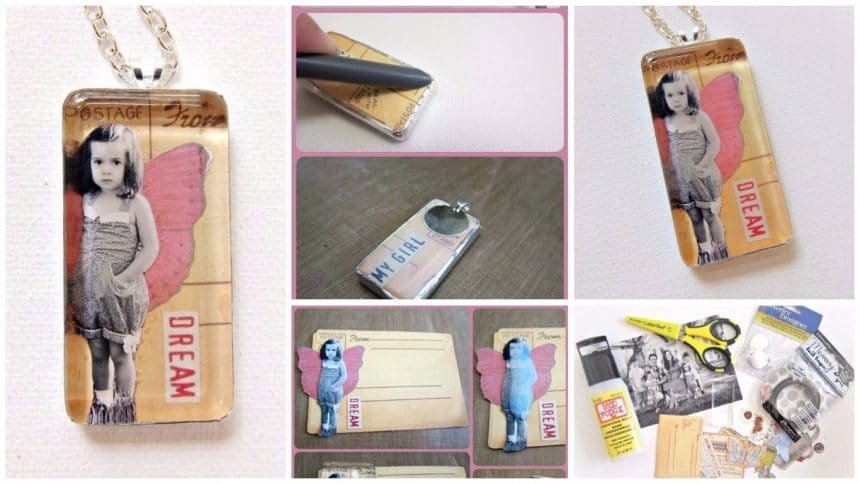
To make your own Faux Soldered Photo Glass Pendant:
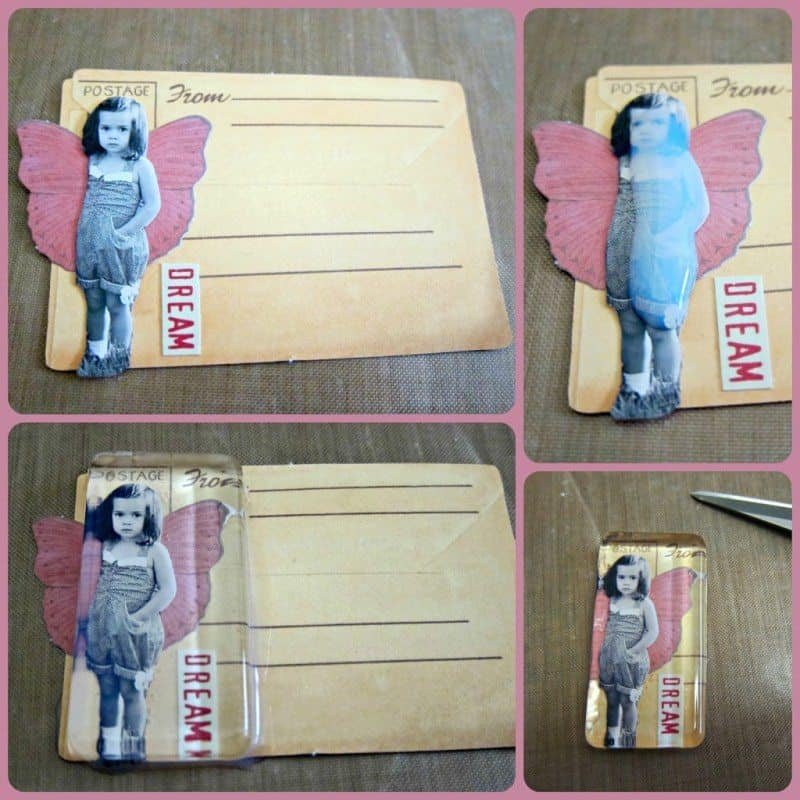
Step one: Fussy cut an image from a picture. Glue it onto a die cut and add other paper embellishments, like the wings and the word.
Step two: Apply Dimensional Magic to the center of the image. Press the glass tile firmly onto the image. After a minute or so, turn it over and firmly press on the back of the paper to smooth out any air bubbles that may be trapped. Allow it to dry.
Step three: Once it has dried, cut around the edges of the tile to remove the excess paper.

Step four: Cut a strip of the memory foil tape, and wrap it around the edges of the tile.
Step five: Use a bone folder or similar tool to firmly press down the foil.
Step six: Glue a bail onto the back of the tile and finish with Dimensional Magic.

I absolutely love my new pendant! It makes me smile when I look at it, and I love that it’s a picture of my little girl. Now I need to make one for each of my boys. It’s so easy to do you could make several in one day, for yourself and for gifts. Have fun crafting!

courtesy: morenascorner