
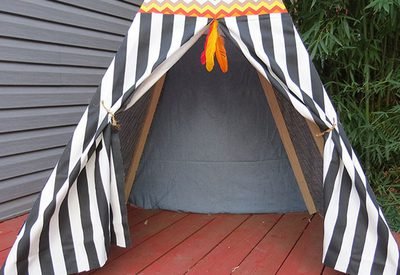
Making a teepee by hand might sound complicated, but this no-sew version is actually quite easy. You’ll find most of the supplies needed for the project, such as hot glue and fabric scraps, around the house. If you don’t have fabric scraps, you can use old sheets, clothing or even a drop cloth. Add pillows and blankets to create a cozy and fun spot for the whole family.

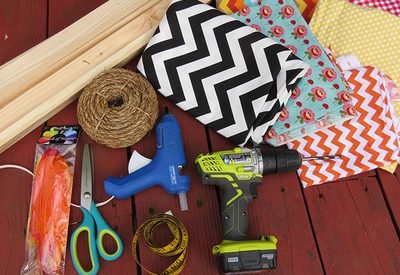
Supplies
Wood, 6 pieces, 1-by-2-inch by 8-foot
Drill
Hot glue gun
Measuring tape
Scissors
Rope
Fabric scraps in various patterns
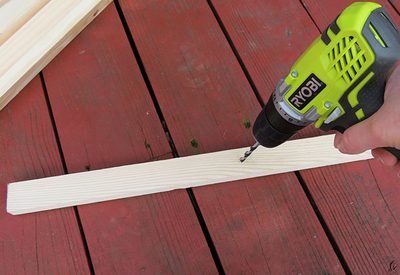
Drill Holes in the Wood
The most economical pieces of wood measure 1-by-2-inch by 8-foot. The pieces cost about $1 each at a hardware store and can be cut to size. For a large teepee, use the full 8-foot piece. For a medium size teepee, like this one, the wood can be cut to 6-foot long. For a small teepee, 5-foot-long pieces of woodwork well. Once you have the wood cut to size, drill a hole 12 inches from the top of each piece. The hole needs to be large enough to string the rope through.
String Rope Through the Wood
Starting with the first piece of wood, string the rope through and tie a knot so that it stays in place. String it through the next piece and tie another knot, leaving about 2 inches of slack.

Stand the Wood Upright
Stand the wood upright and position each piece to form a teepee shape. You’ll need someone to assist you with this step.
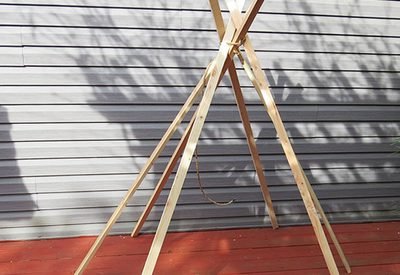
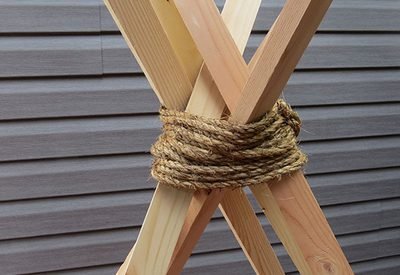
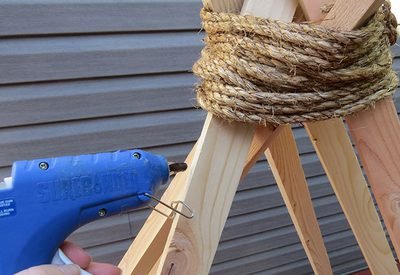
Wrap the Rope Around the Wood
Wrap the rope tightly around the top of the wood. This secures the frame.
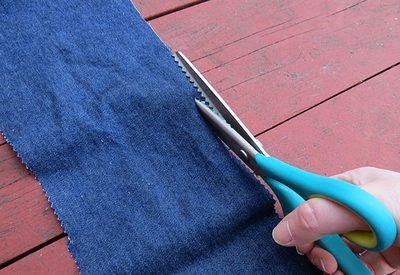
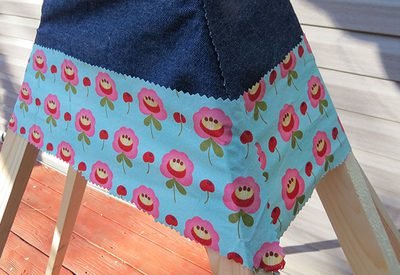
Cut Strips of Fabric
Cut strips of fabric for the top portion of the teepee. Pinking shears work best to prevent the fabric from fraying. Each strip will be a different width and length depending on how you design your teepee. If you have large scraps, start with long strips and trim as you go. Work your way from front to back and top to bottom. It’s OK to use smaller scraps as long as they cover one piece of wood to the next.
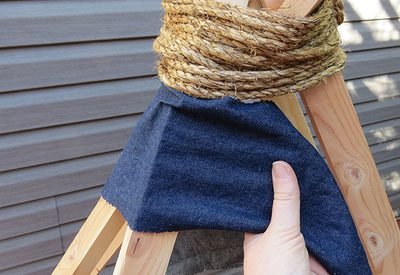
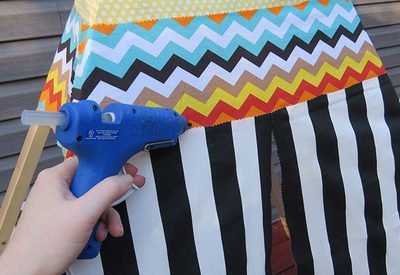
Apply Hot Glue
Apply a vertical line of hot glue to the edge of the wood
Wrap the Fabric
Stick one side of the fabric to the wood and wrap it around to the next piece of wood.
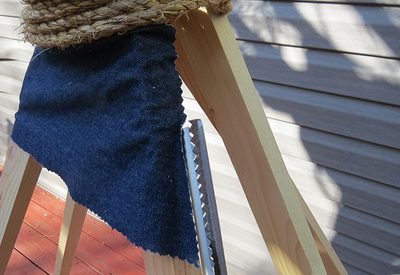
Trim the Fabric
Apply hot glue to the second piece of wood and stick on the fabric. Trim off any extra fabric.
Continue Wrapping the Fabric
Continue wrapping the fabric all the way around the frame, and start on the next pattern.
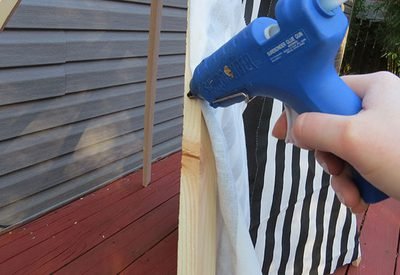
Make an Entrance Curtain
After applying multiple fabric patterns, make the entrance curtain. The fabric will be glued vertically and run to the floor. You can use two pieces of fabric, one for each side, or one large piece that will cover the entire front section. Just make sure to cut a slit up the center so you can open the curtains. To secure it, glue the top of the curtain to the bottom of the last horizontal piece on the frame
Glue the Curtain to the Wood
Apply glue from the top to bottom of the wood and attach the sides of the curtains.
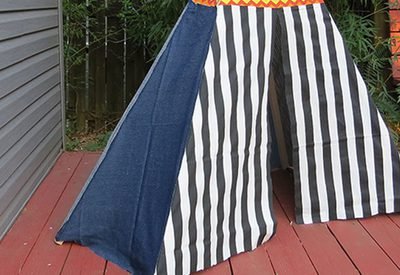
Cover the Back with Vertical Panels
You can use horizontal strips or larger vertical panels to cover the back of the teepee. For vertical panels, cut large triangles to cover each section. Once glued into place, you can trim off any extra fabric.
Tie the Curtains
To tie back the entrance curtains, cut a small hole in the fabric about halfway down the teepee, close to the wood. String a small piece of rope through the hole and around the fabric.

Add the Finishing Touches
There are so many uses for a teepee, so get creative with the interior decor. If it’s for your kids to play in or a slumber party, fix it up with sleeping bags and treats. You can also have your kids make signs to hang on the front curtain. Or, put pillows and blankets in the teepee to make it a quiet, cozy spot for homework or reading.
courtesy: ehow