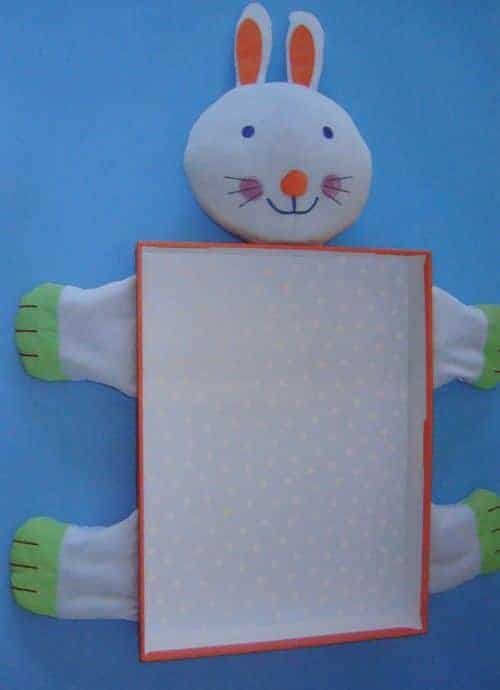
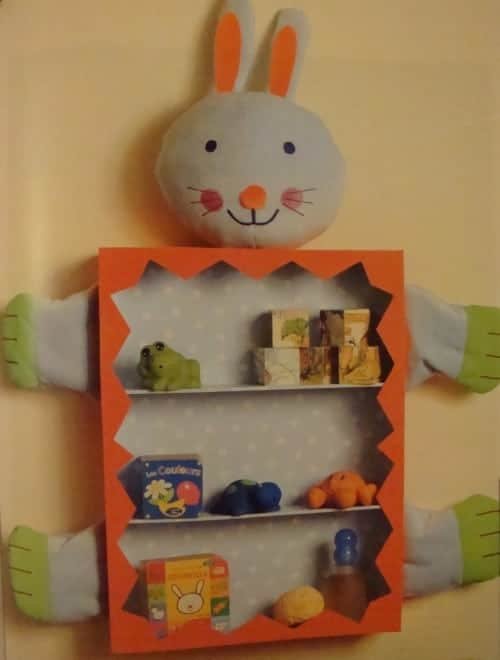
A small collection …, a toilet kit …, a family of doudous …, books … A small collection …, a toilet kit …, a family of doudous …, books … All this can find a place in this amusing decorative shelf. Depending on where you hang it, it will be blue, pink, multicolored … and the rabbit will be replaced by a puppet, a puppet or a stuffed animal. It will make sensation anyway!
Prepare the required elements
Prepare the game carpet ” rabbit ”
Cut in 3 mm cardboard:
– 1 bottom: 29.4 X 39.4cm
– 2 long sides: 39.4 X 7 cm
– 2 short sides: 30 X 7 cm
– Shelves and Shelf Brackets: 6 times 12.6 X 6.4 cm
4 times 29.3 X 6.4 cm
Cut into the carton:
– 29.3 X 39.3 cm
Construction of the structure
Cut the bottom and the four sides of the 3 mm carton. Assemble the long sides against the bottom. Krafter the joints outdoors and then inside with strips of kraft paper
Construction of the structure – continued
Assemble the short sides in application against the previous assembly.
Krafter outside and then inside.
Exterior cladding
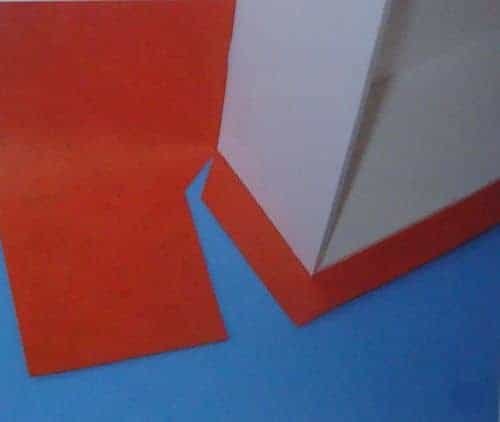
In a fancy paper, cut a rectangle of 58 X 48cm. Draw a light line at 9cm from a large and a small side. Glue the back of the box and glue on the paper aligning it on these two lines.
Cover the 2 large sides
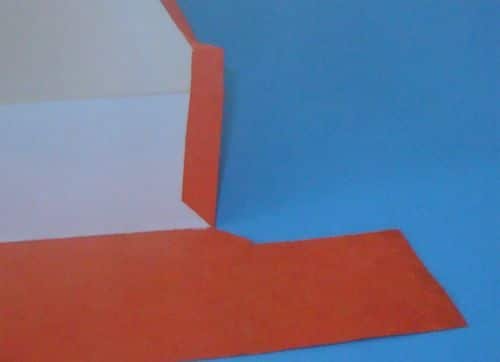
To cover the two large sides, make the notches indicated.
Gluing
Glue a large side of the box and fold down the paper. Glue the tabs on the two short sides.
Leave the top back on hold.
Small sides
For narrow sides, fold the excess paper from each end
Cut on the fold
Cut on the fold and glue the paper. Once all the sides are glued, pinch the corners
Remove the surplus.
Bonding
Glue opposite the two large sides then the two small ones forming the angles.
Fixing the elements
CAUTION: Keep 1 cm of fabric to fix the legs. CAUTION: Keep 1 cm of fabric to fix the legs. Either the legs of the animal are flat (carpet of awakening) or they are in volume (plush). “There will, therefore, be two different ways of fixing them.
For this model (waking mat)
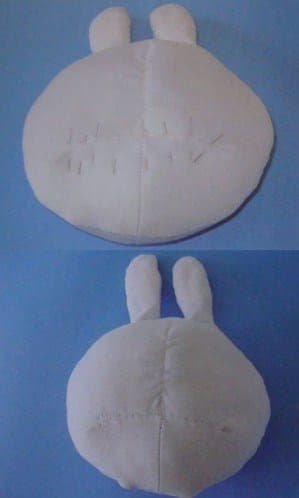
Detach the head and legs from the carpet. Close the seam of the head with small stitches. Detach the head and legs from the carpet. Close the seam of the head with small stitches. Take a wire. If it is fine, fold it in half and twist it. Give it the shape of a hairpin and pass it at the base of the head by picking it through the fabric.
Shift each wire 2cm to the right and left of the center of the head to create two attachment points. Put on hold.
Split the sides
Split the sides of the box to slide the fabric. Split the sides of the box to slide the fabric.
Dig the cardboard inside
Dig the cardboard inside, on either side of the slot.
Glue the fabric
Glue the fabric to the strong glue
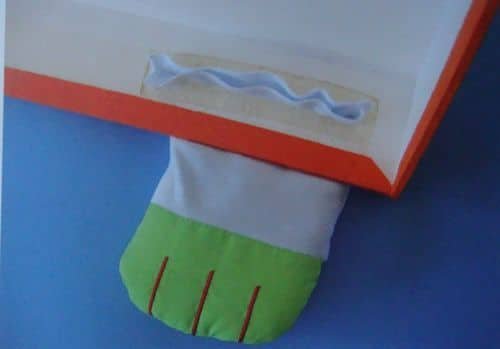
Drill four holes
Drill four holes on top of the box, slide the wires from the head
Dig the carton
Digging the cardboard and glue the wrapped iron wires Cover these collages with a strip of kraft paper.
For a volume accessory
For each element of the accessory, use the same technique as for the head of the rabbit.
To hang the shelf, place two rings on the back of the box at 5 cm from the top and 4 cm from each edge. Drill the cardboard, slide the stem of the ring. Inside, thin the cardboard, open the stem and glue it to kraft paper
Advice
Tie a string tight enough to prevent the shelf from leaning forward when hung.
Inside Shelving and Shelving
Cut shelves, shelf supports, and carton after checking all measurements directly on the carton.
Cover the next board. Shave the four sides and stick to the bottom.
Cover two boxes
Cover two cartons of 29.3 X 6Acm, fasten a large side and trim the other three.
Glue them at the top and bottom of the box.
Cover the 4 shelf brackets
Cover the 4 shelf supports, remount one side of 12.6 cm and trim the other three. Stick them on the long sides at the top and bottom two by two in the opposite.
Cover the two shelves
Cover the two shelves: top, slice front and bottom. Shave the other three sides. Glue them to the top and bottom supports with a net of strong glue.
Try the two vertical supports of the middle. Repeat if necessary. Cover with a 12.6 cm side and trim the other three. Stick them between the shelves.
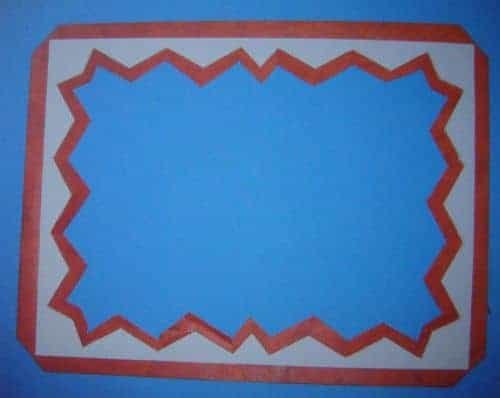
Decoration on the façade
In a 2mm carton, cut a rectangle of 40, SX 30, Scm. In a 2mm carton, cut a rectangle of 40, SX 30, Scm. It should protrude 2 mm around the shelf. Check the measurements! Draw the patterns into a point (see pattern below). Cut along these lines.
Glue the faceplate to the paper
Glue the facade on the paper leaving a 1 cm stitch all the way round, inside and outside.
Finishes
On the outside, cut at 45 ° in the corners and glue the edges
Inside, remove the tips from the
3 mm outward corners of the cardboard and split in the middle of the re-entrant corners. Glue the edges alternately on one side and the other, folding the paper back on each tip.
Place a net of strong glue all around the shelf, on the edge of the cartons and glue the facade.
Putting in the press, front against the table, the rabbit flat belly.
Find other creative cardboard ideas
This book will learn in step-by-step to create many other superb decorations or useful objects.