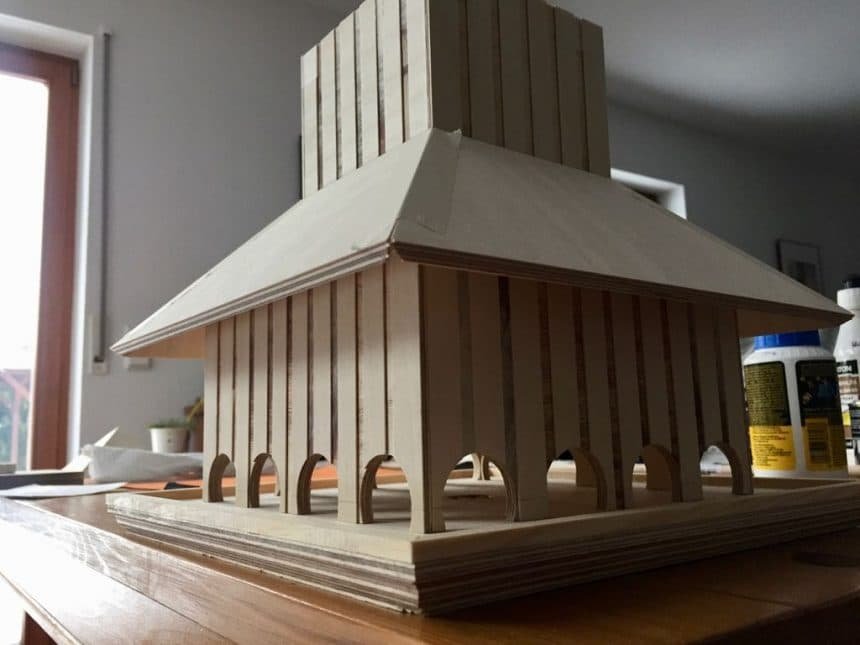
We needed a new bird feeder for our yard. I wanted to make something special. It should have a shape like a Chinese pagoda house, with two levels. We travel a lot and that’s why the feeder should contain a lot of seeds and does not have to be refilled very often. We have already a pole of the old house in the garden. My idea was to use a screw in the center to mount it to the pole. The feeder should be water and weather proofed.
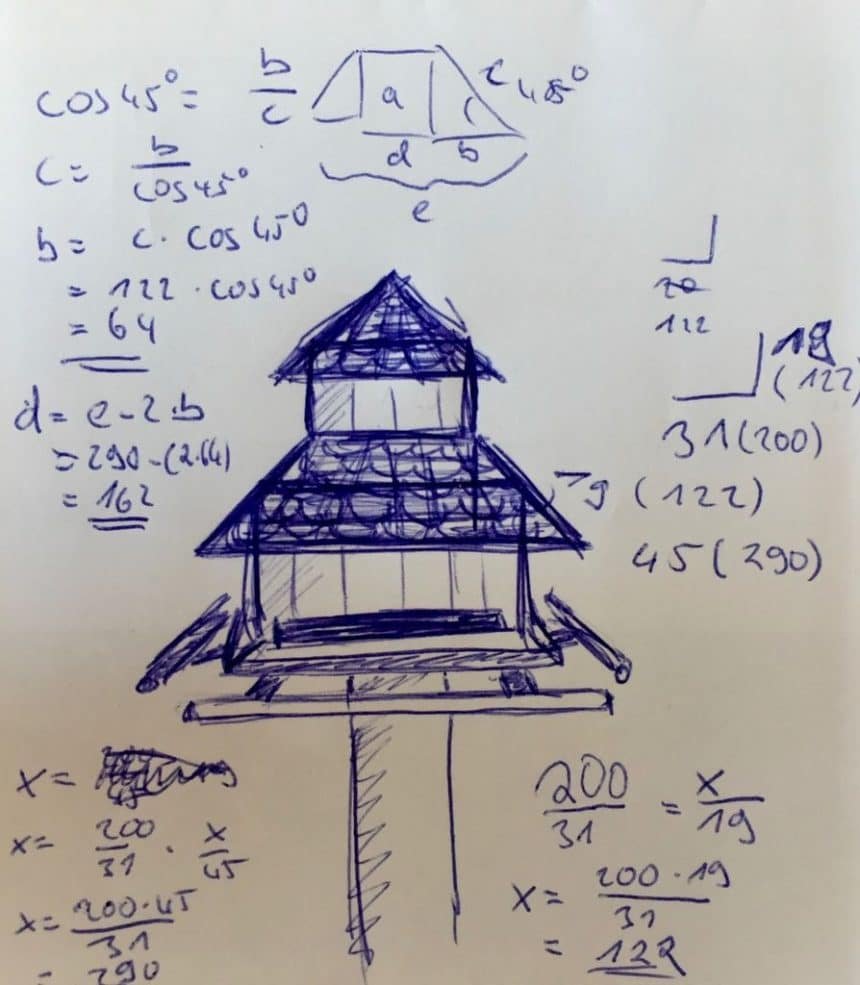
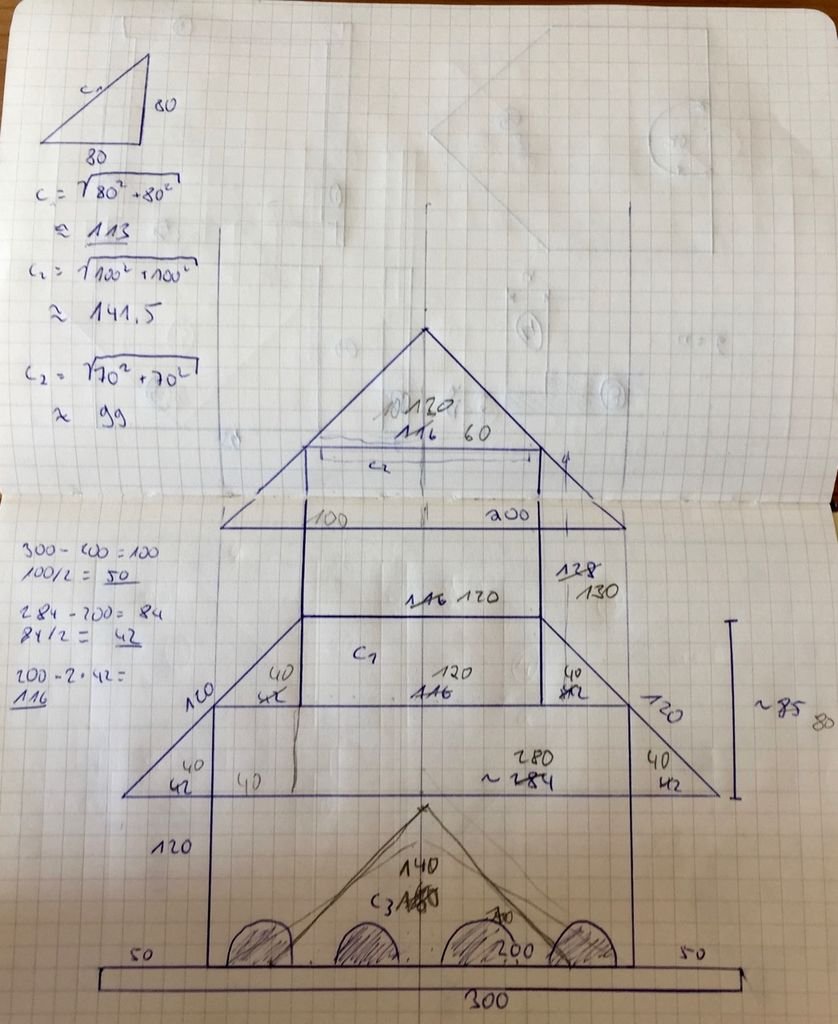
These are the key features. I made a quick drawing to visualize the concept. I used round holes for the seeds later, but the rest looks like the final product. I made this project back in December. Unfortunately, I didn’t have time to write this Instructable earlier. You can make this house for the next winter.
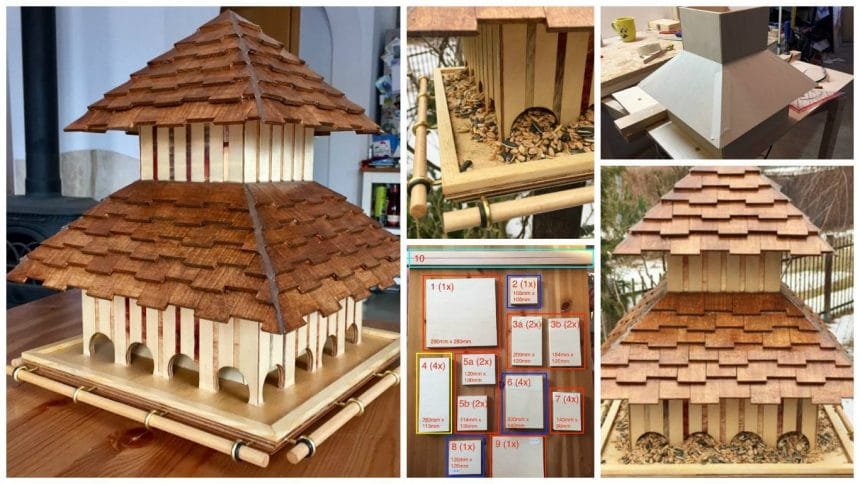
The quick sketch is my reference. I start with the general shape of the house and continue with a complete list of all parts.
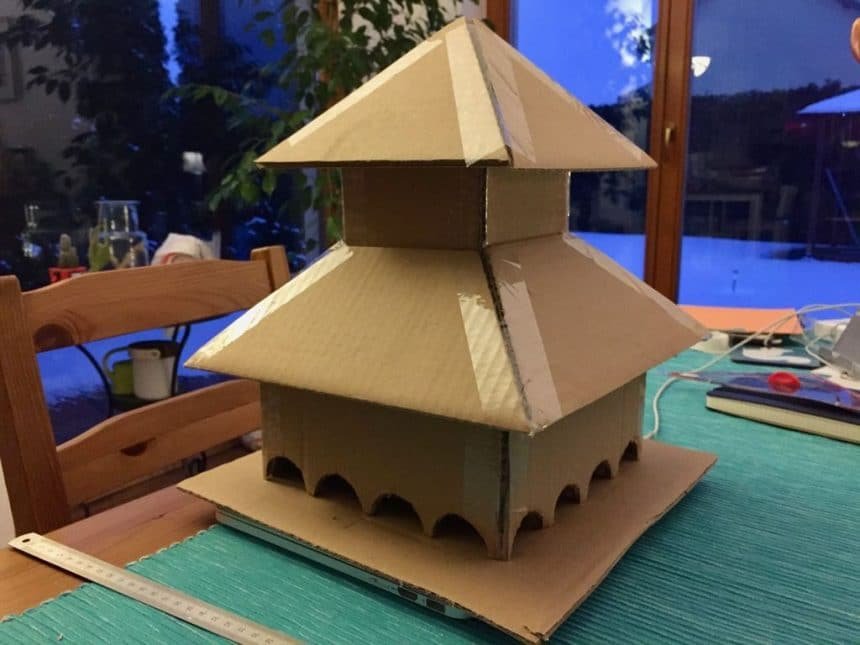
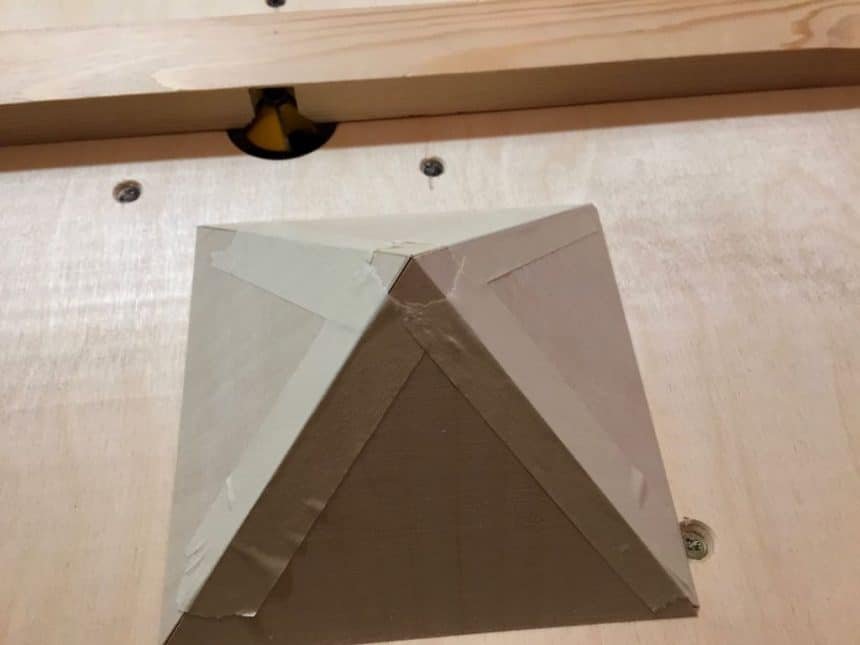
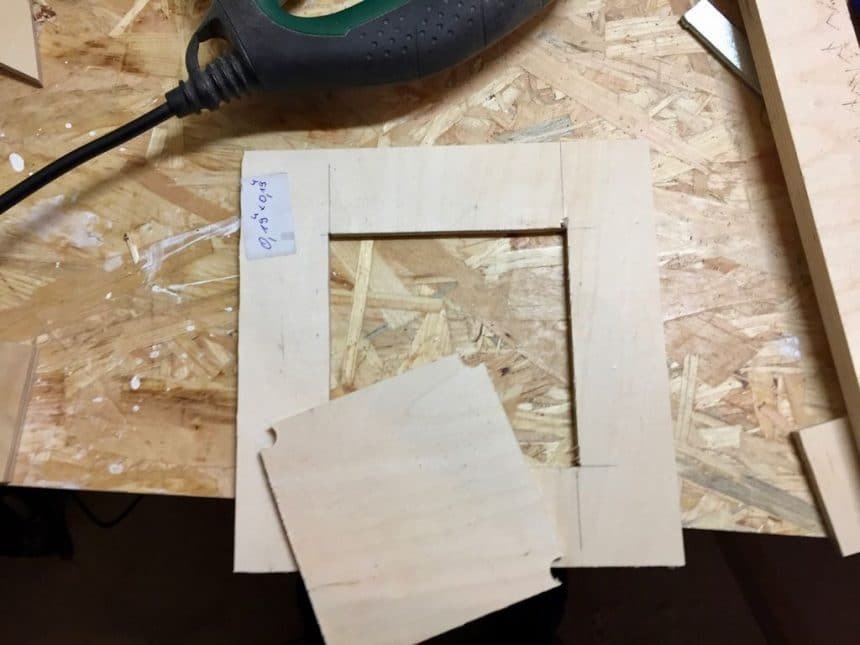
As usual, I make a cardboard model first to see the proportions in life-size. I’ll change the seed hatch to round holes, due to having more area for the glue later on. The cardboard model is totally optional, but I like to do it
What’s needed?
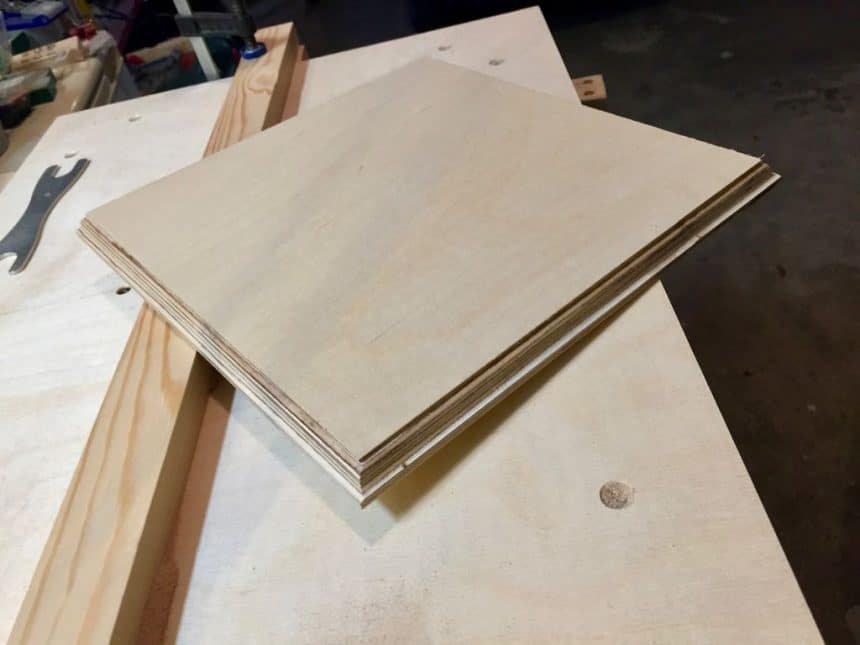
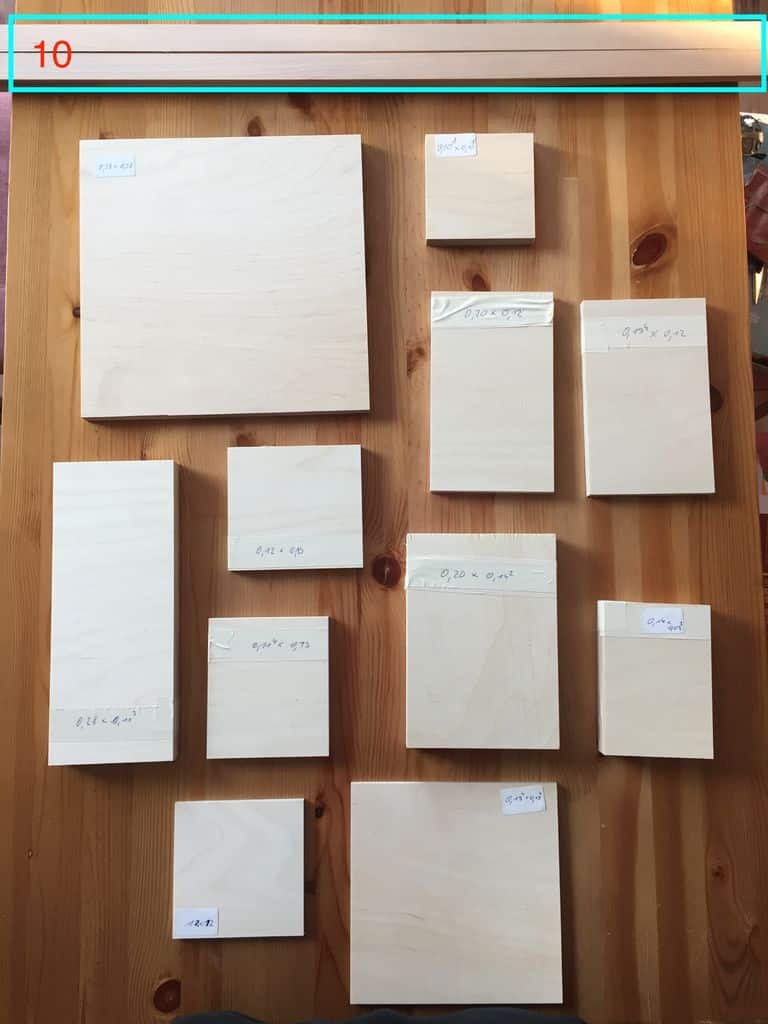
Two plywood slabs with different thicknesses. I use 15mm and 6mm, but you can use different size as well. The final appearance may differ, but that’s the idea about DIY stuff, isn’t it? 😀
Some scrap plywood, 15mm thick, for the magnets.
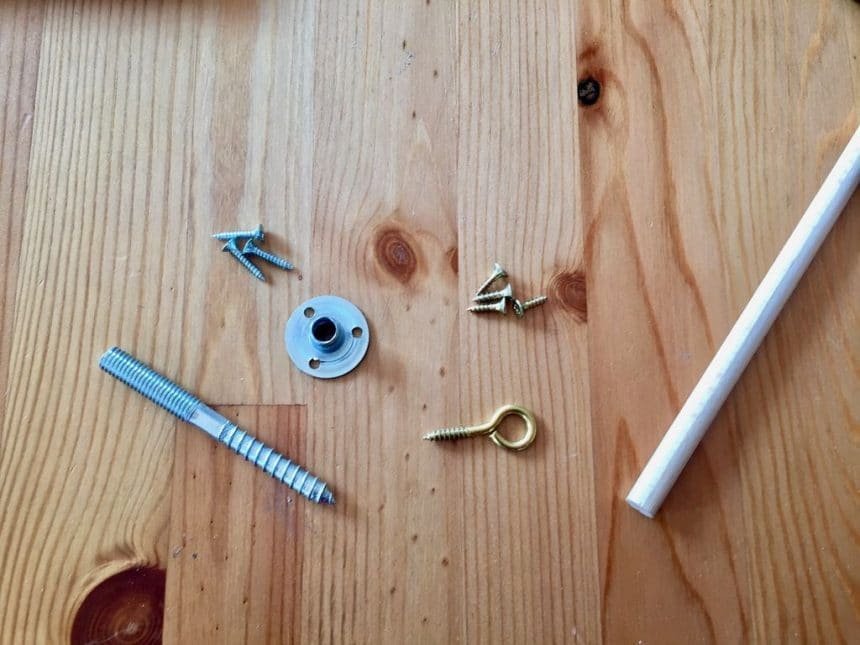
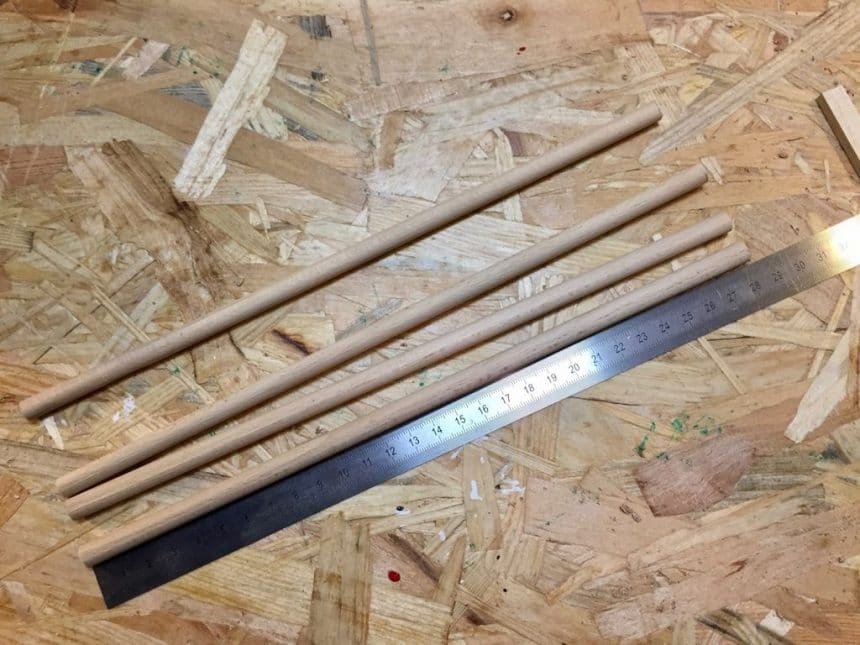
Wooden bars for the bird “runway”. I used 8mm round bars. 1.5m should be enough.
16 screw hooks (stainless), to mount the bars to the base
8 O-rings to hold the bars in the hooks.
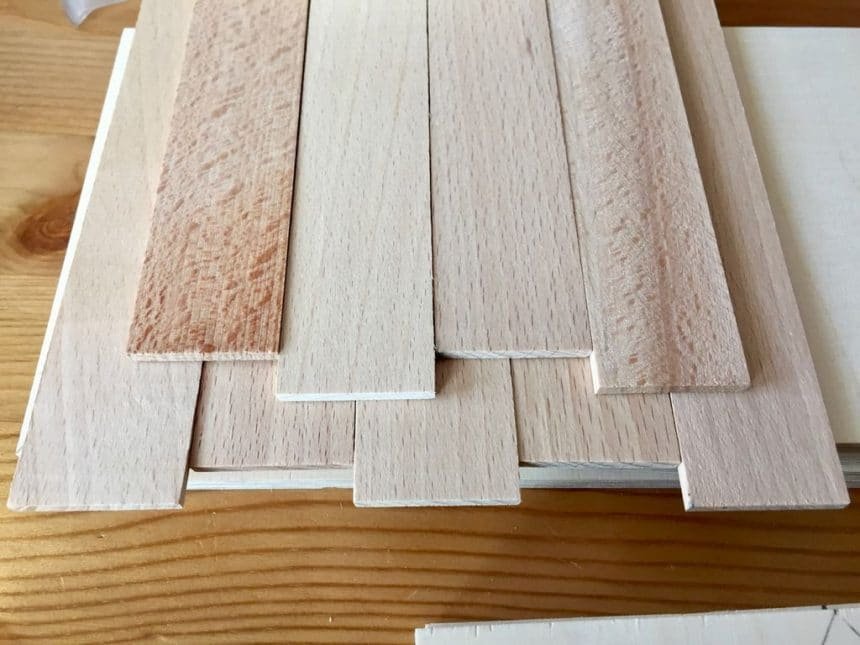
Wooden strips for the roofing tiles. I used 30mm x 100mm x 2mm strips and cut them into 30mm and 25mm long pieces.
4 wooden strips for the base plates. I used 10mm x 100mm x 2mm strips. 1.5m should be enough.
One hanger bolt (one end is a M8 bolt, the other end is a wood screw) to mount the house to a pole
M8 retainer nut, the counterpart for the hanger bolt.
4 tiny screws made of metal for the magnetic fastening
4 neodymium magnets for the magnetic fastening
Measurement devices
Pencil
Saw
Wood drills
Electrical driller
Screw clamps
Clear lacquer (water resistant)
Wood stain
Brush
Wood glue (water resistant)
Brown silicone
Cutting heads
Grinding paper
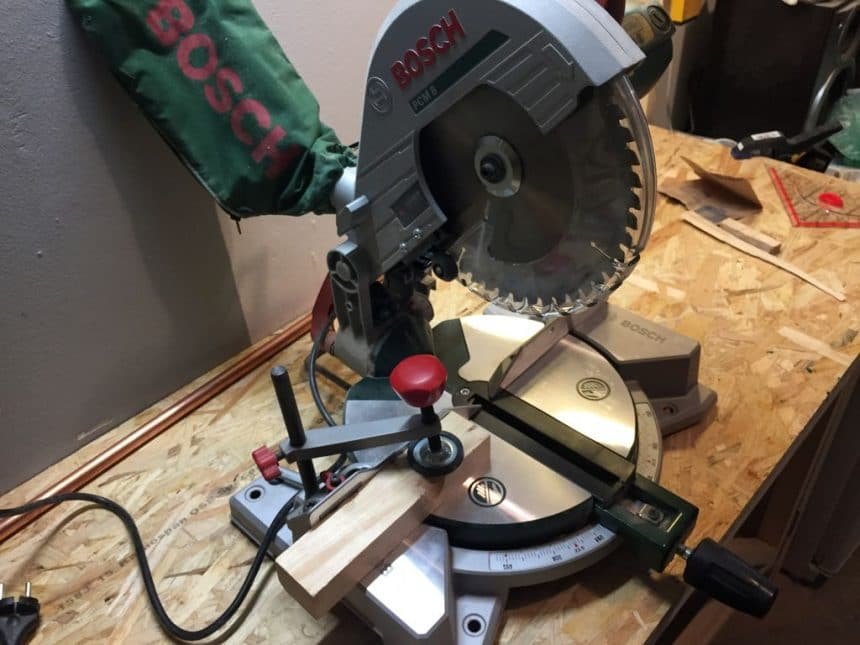
Chop saw for cutting all pieces. You can use a hand saw or jigsaw as well, but the finish is better with the chop saw
Jigsaw
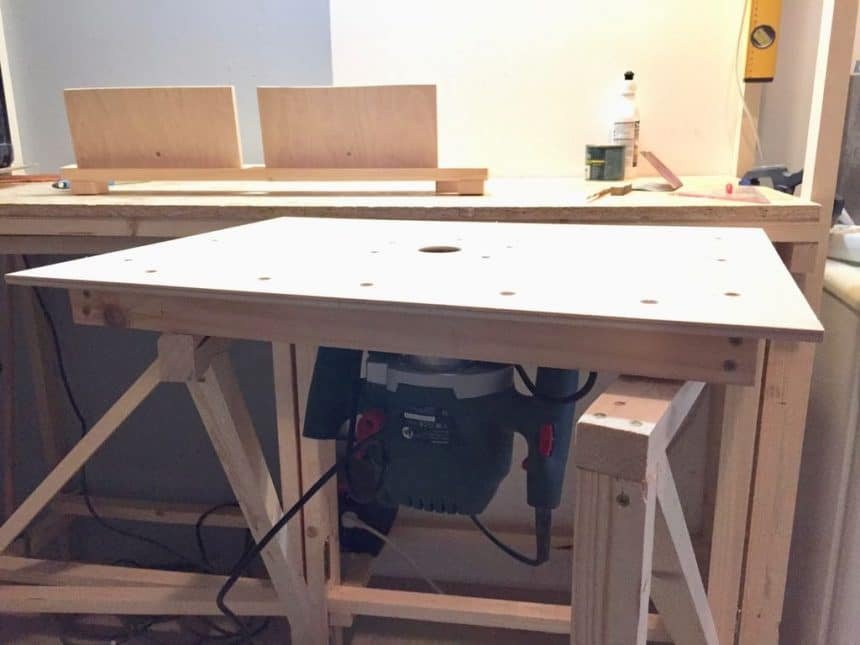
Router machine
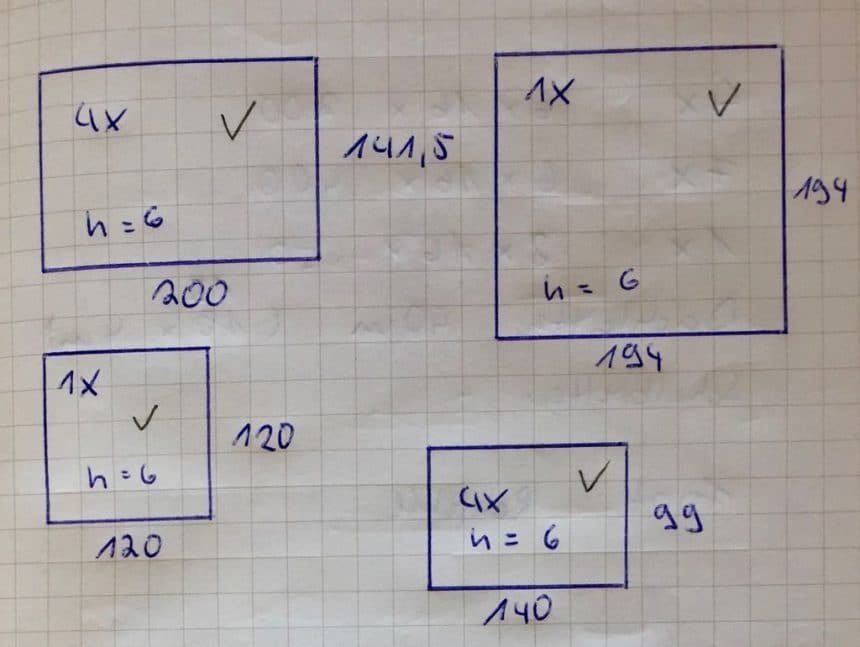
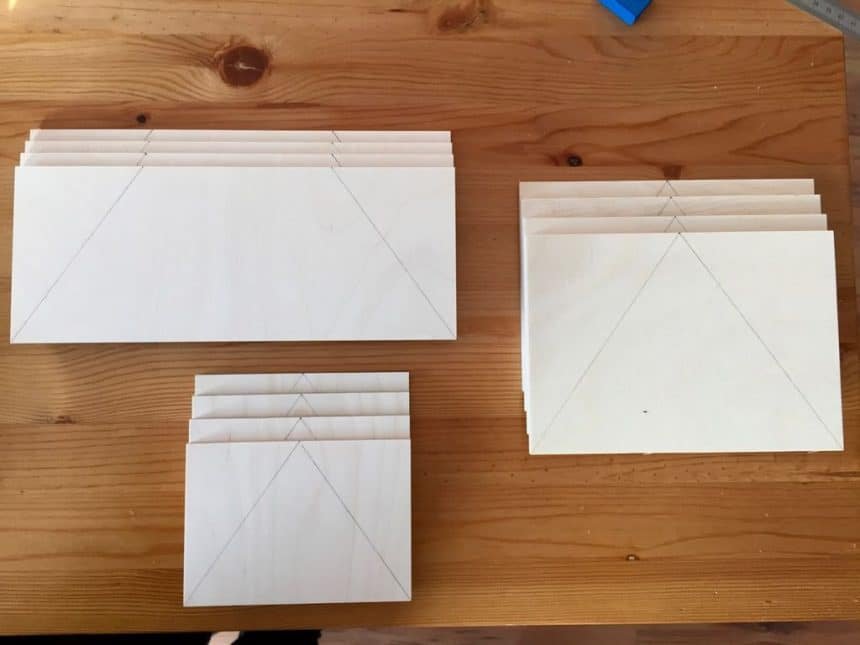
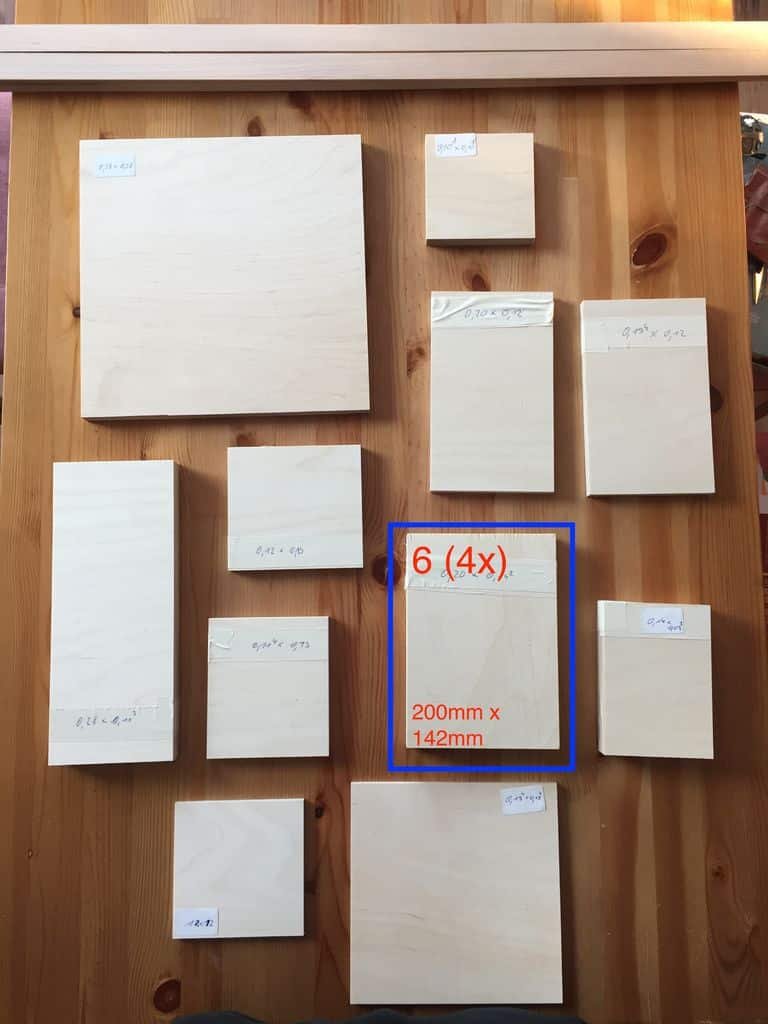
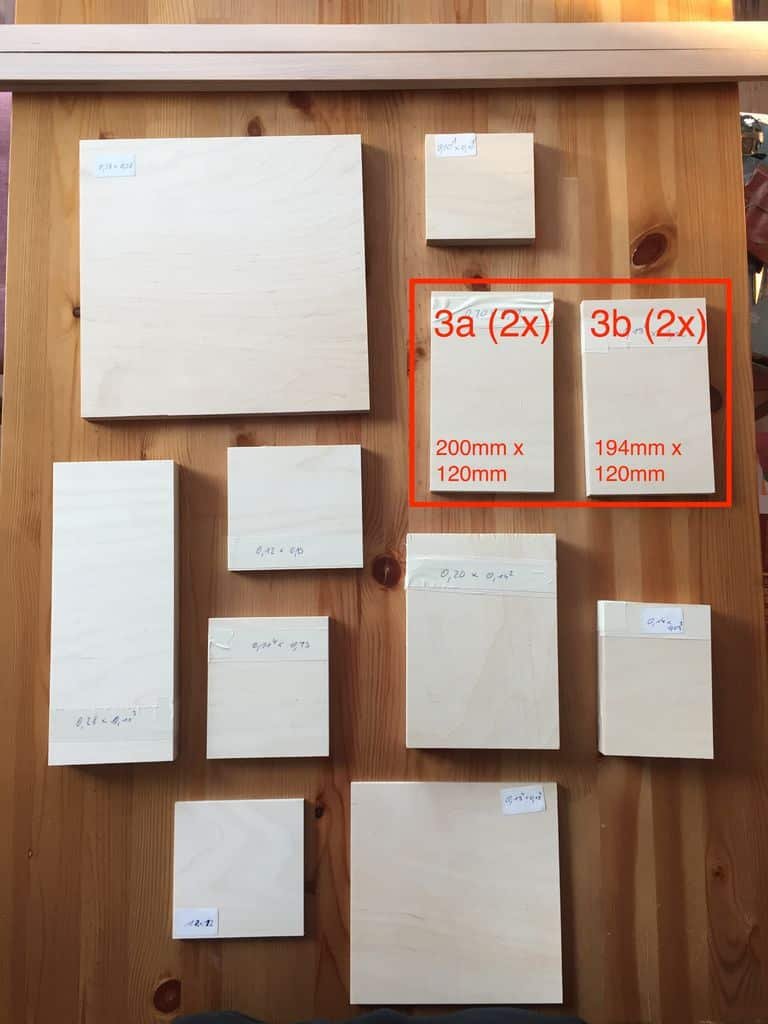
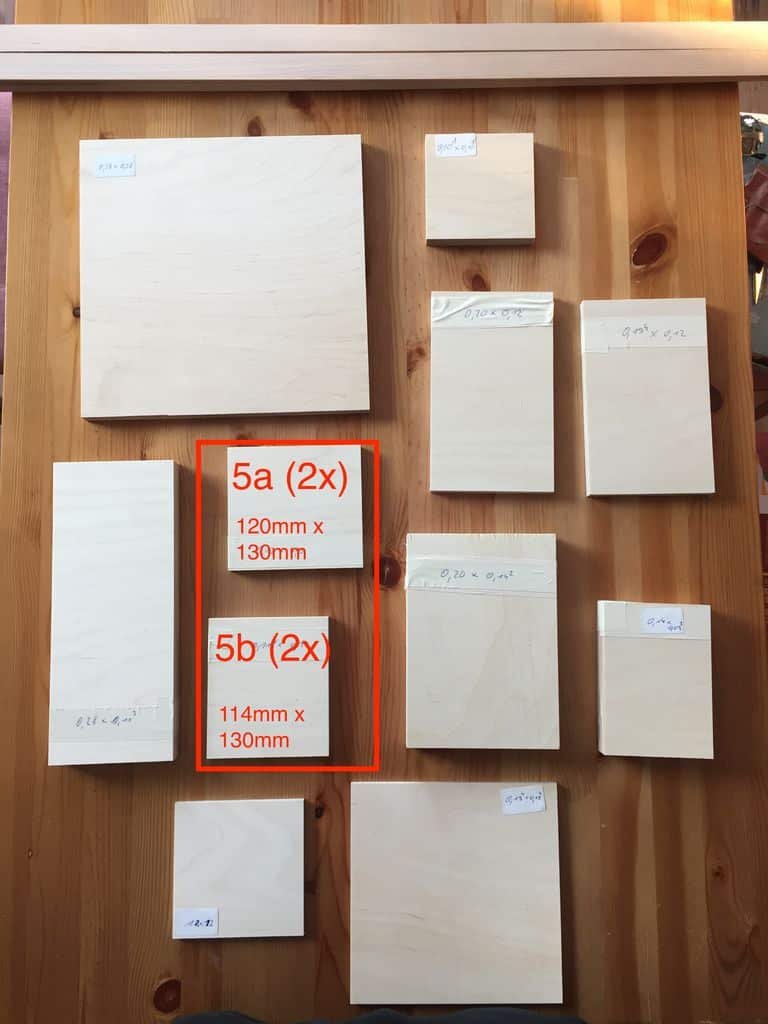
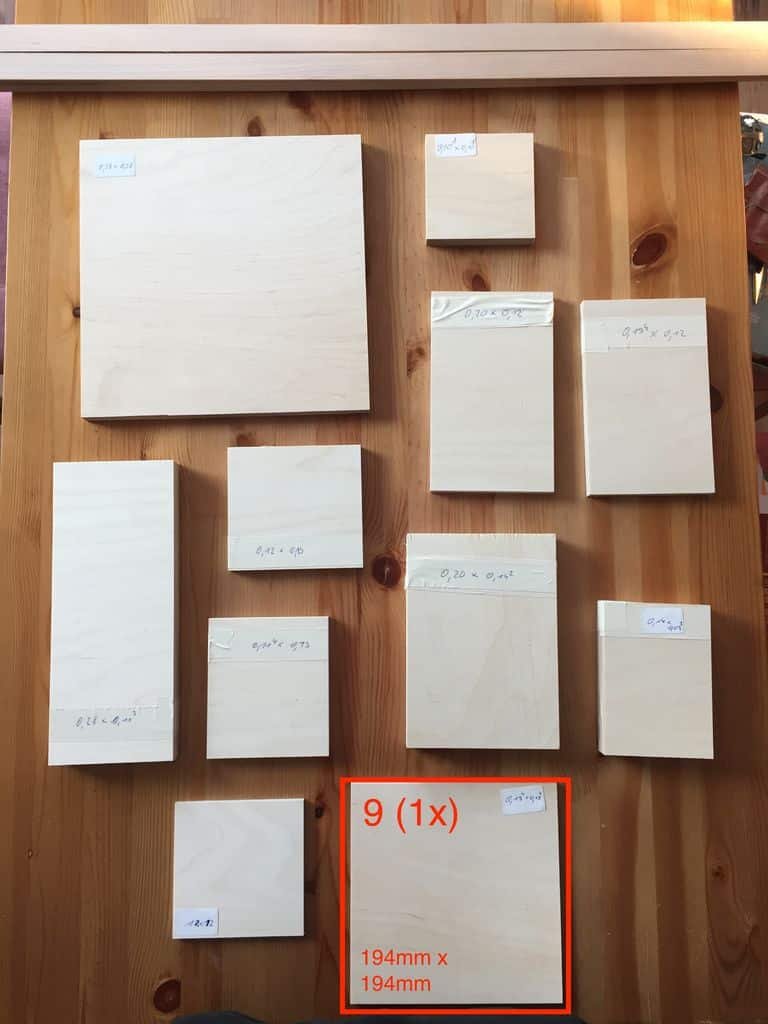
I start with cutting all the main parts. The red framed parts are for the body, the blue ones for the upper roof and the yellow ones for the lower roof. Parts 1 and 2 are made out of 15mm thick plywood. The other parts are made of 6mm thick plywood.
Parts made of 15mm thick plywood:
Part 1: The base plate
Part 2: Upper roof plate. It will hold the screws for the magnetic fastening
4 Magnet holder will be described in an upcoming step
Parts made of 6mm thick plywood:
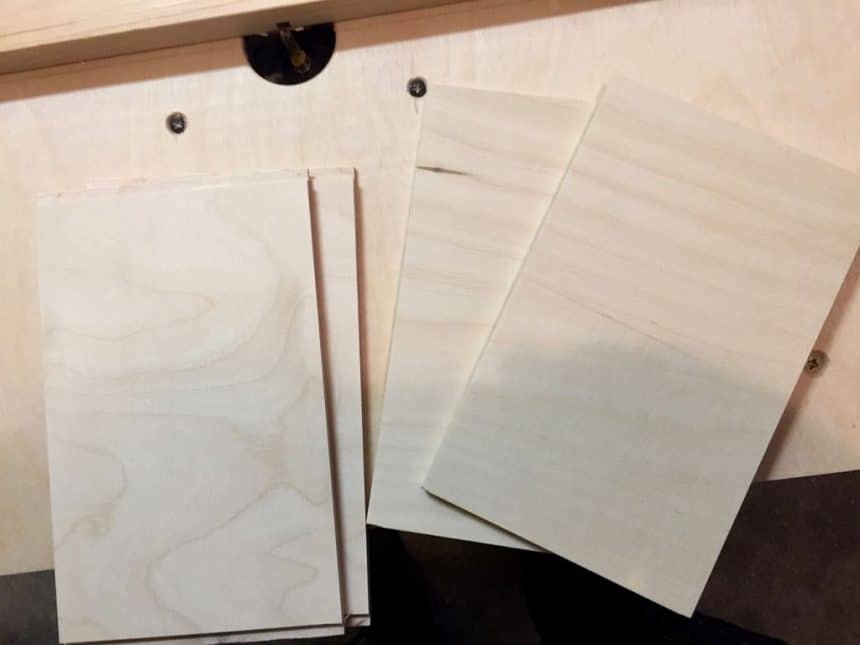
Parts 3a and 3b: Ground-floor walls
Part 4: Lower roof
Parts 5a and 5b: First-floor walls
Part 6: Upper roof
Part 7: the Inner pyramid. It moves the seeds to the holes
Part 8: Upper roof. Ceiling of the roof
Part 9: Ceiling between ground floor and first floor
Parts made of 2mm thick wooden strips:
Part 10: Roofing tiles
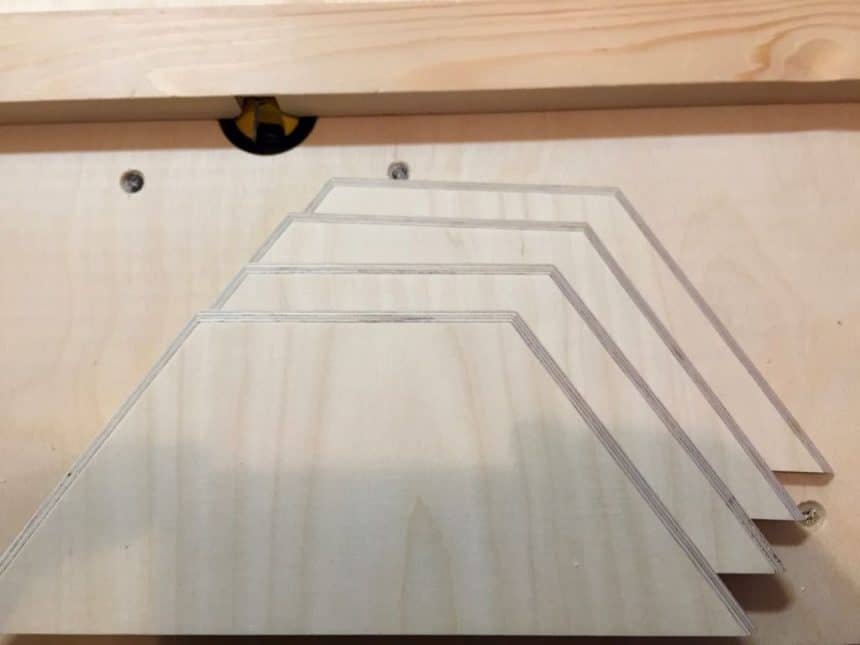
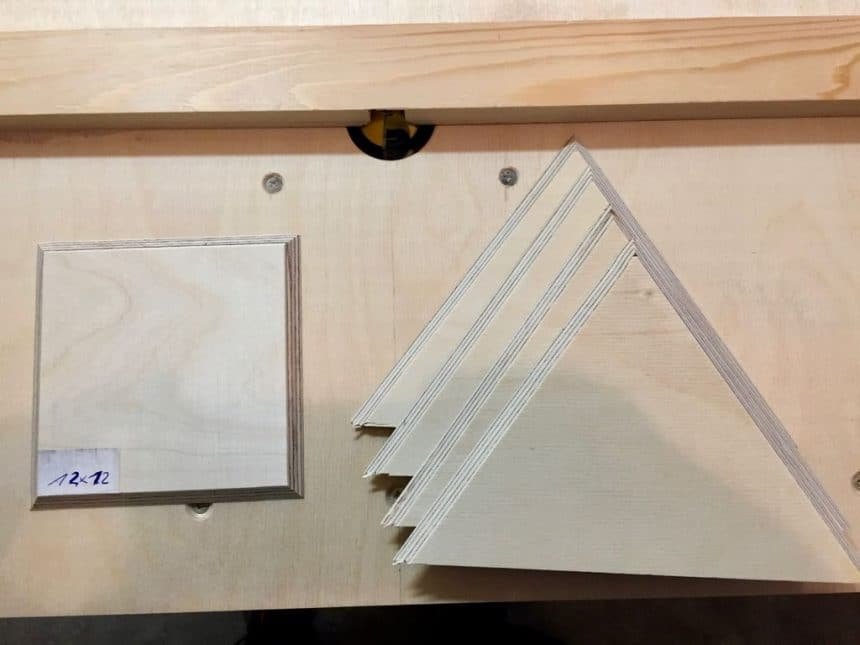
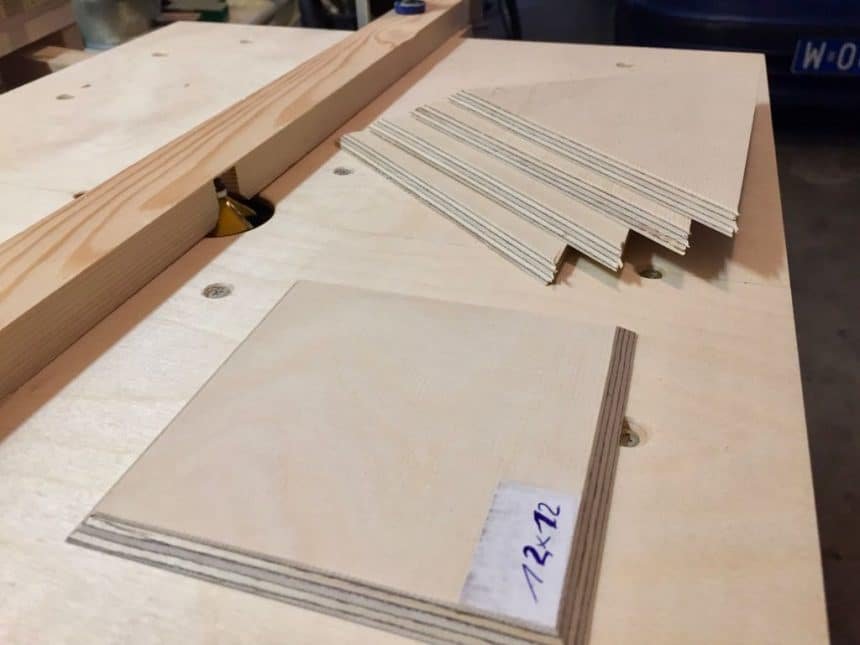
After all parts a cutout, I mark the edges of the triangular and trapezoidal parts. This would be the two roofs and the inner pyramid. I use my chop saw to cut them. If you don’t have one or your chop saw cutting range is not wide enough, you can use a manual saw and a guidance to cut the parts as well.
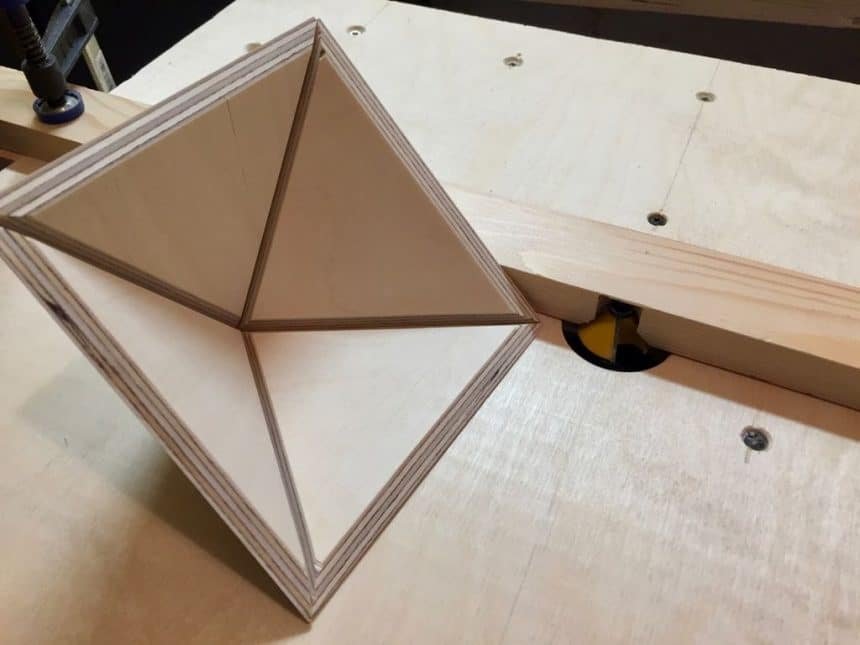
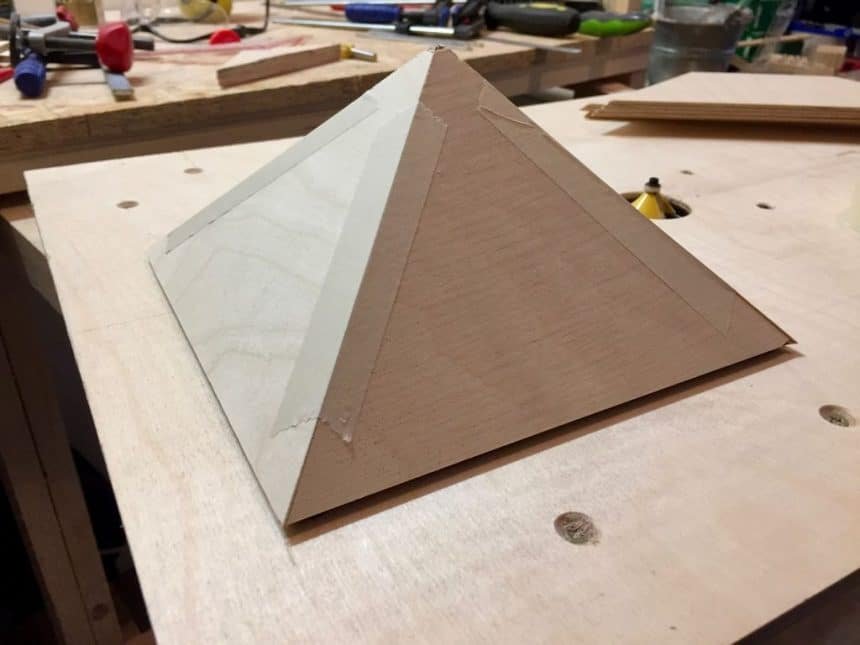
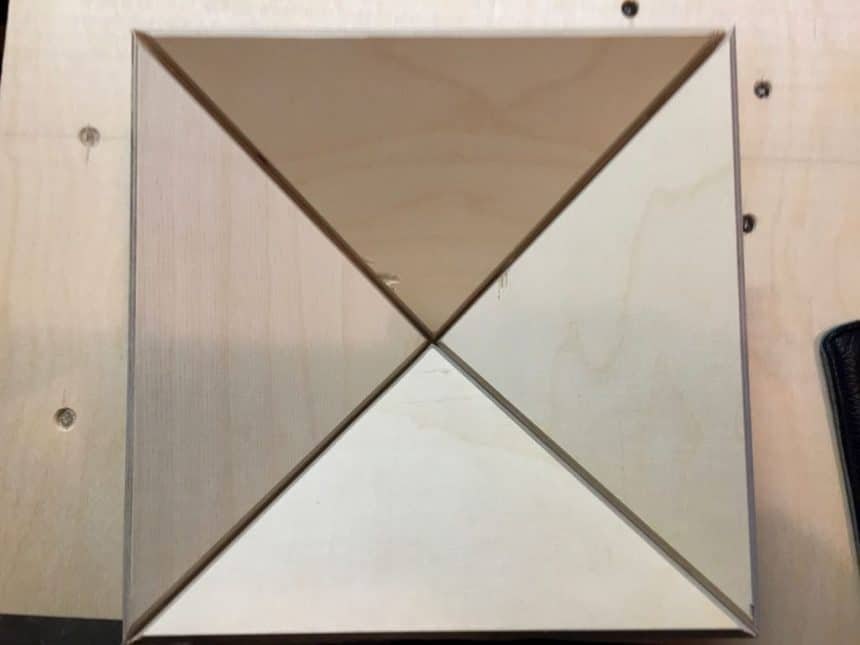
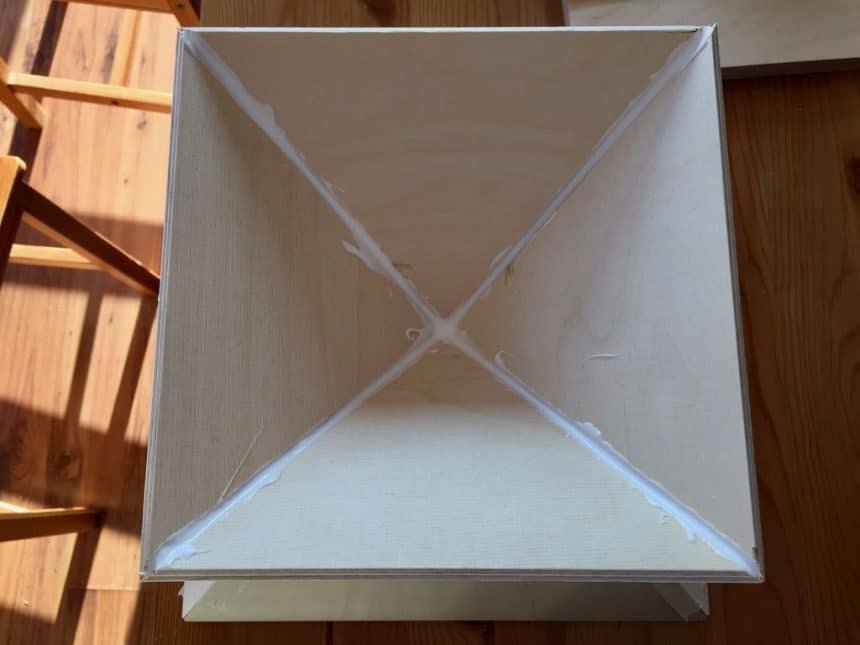
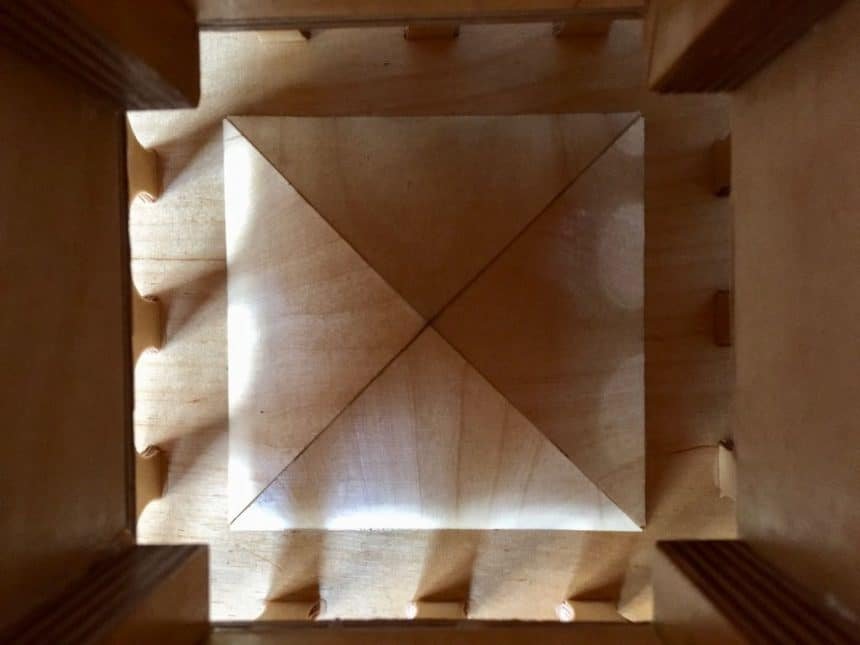
So now all main parts a ready for the next steps. I start with part 7, the inner pyramid. It’s used to move the seeds from the center to the holes on the ground-floor.
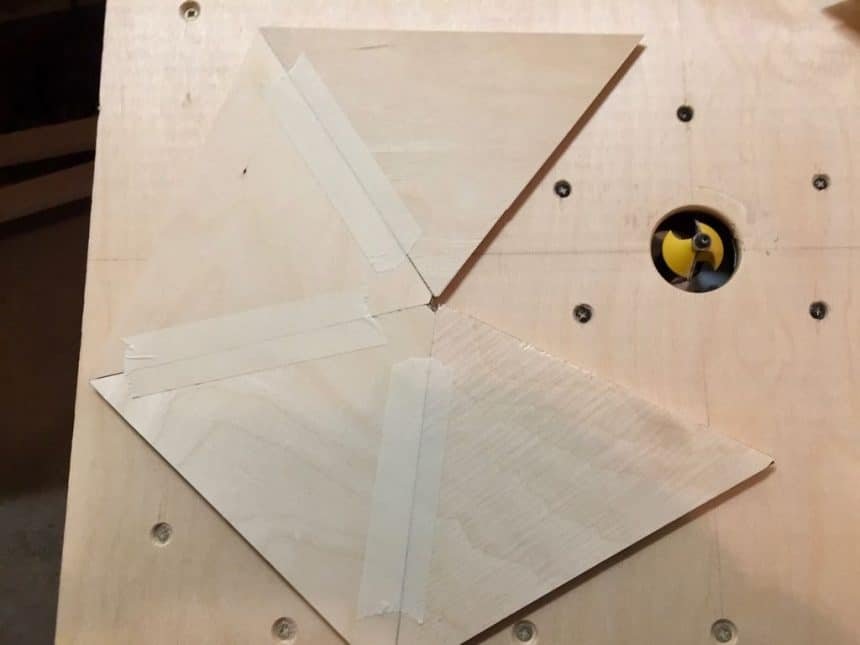
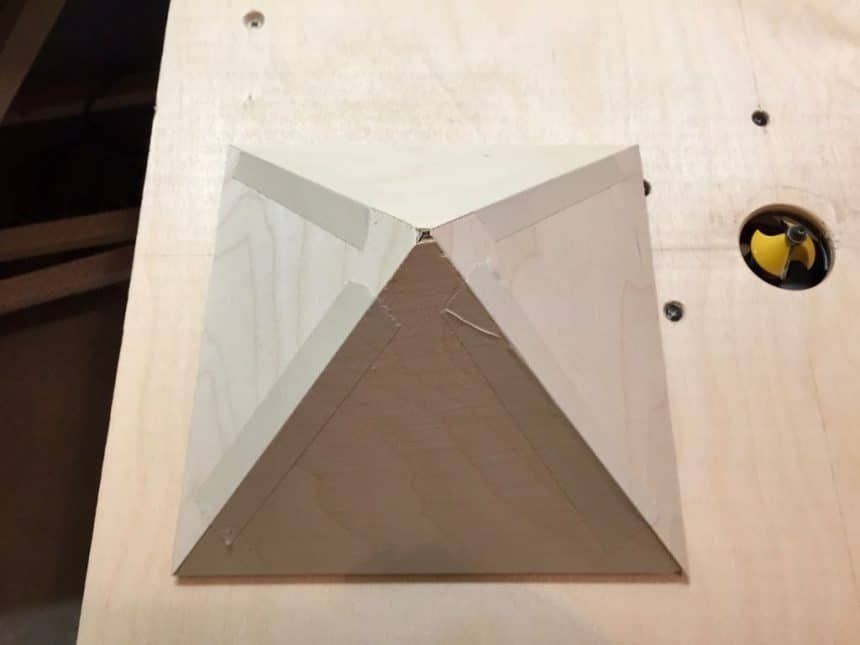
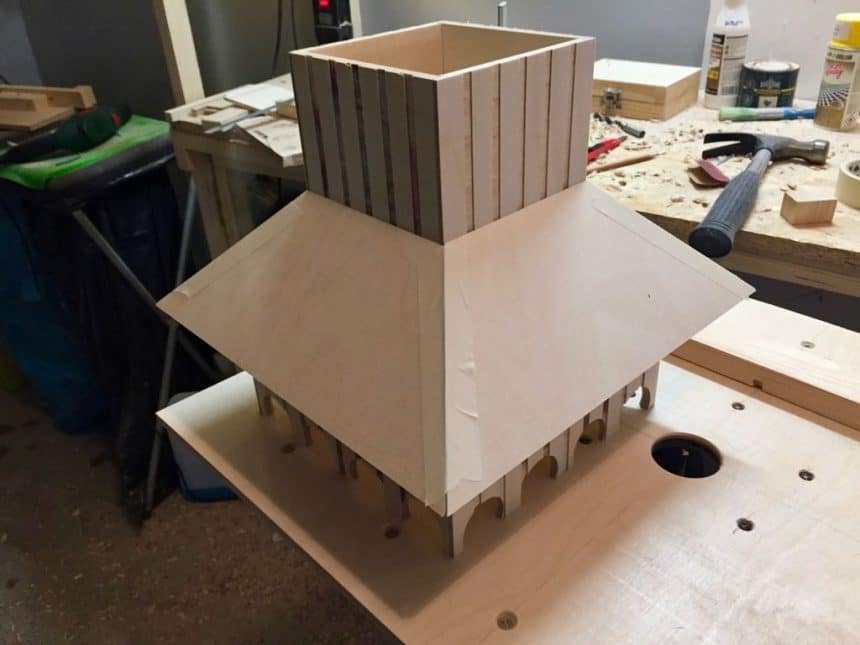
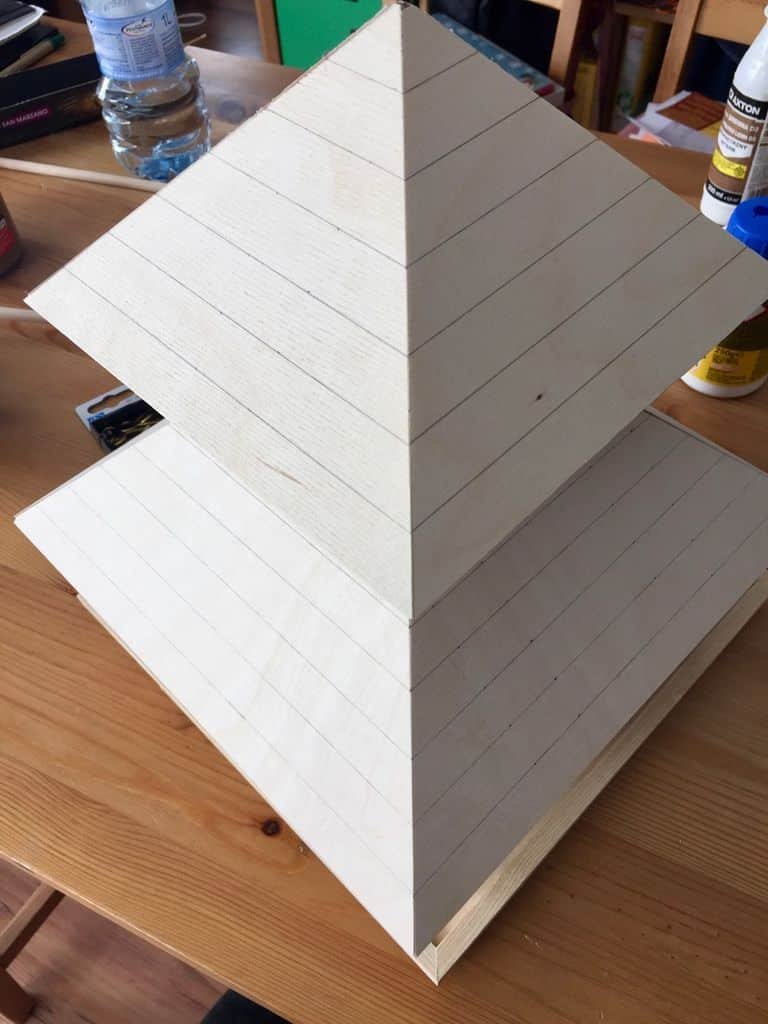
I use my table router with a 45° cutting head to cut out a 45° angle on all edges of all four parts. The angle between the sides of the pyramid is actually wider than 90°, but this is no problem. The gap will be filled with wood glue later on. The 45° cut on the ground line of the triangles is important to glue it to the base plate later on. I use some masking tape on the pyramid edges to keep it in shape.
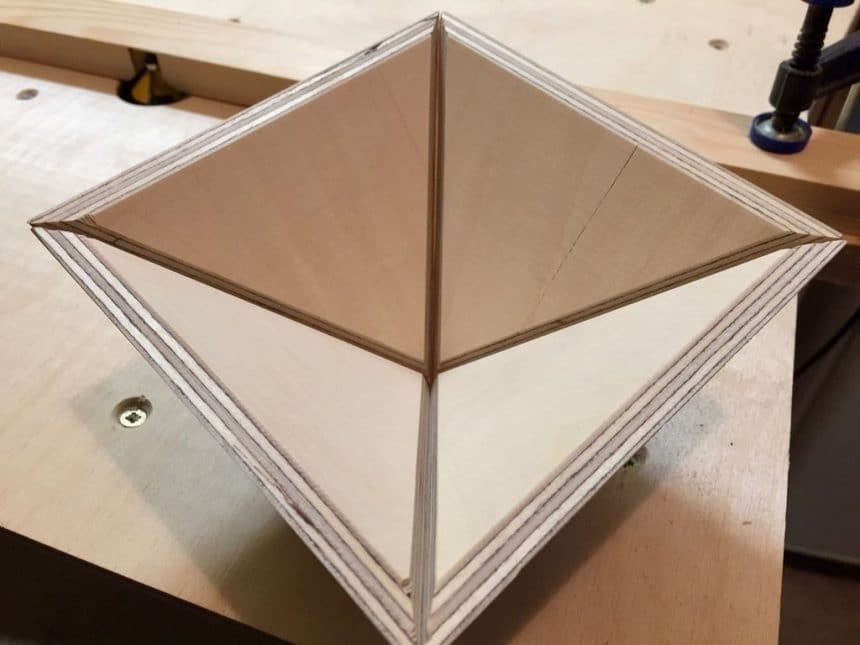
Next is part 4, the lower roof. I use my router with a 45° cutting head again to cut the edges. This time I leave the base sides untouched for a nicer look later. Just cut the slopes and the shorter end of the parts. I use some masking tape on the trapeze edges to keep it in shape. A short test with one of the first floor walls will show you if everything fits together.
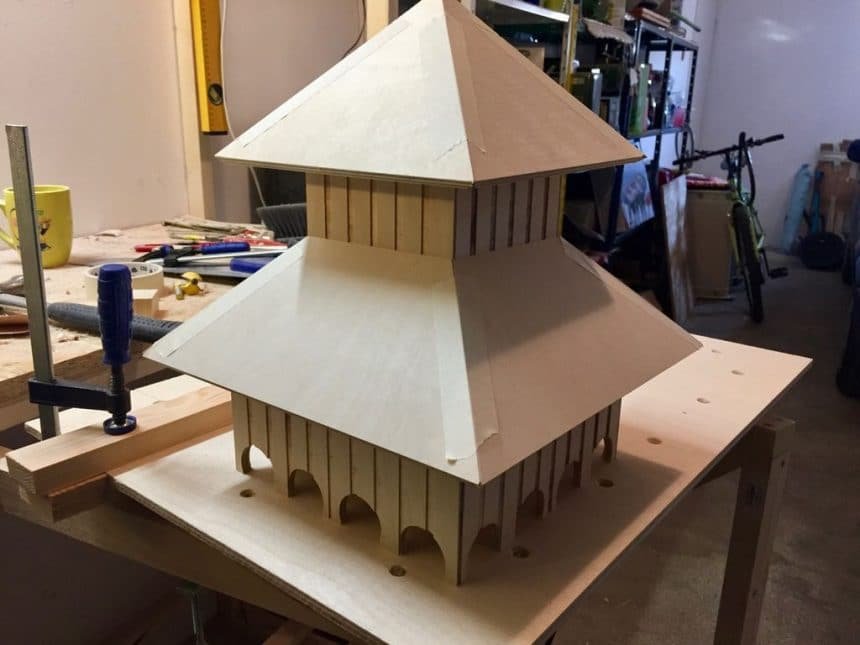
Next are parts 6 and 8, the upper roof. Again, I use my router with a 45° cutting head and the cut the edges of the triangular shapes, but I leave the baseline untouched. The quadratic shaped part is cut on all edges. I use some masking tape on the triangle edges to keep it in shape. The quadratic part fits in the center.
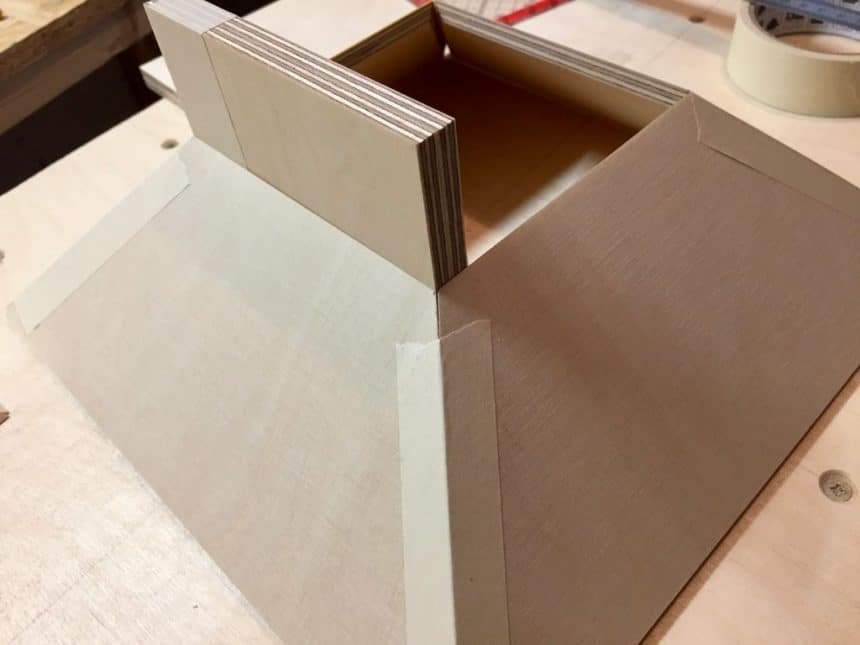
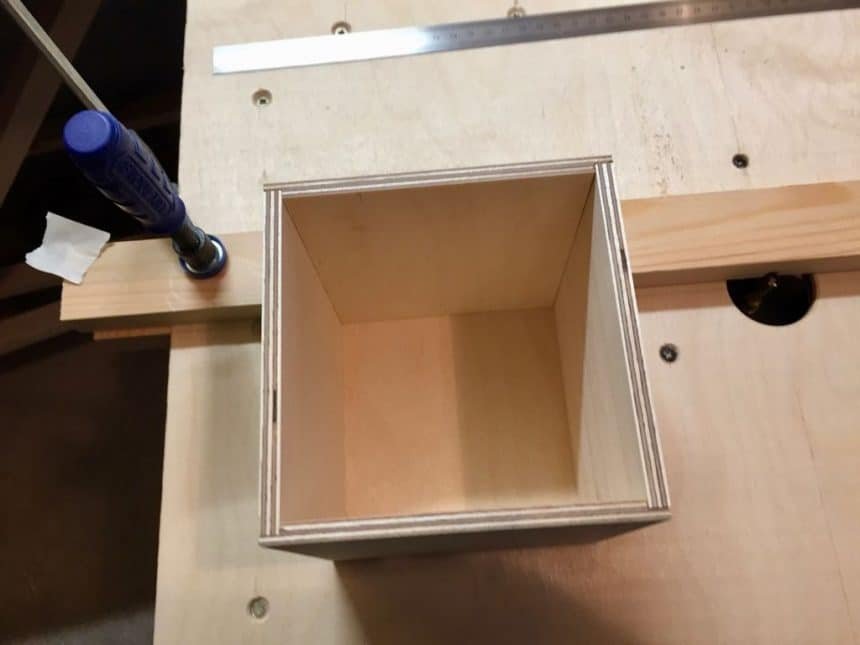
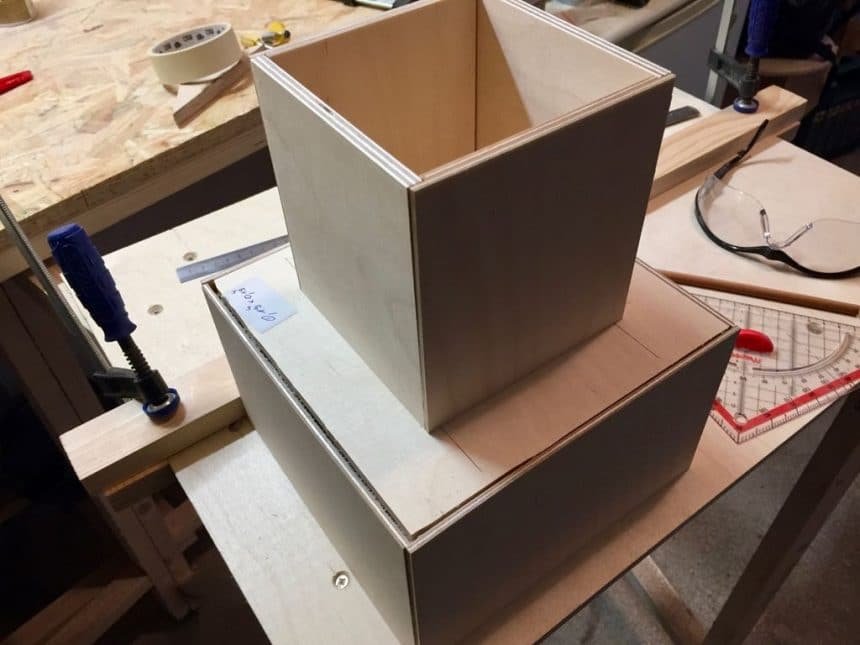
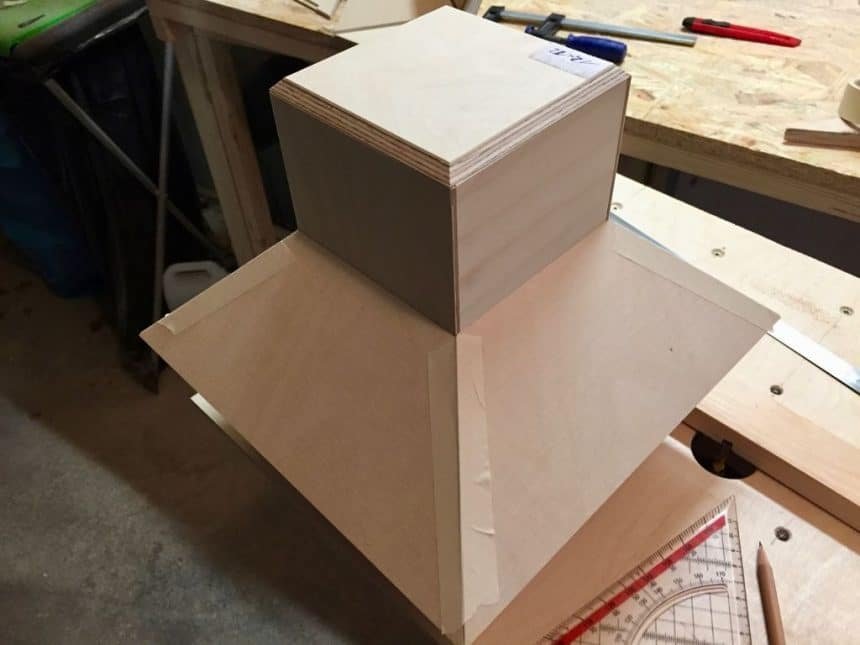
Now it’s time to change the cutting head on the router. I use a 6mm straight cutting head. The goal is to make a joint between the wall parts. I cut a notch on both sides of the longer plywood parts with half the thickness of the depth of the notch (in my case 3mm). The parts will be glued together later on. Just a short test to see if everything fits.
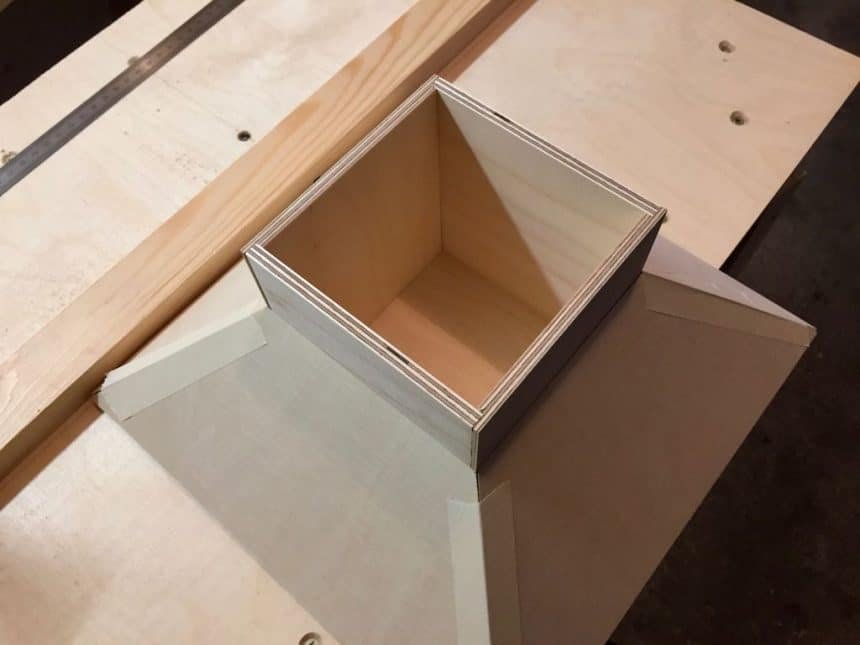
I use the same procedures on the parts 5a and 5b, the first floor walls. Again a short test to see if everything fits. Finally, I can pull over the lower roof to see if this fits as well. Perfect, but it’s still not the time for the glue
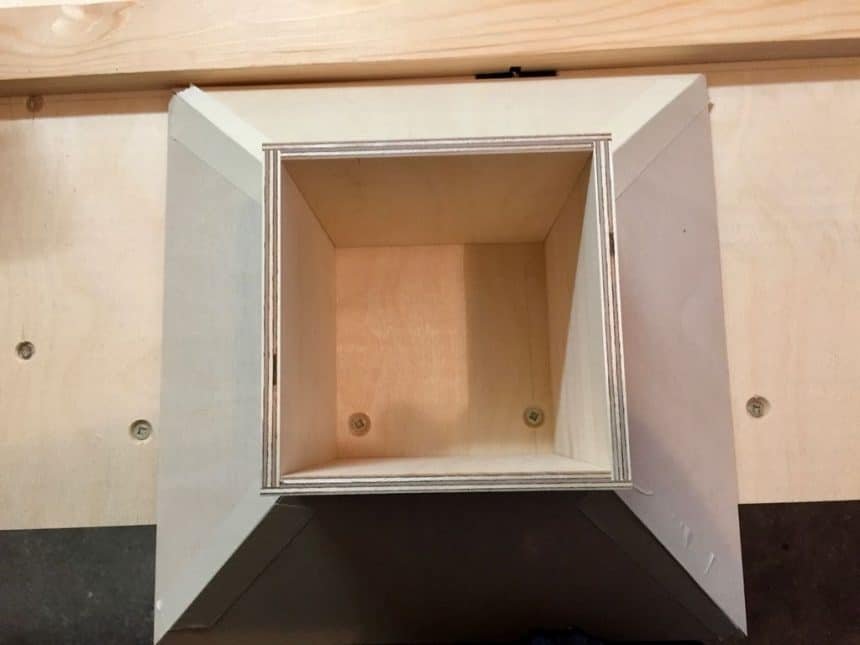
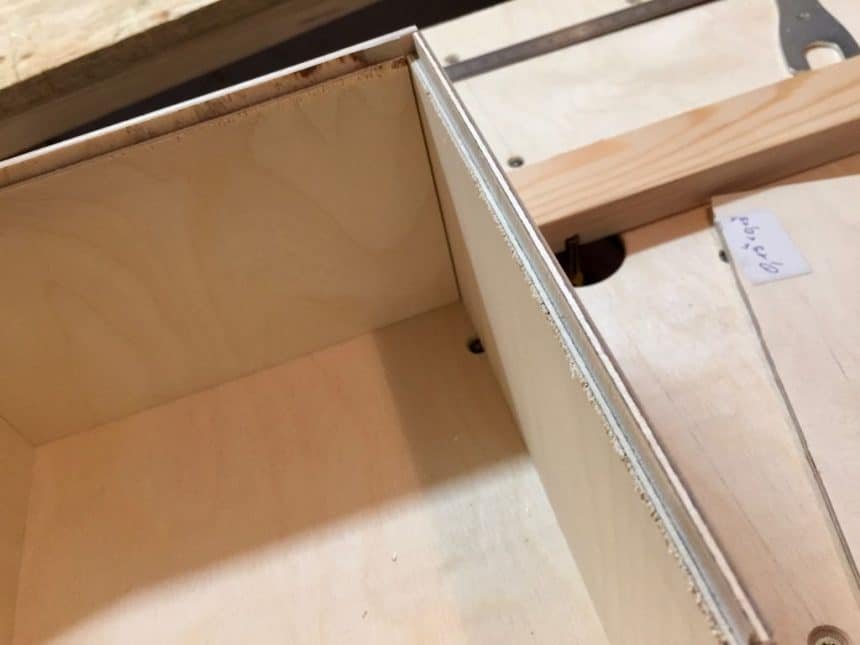
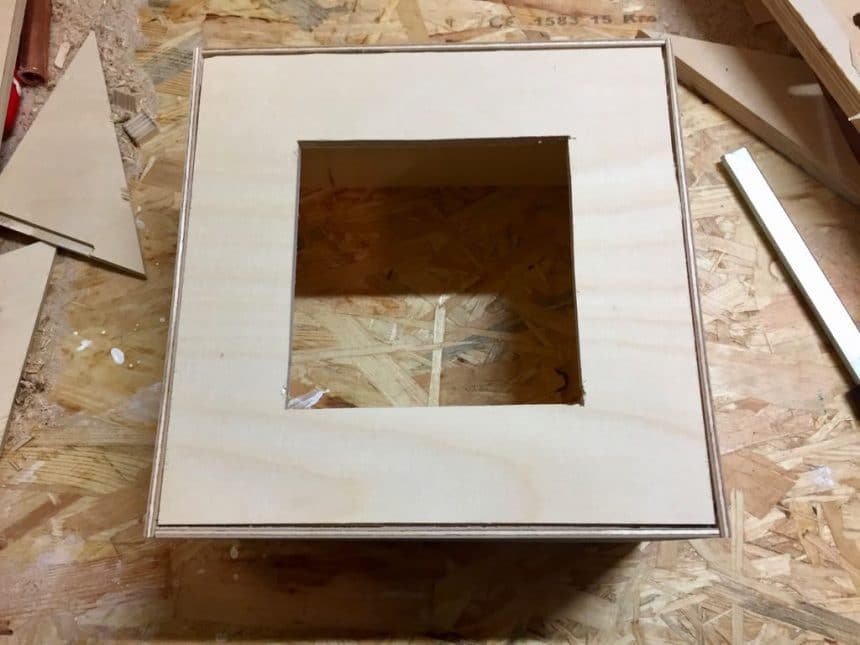
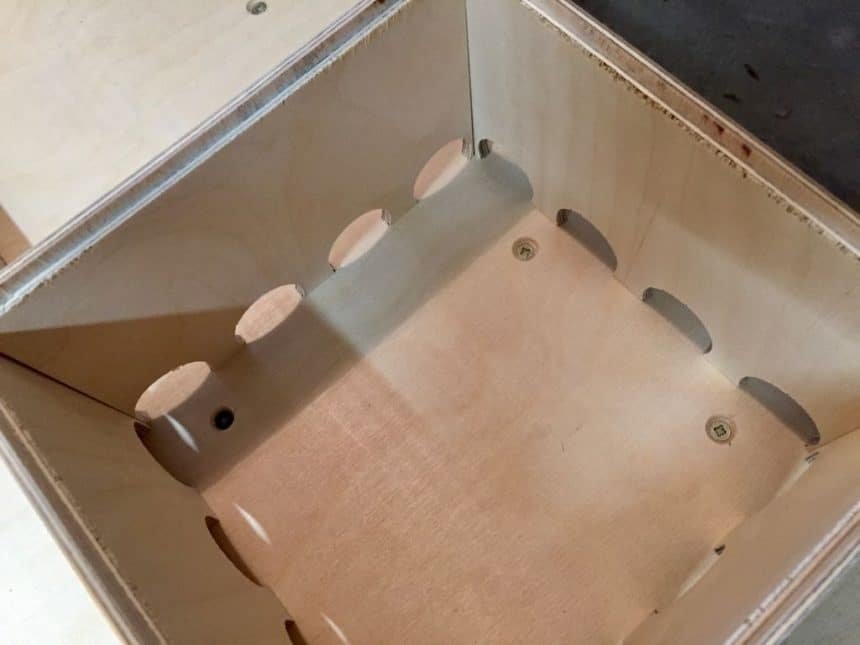
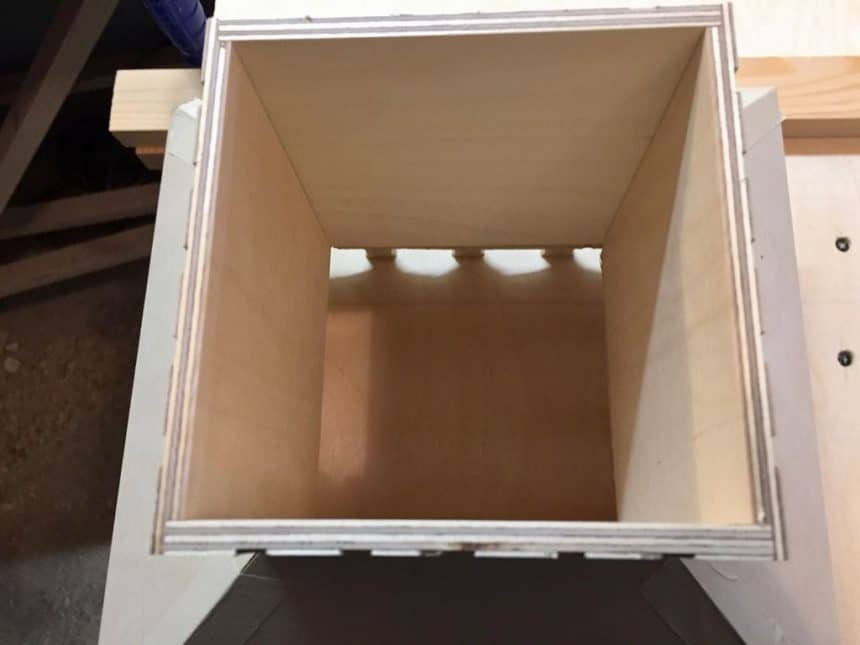
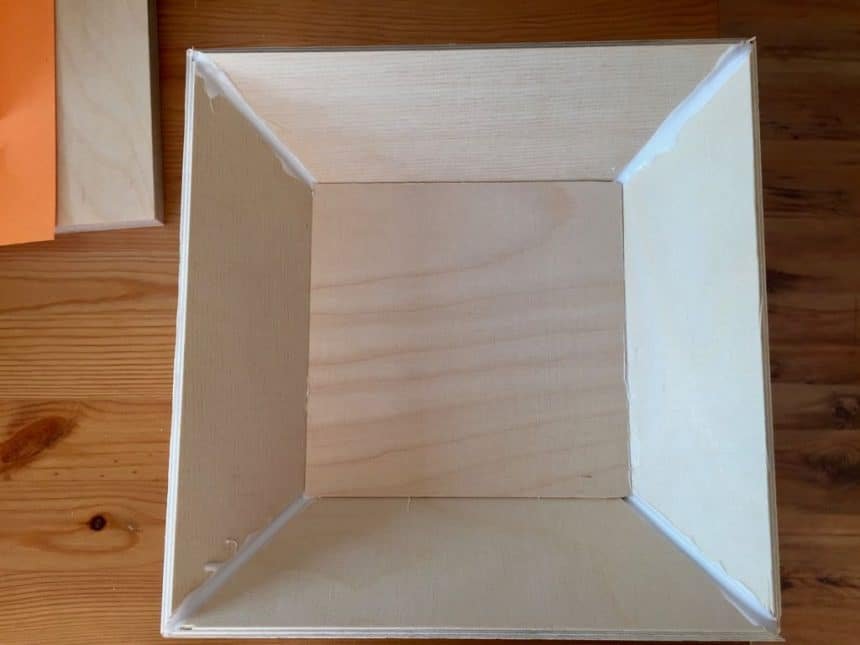
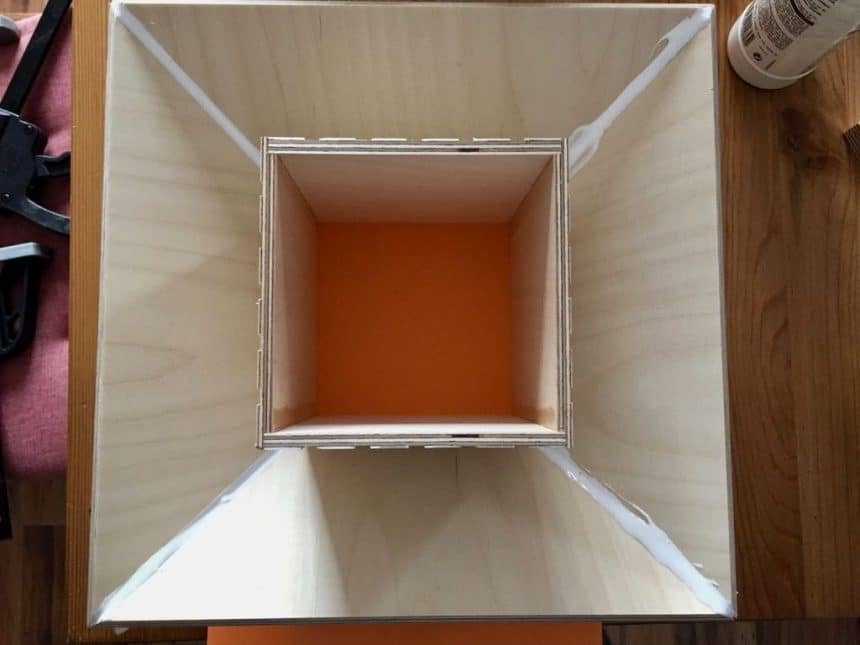
This next step is a bit more complicated. I want to make the ceiling of the ground-floor. Therefore I use part 9, the ceiling. First I need again some notches in the walls of the ground-floor. I use my router with the 6mm straight cutter to mill the upper sides of the walls. This time, the notch has to be 6mm deep (the thickness of the ceiling plate) and 3mm wide.
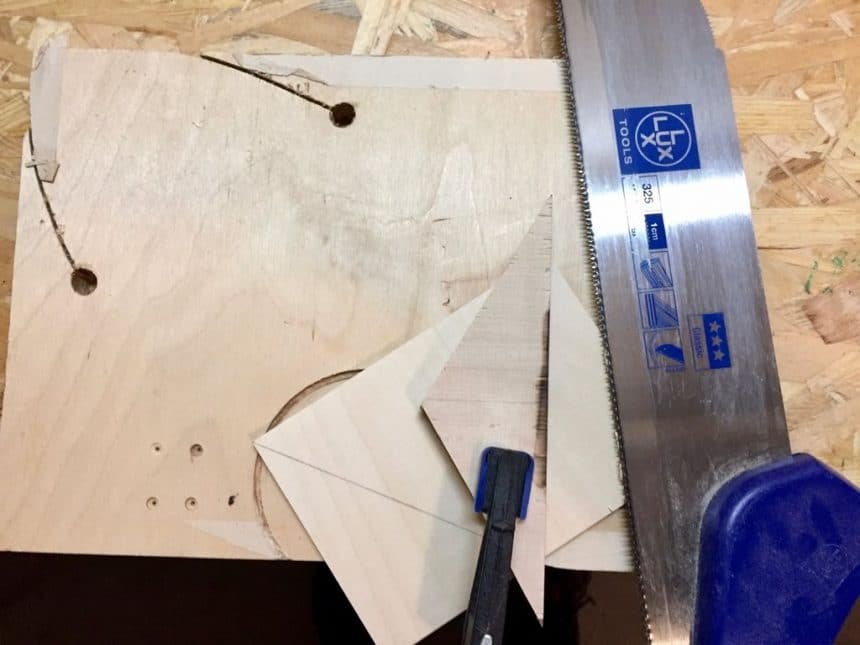
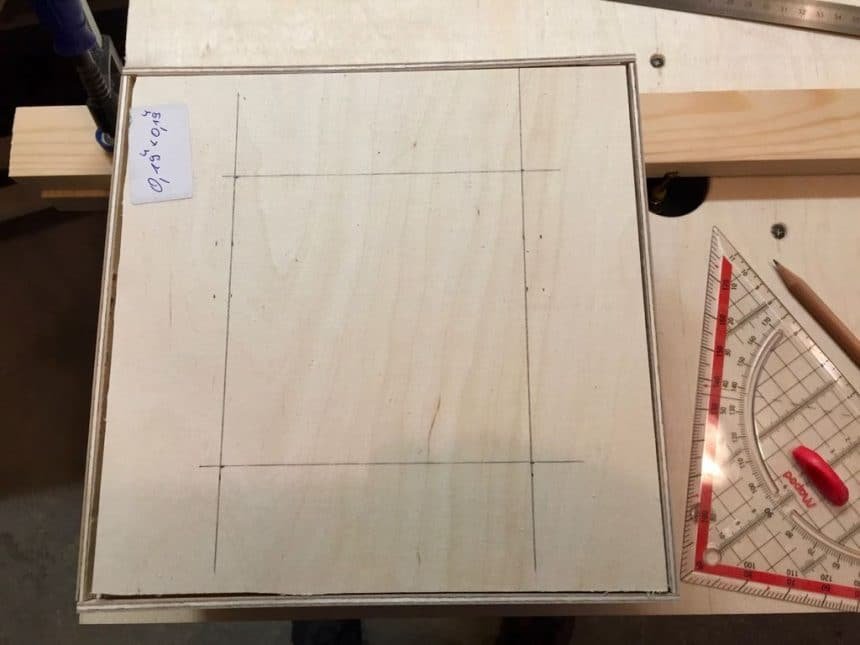
The ceiling plate should now fit perfectly. Next step is to cut out an inner square. The square should have the inner dimension of the first floor. This is in my case 120mm – 2x6mm = 108. The first floor walls will be glued directly to the ceiling later on.
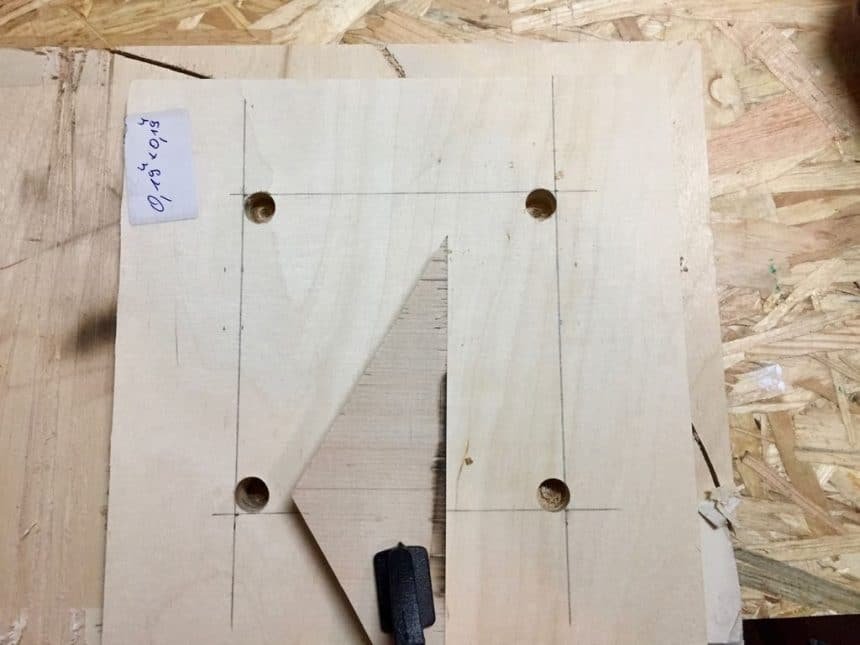
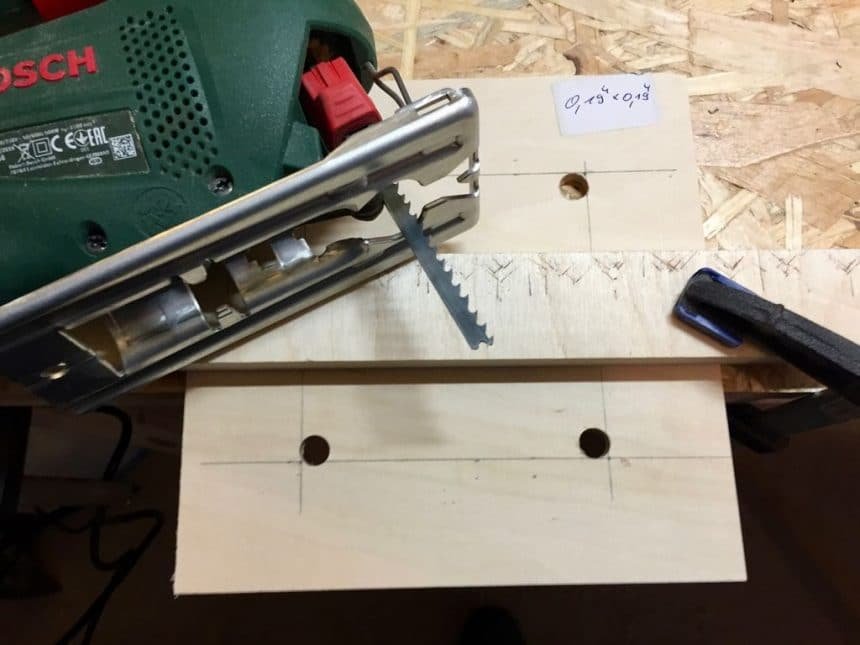
I mark the square with my pencil and drill four holes in the corners so I can insert my jigsaw to cut out the square. A short test at the end fits perfectly.
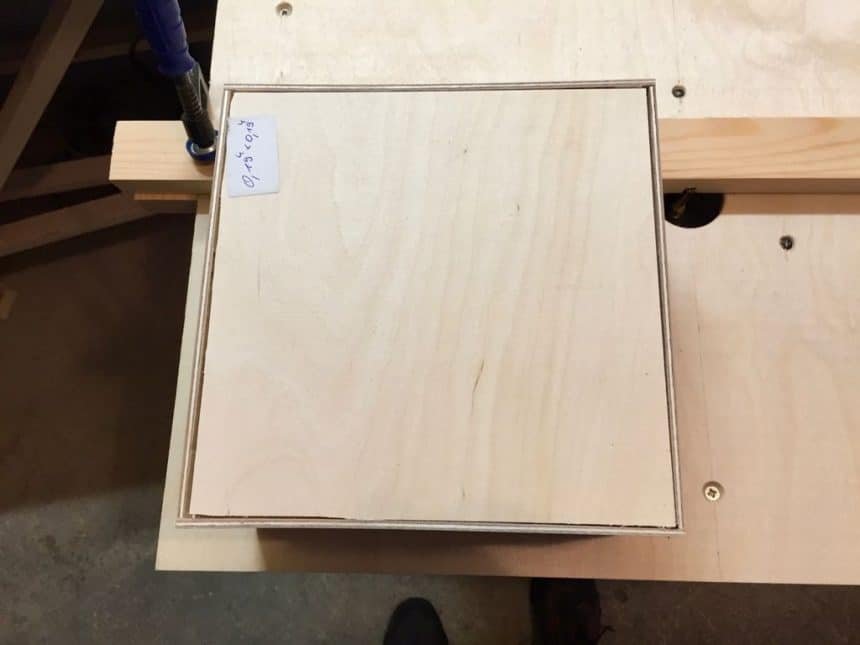
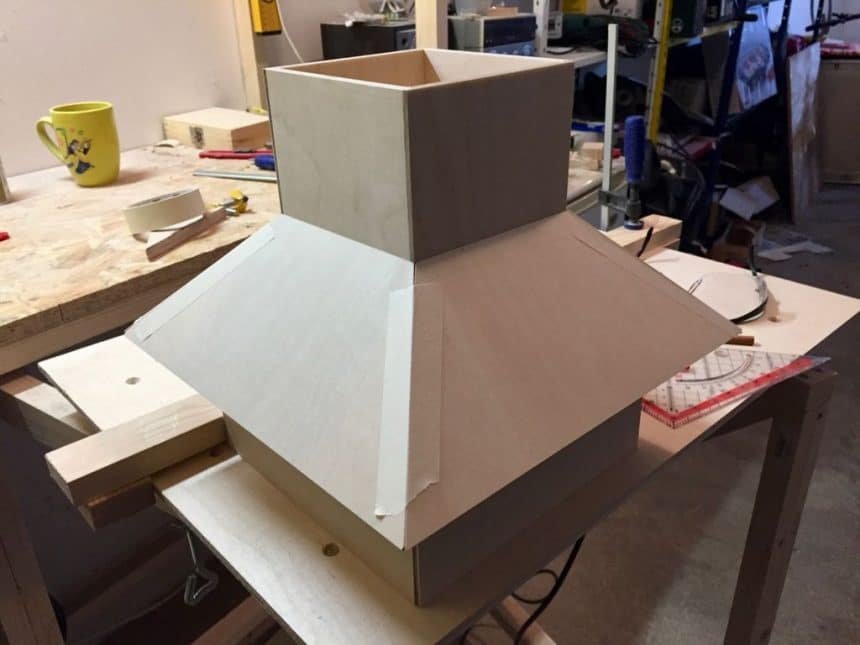
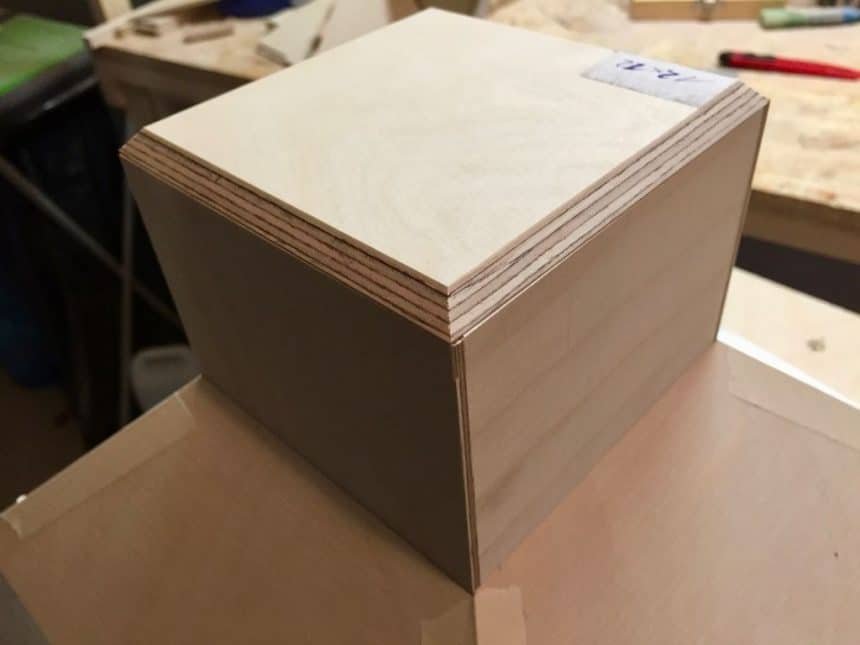
The main parts a ready to be assembled for a first test. I put the walls together of the ground-floor and place the ceiling on it. I place the walls of the first floor on the ceiling and pull over the lower roof. I cover the first floor with the upper roof plate and finally with the upper roof itself. Et voila, it fits perfectly. Now it’s time to focus on the details.
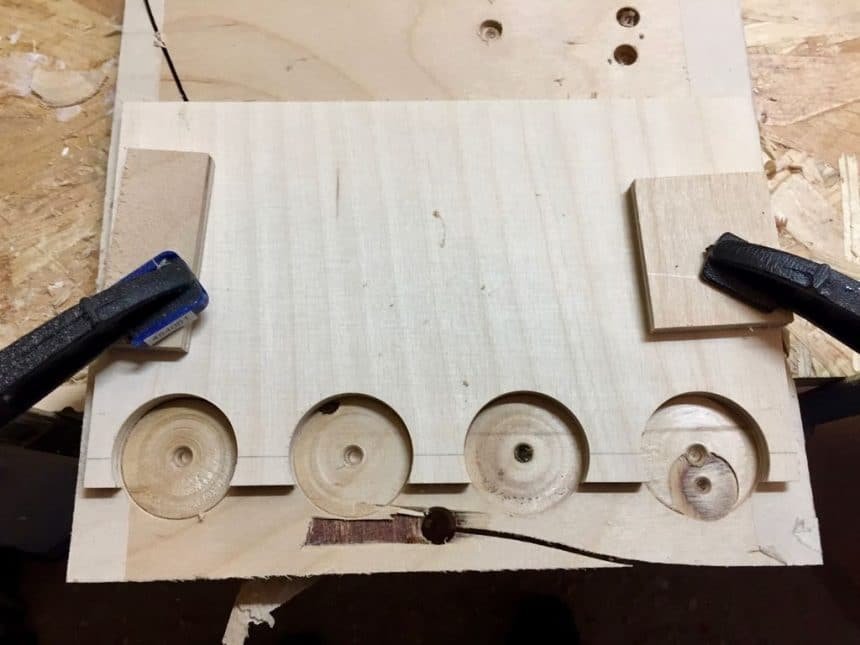
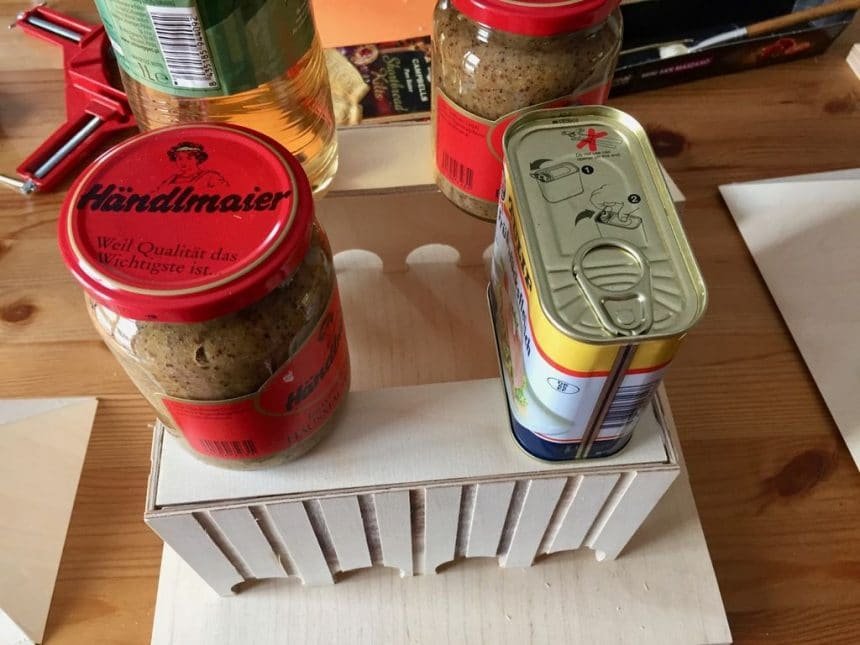
In the next step, I cut out the holes for the seeds. I’ve decided to make holes and not an entire hatch over the full length. With the holes I got more area to glue the walls to the ground plate later on.
I use 35mm foster drill for the holes. I mark a parallel line roundabout 10mm from the baseline. I use a nail to mark the center. You can drill a small hole with a small wood driller as well. I cut out four holes on each wall with the foster drill. A short test again
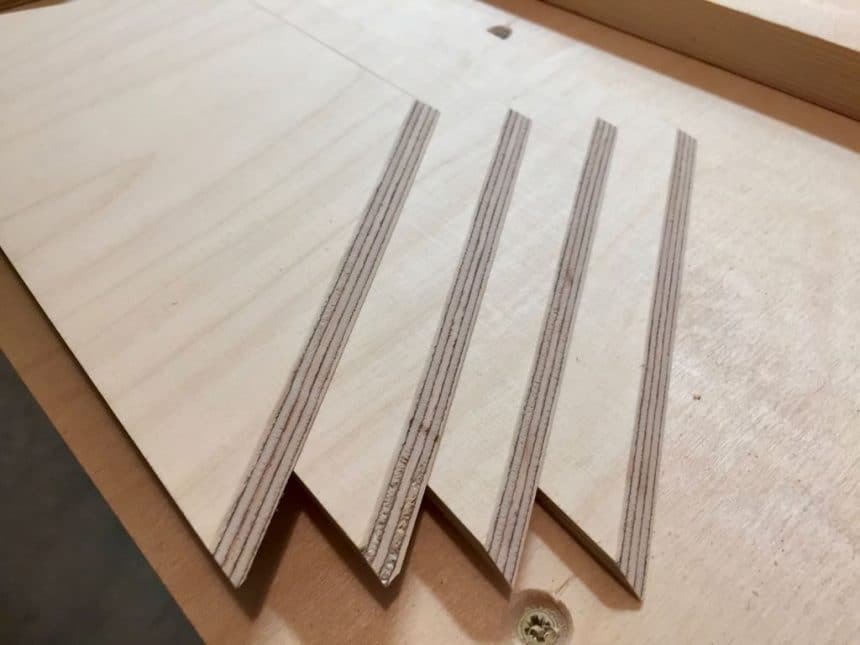
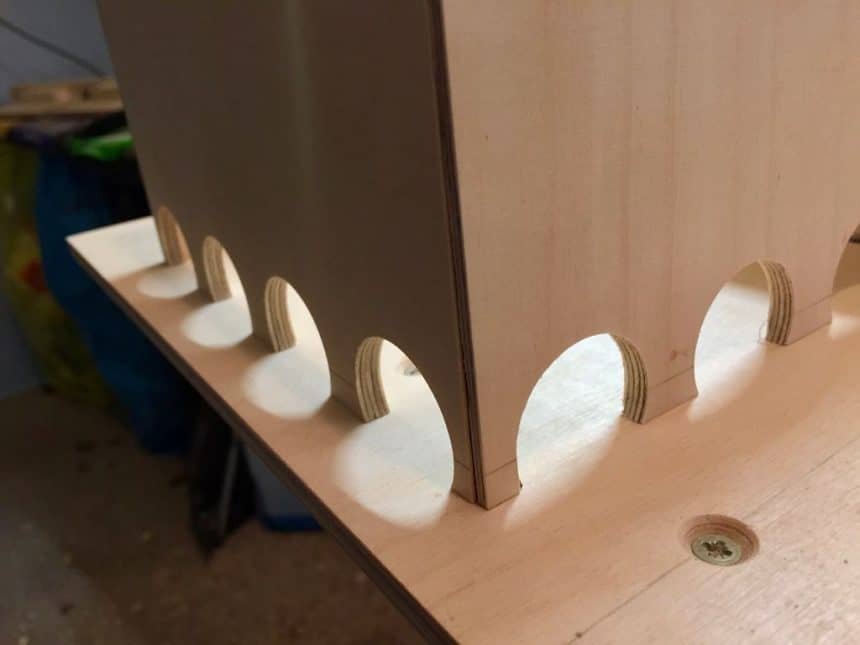
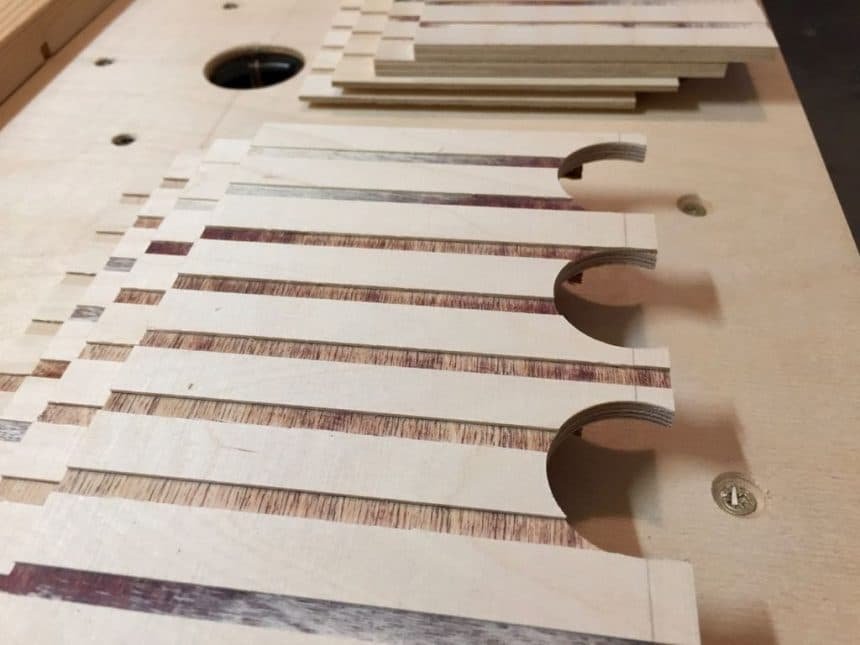
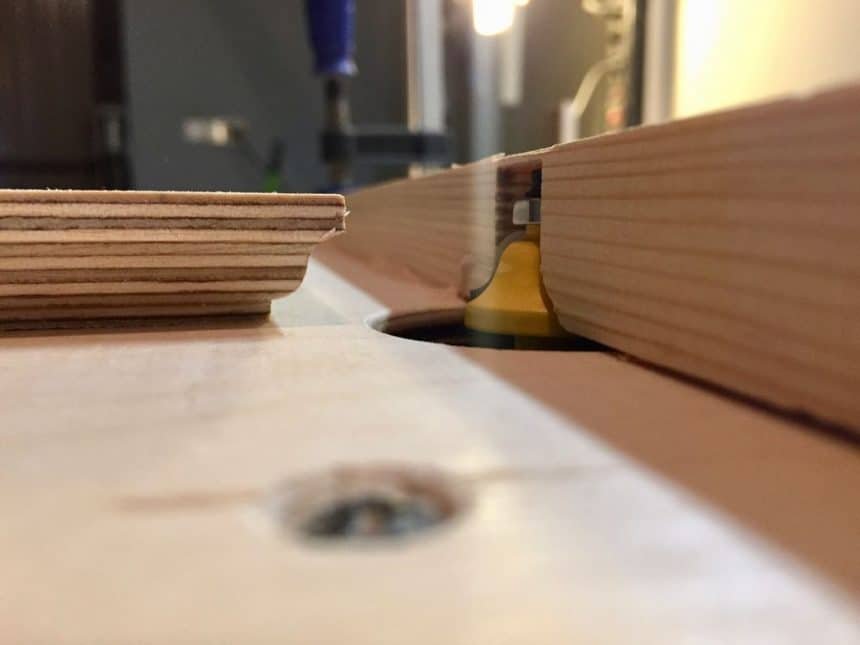
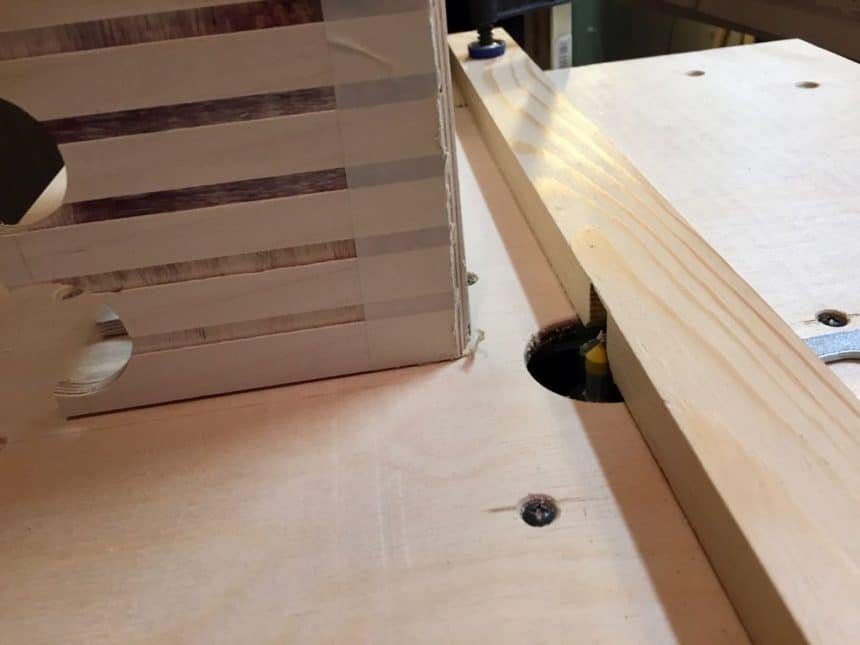
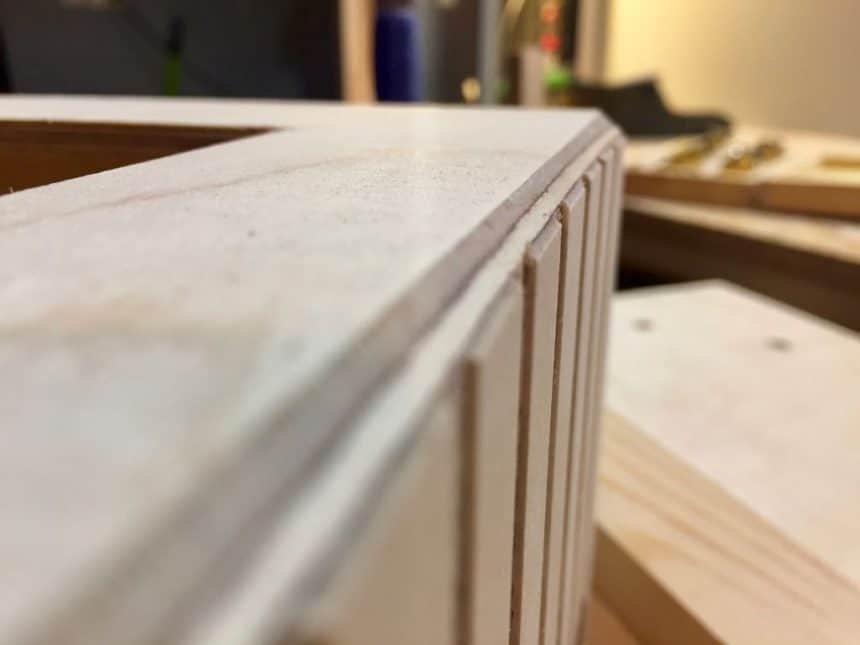
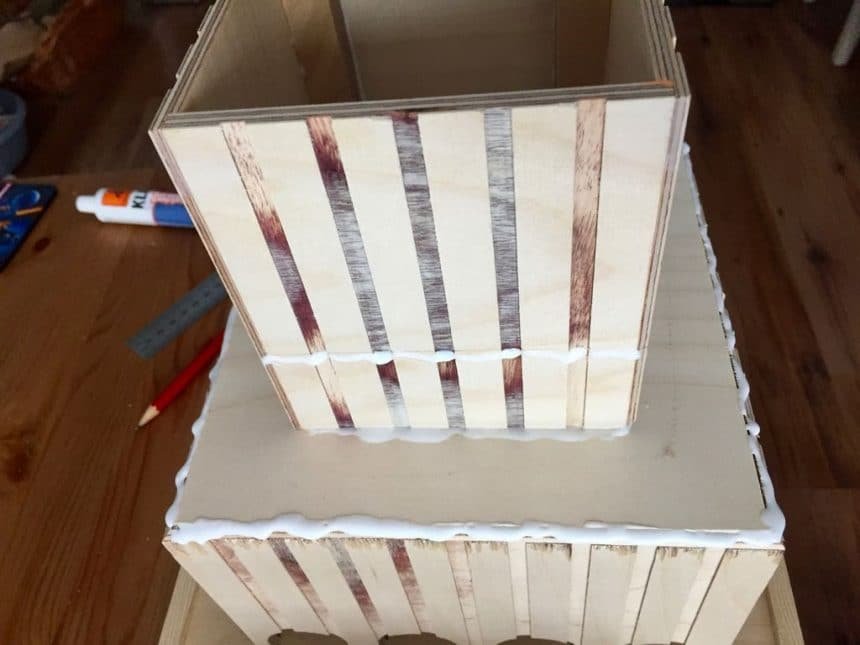
I want to have a nice finish on the facade. That’s why I use my router with a 6mm straight cutter to mill small and parallel notches on the outside on each of the eight walls (ground and first-floor walls). The notch ist roundabout 1mm deep. You can use different distances between the notches. Do as you like. You can leave out the whole step as well. You can achieve a nice finish with paint too. It’s up to you
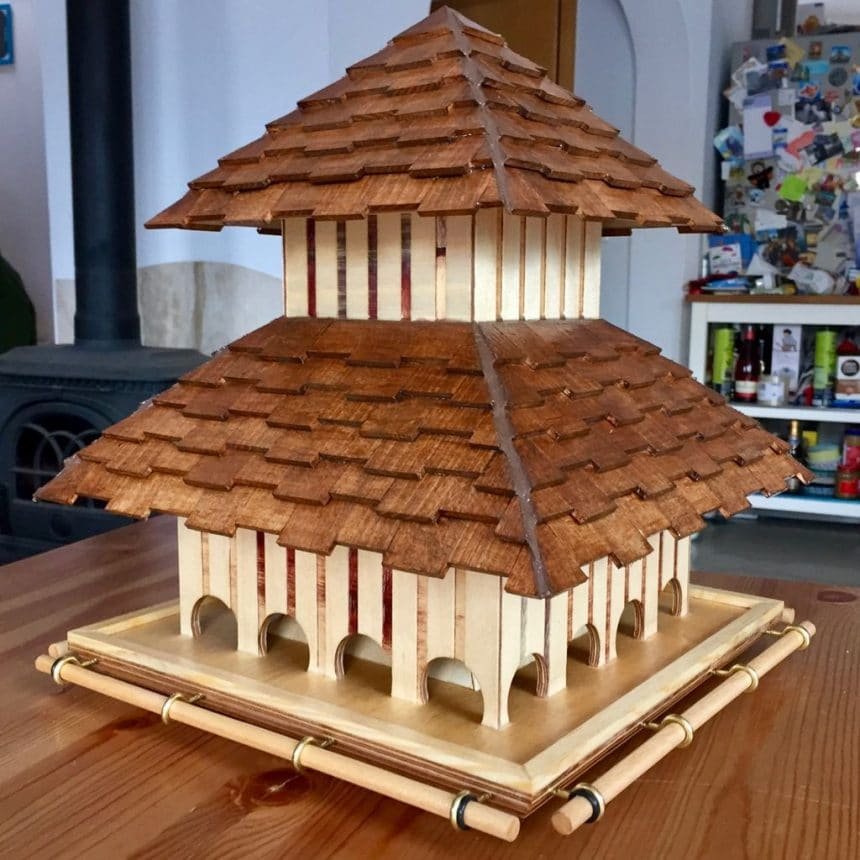
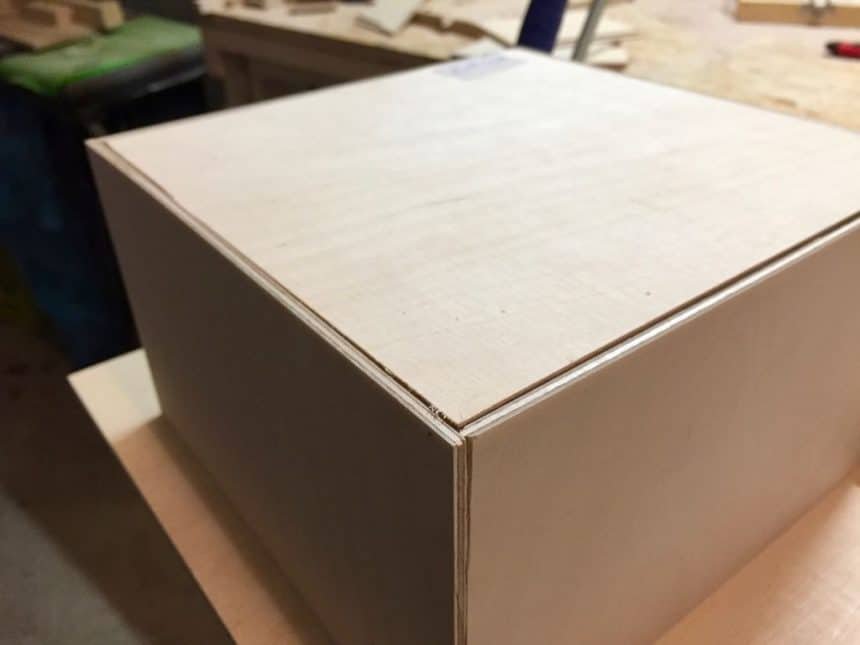
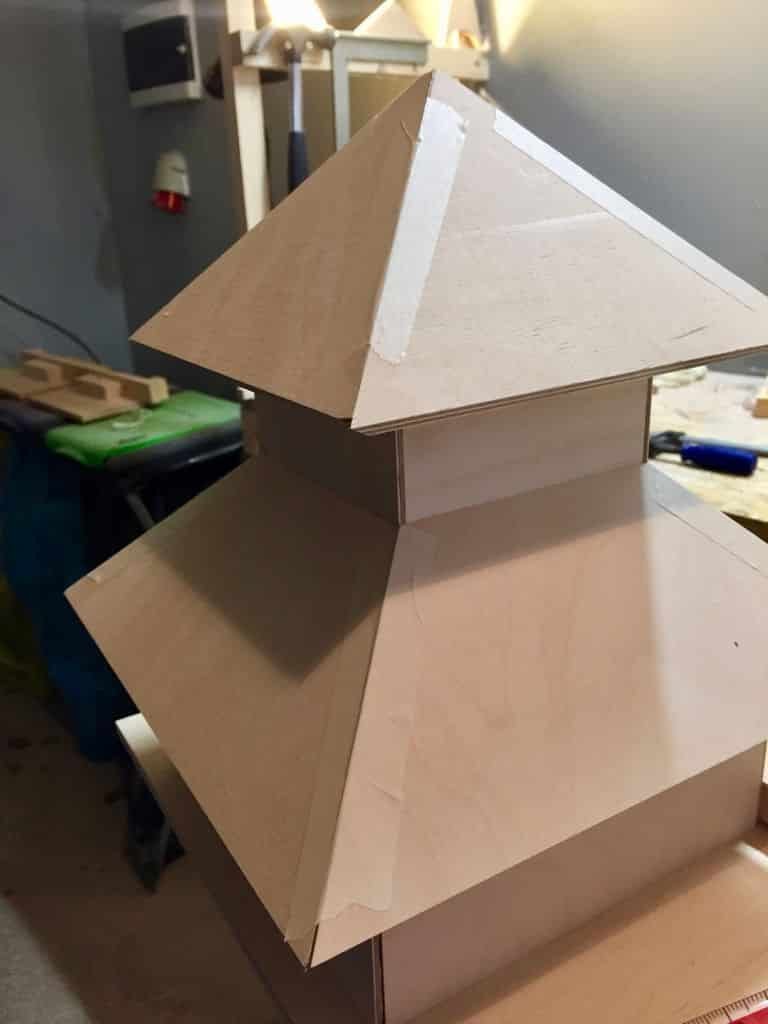
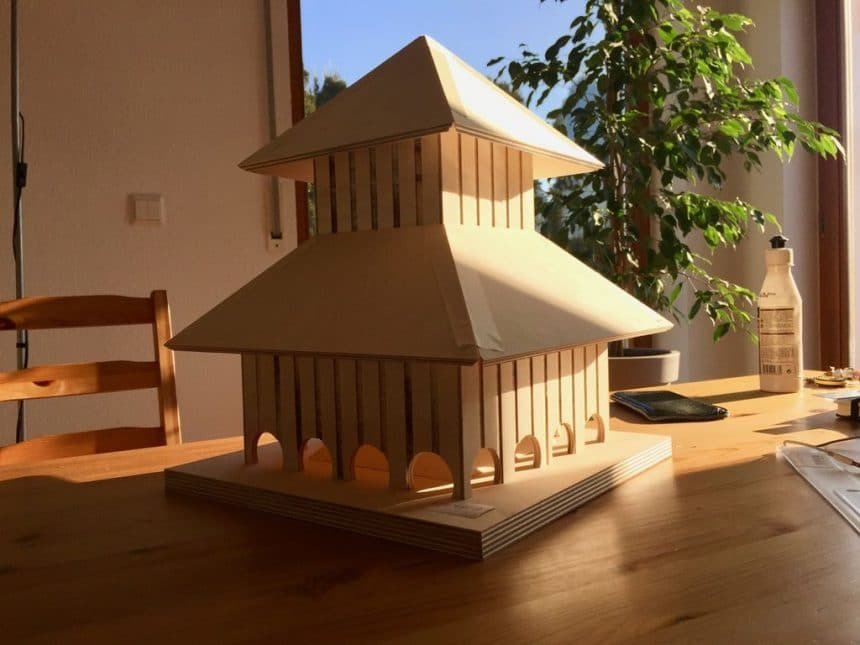
We are getting closer to the end. So it’s time for another test assembly. It looks almost finished with the nice sunlight falling on it
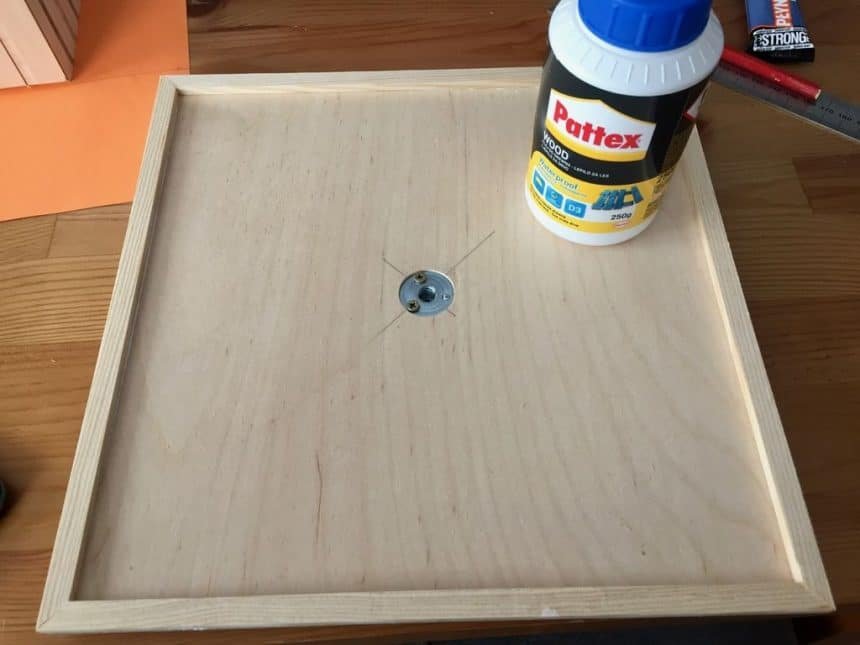
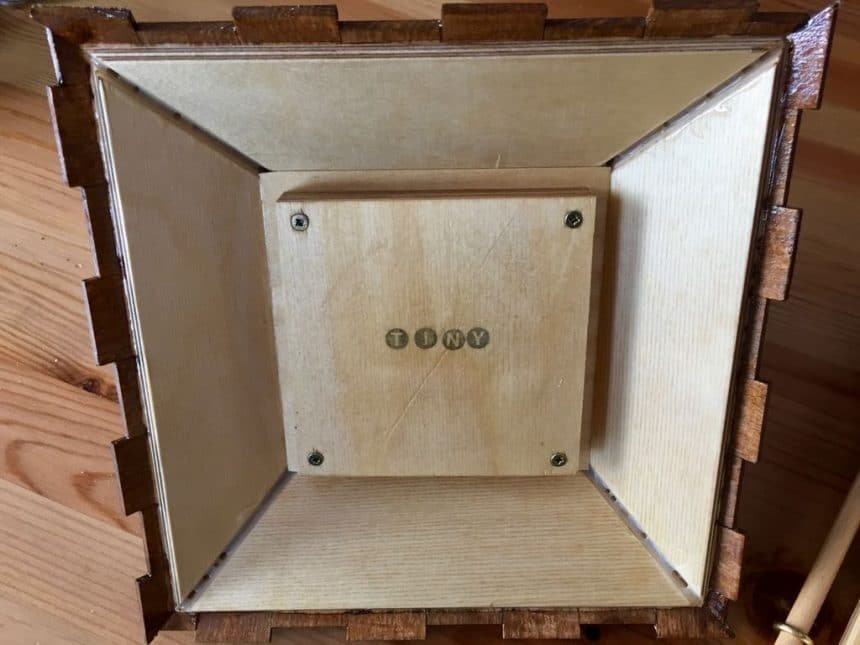
The house is almost done. It’s time for part 1, the ground plate. I use my router to achieve a nice finish on the edges, but this not necessary.
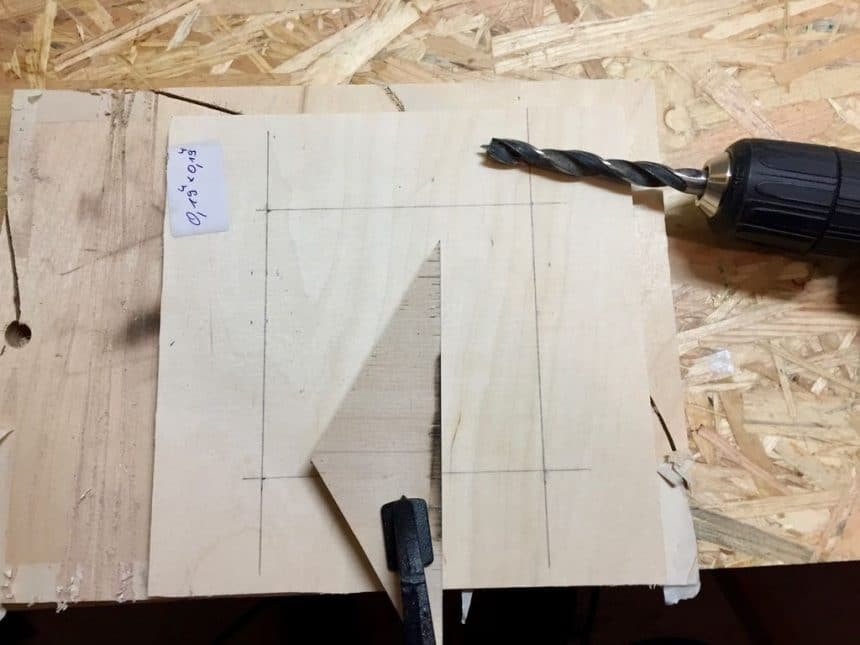
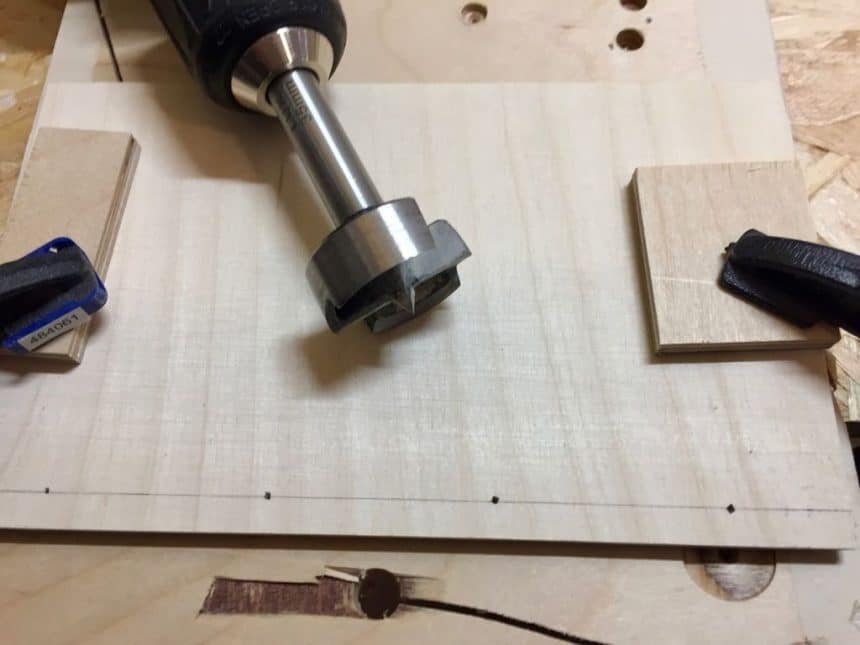
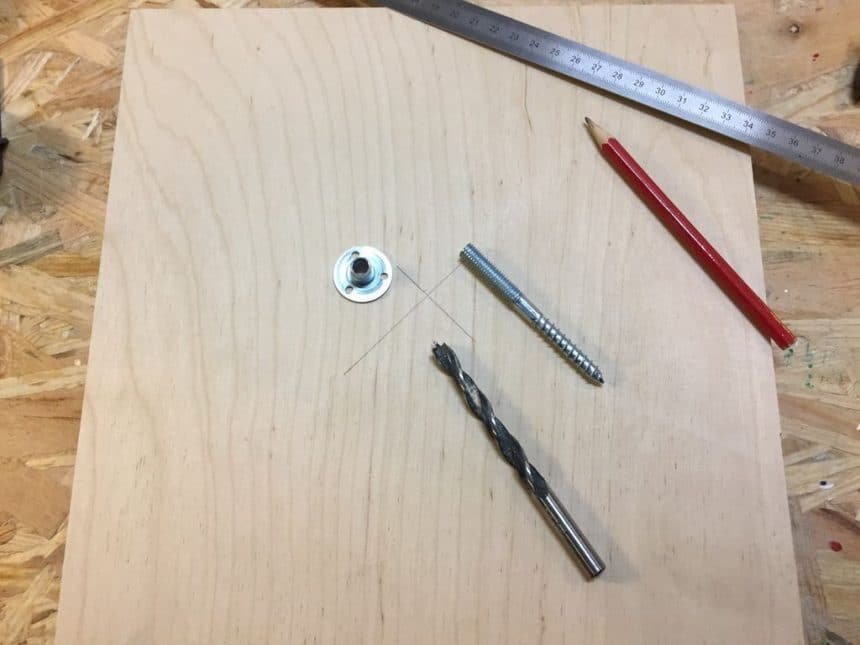
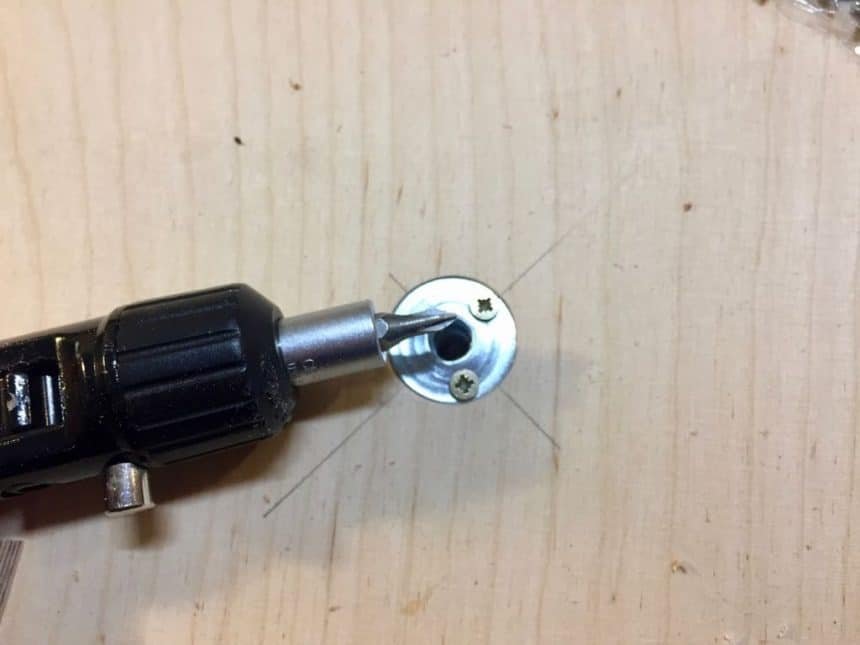
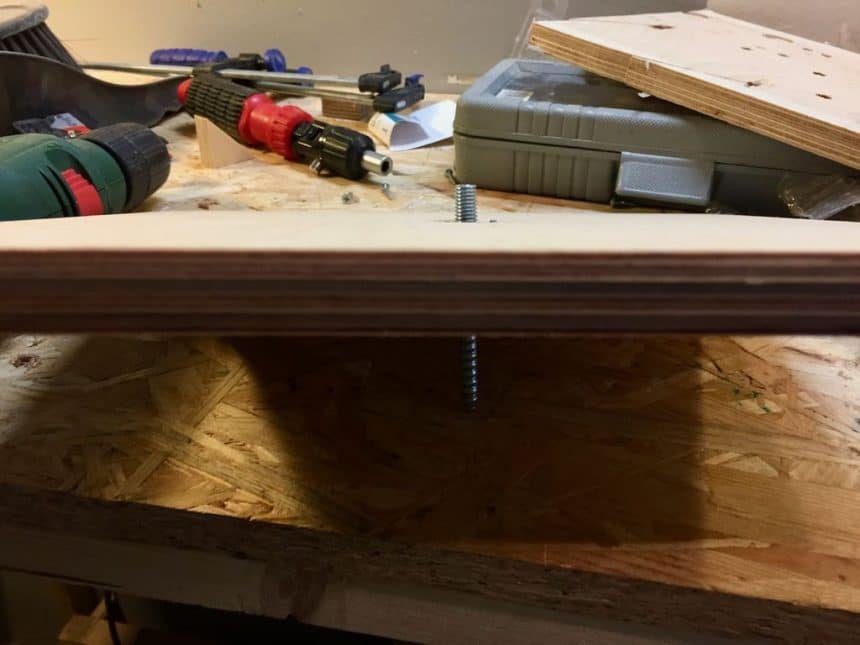
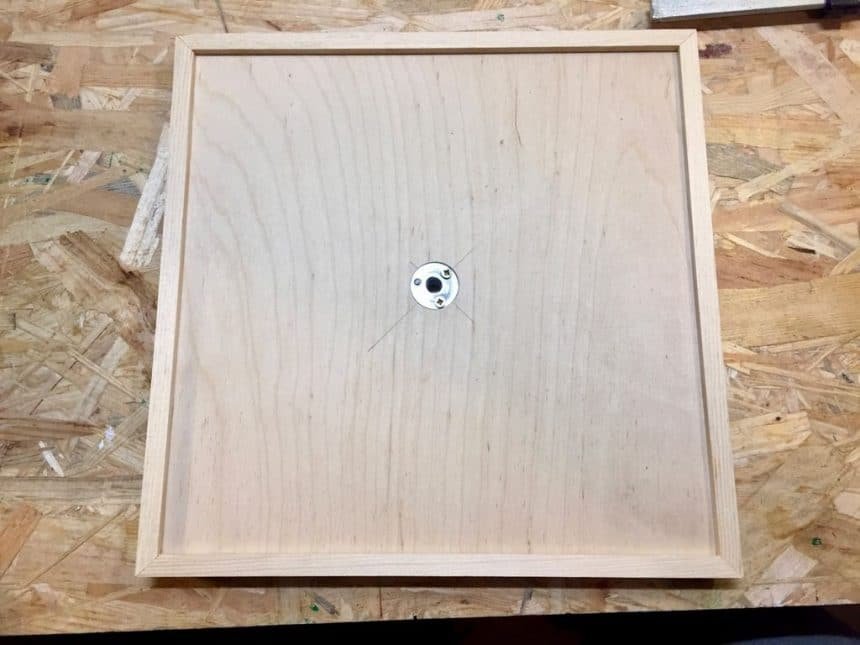
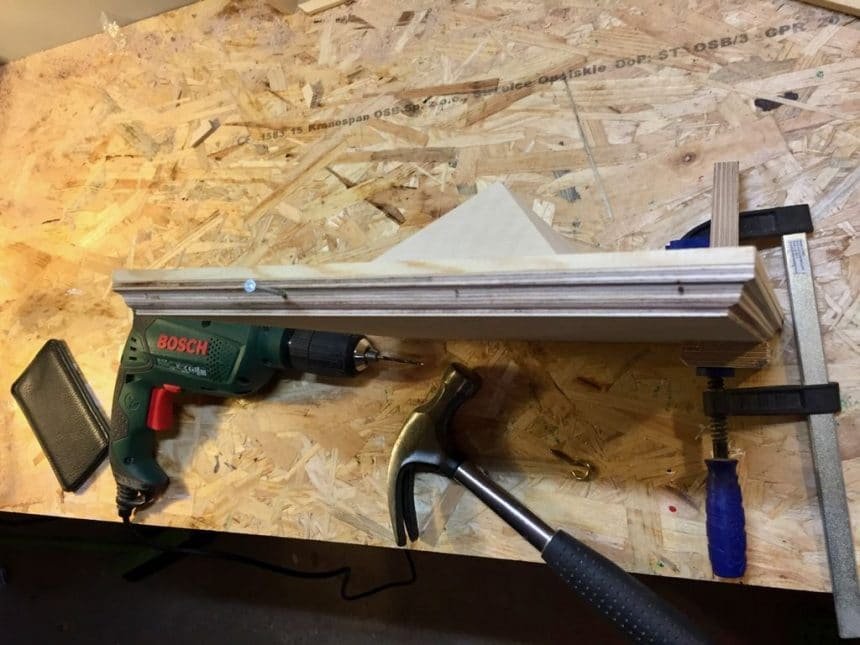
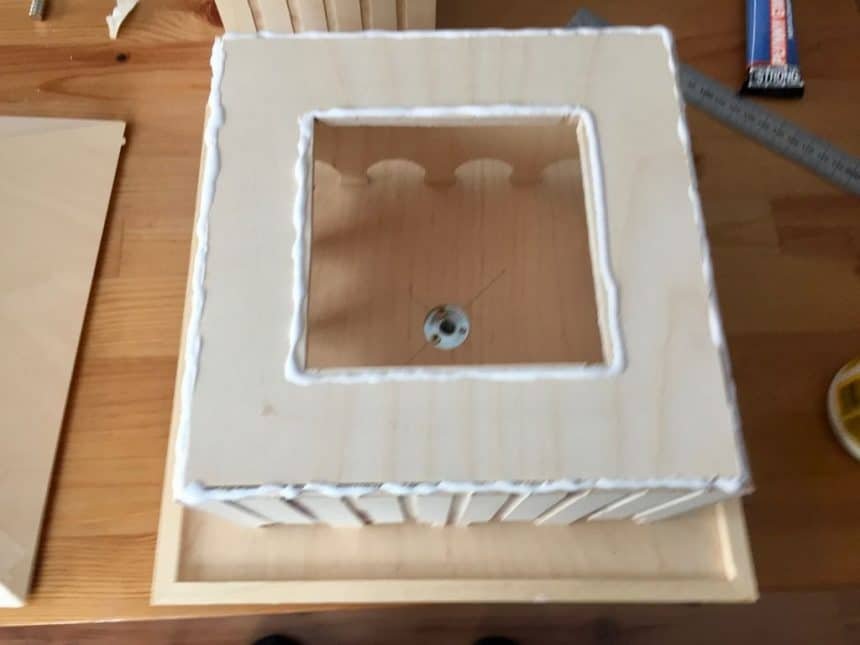
Next step is to apply the retainer nut for the pole mount. Therefore I use a long ruler to find the exact center of the plate (simply draw a line from each corner to the other). I use a 20mm foster drill to form a hole which is 1mm deep. Then I use a 10mm wood drill to drill through the base plate. Now I can insert the retainer nut and fixate it with three screws (your nut may differ from mine, there are also some nuts with claws instead of screws. You need a hammer there ;D). A small test: The bolt fits. The bolt will be screwed in the pole later on.
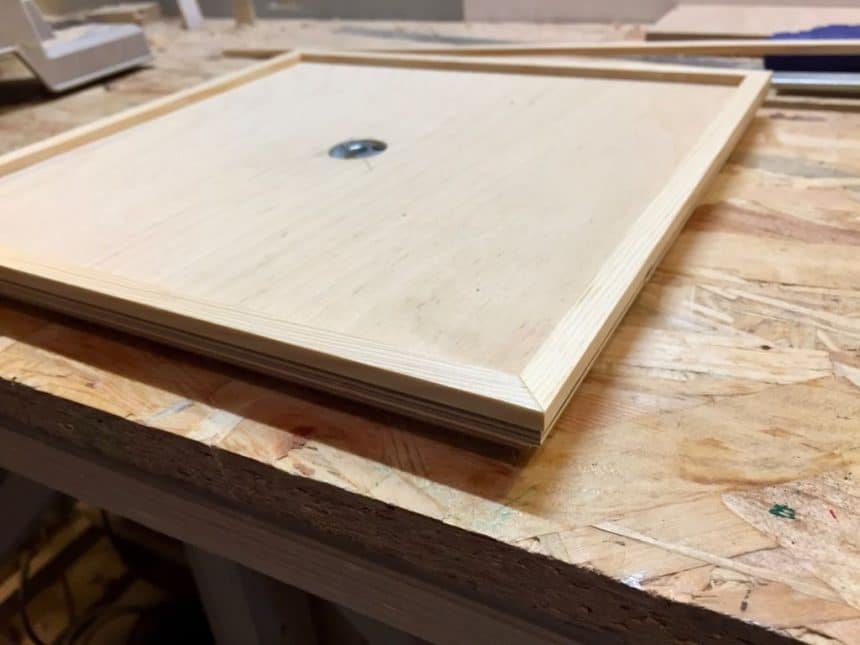
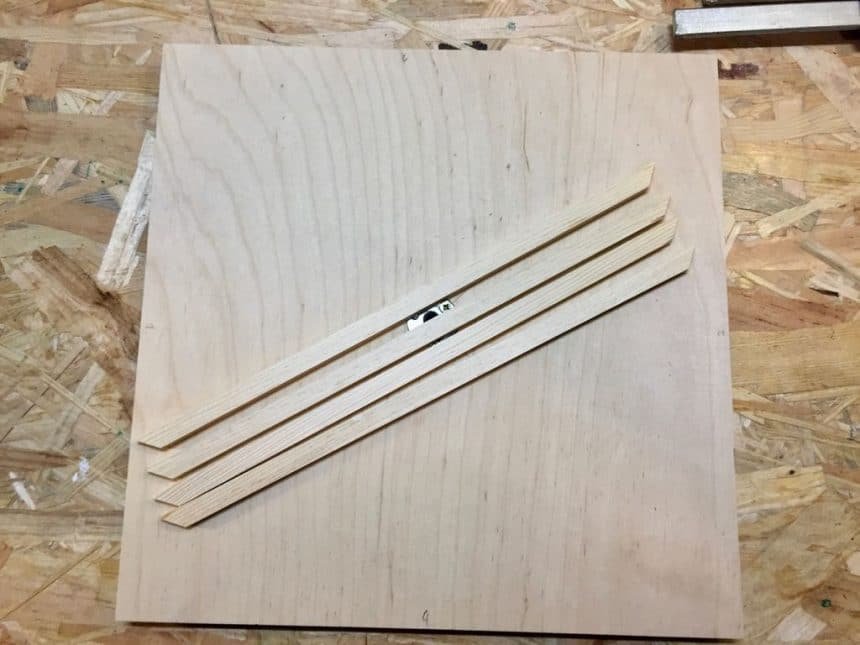
The plate will offer the seeds later, therefore I need a small rim, which prevents the seeds from falling down. I use wooden strips, which are 10mm wide and 2-3mm high. I cut them in the length of the base plate, which means 280mm. I apply a 45° angle on each end, like a picture frame.
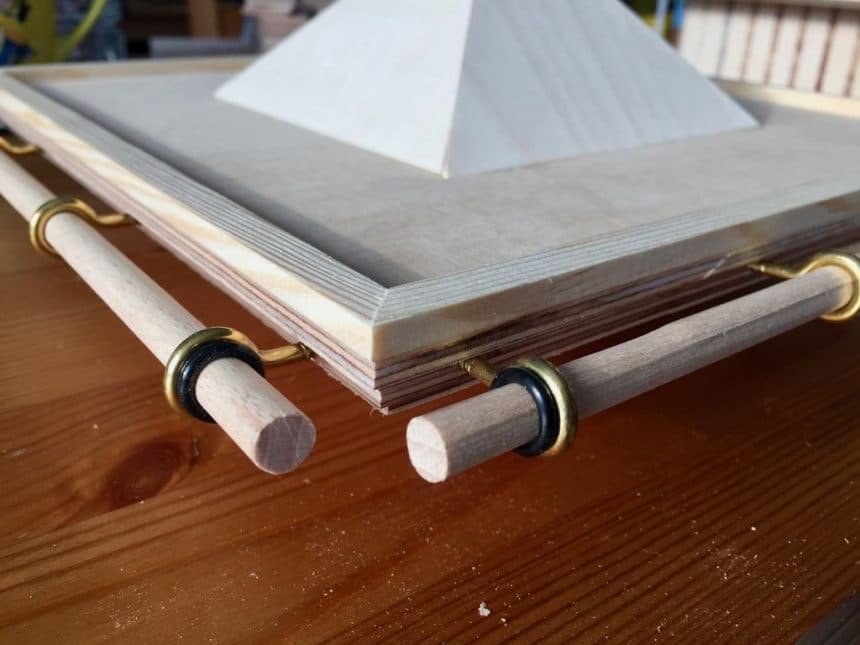
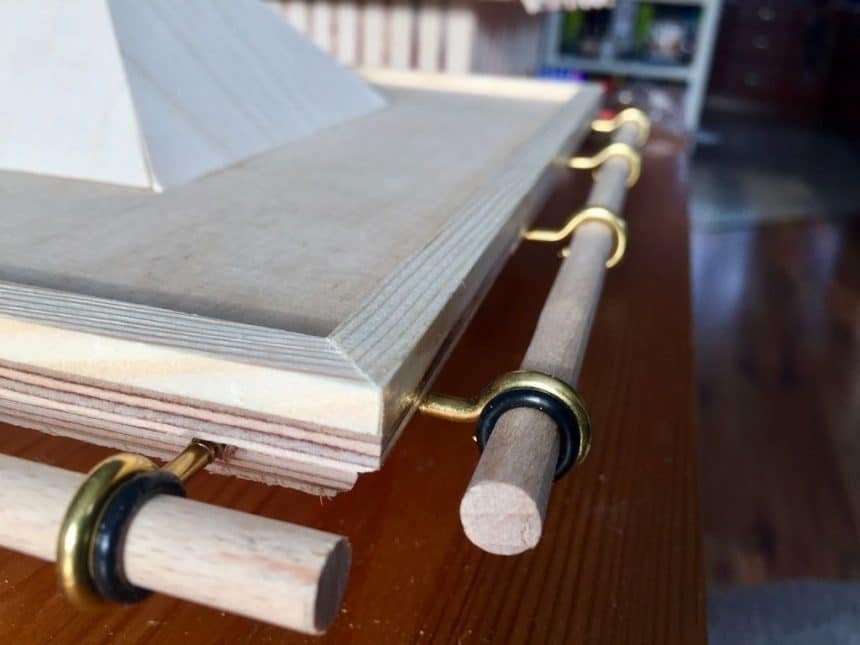
Finally, I use round wooden bars with a thickness of 8mm for the bird “runway”. I cut them in the length of the base plate, again 280mm. The bars will be held with four screw hooks on each side. Therefore I drill holes with a small wood drill. That makes it easier to insert the hooks later on.
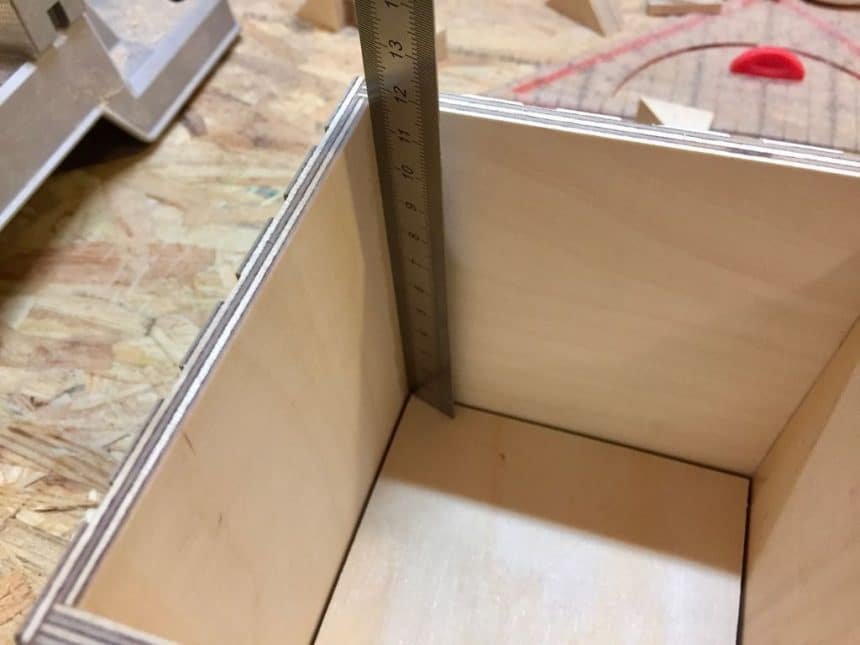
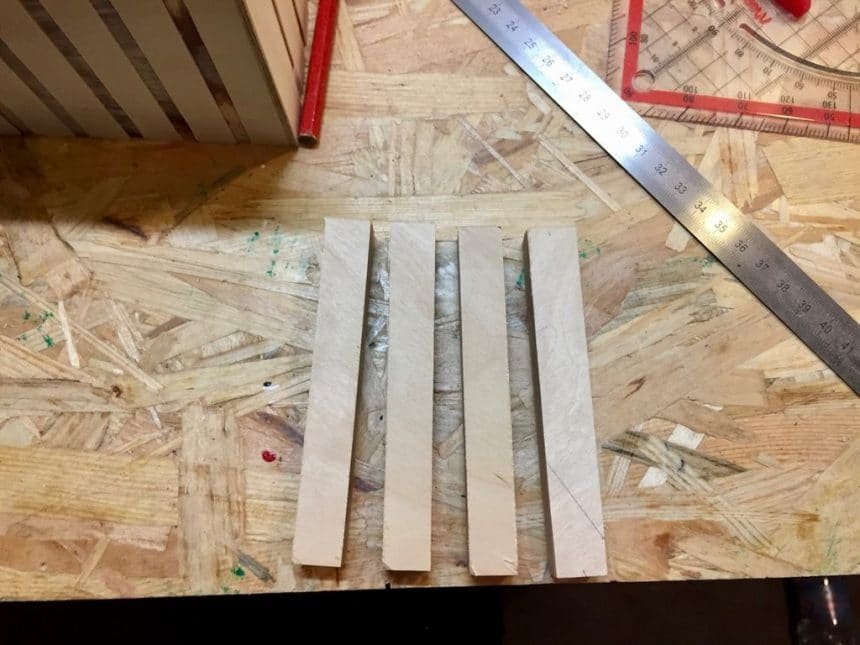
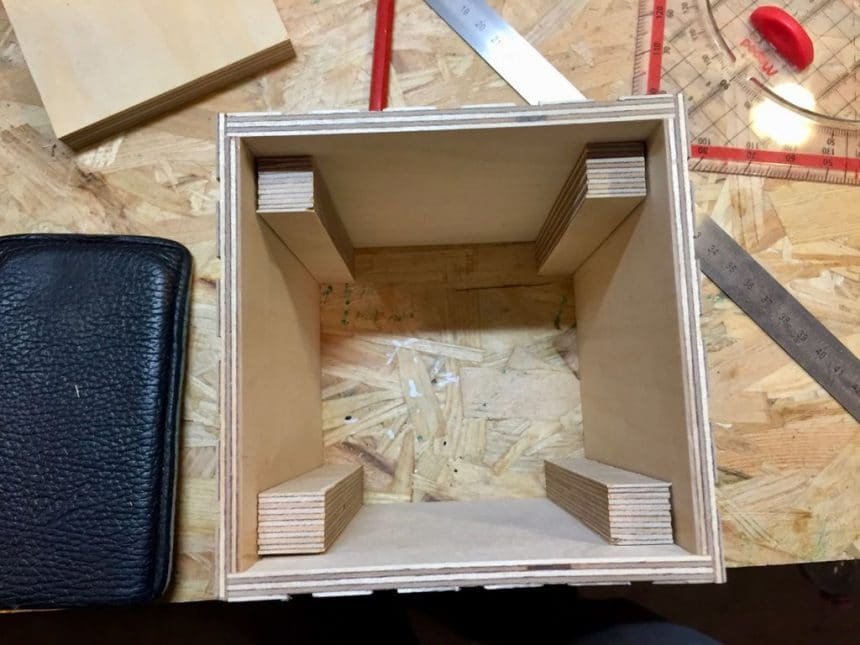
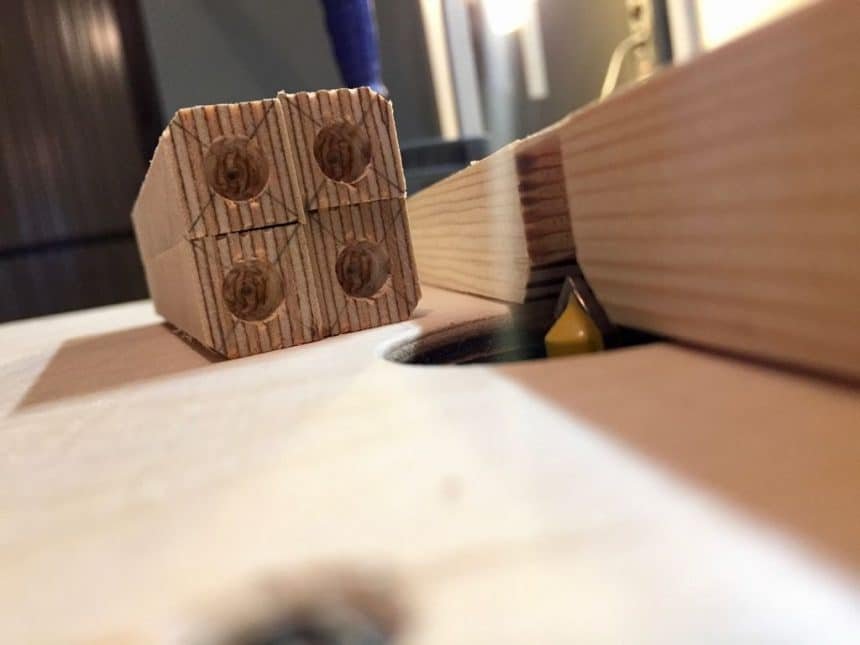
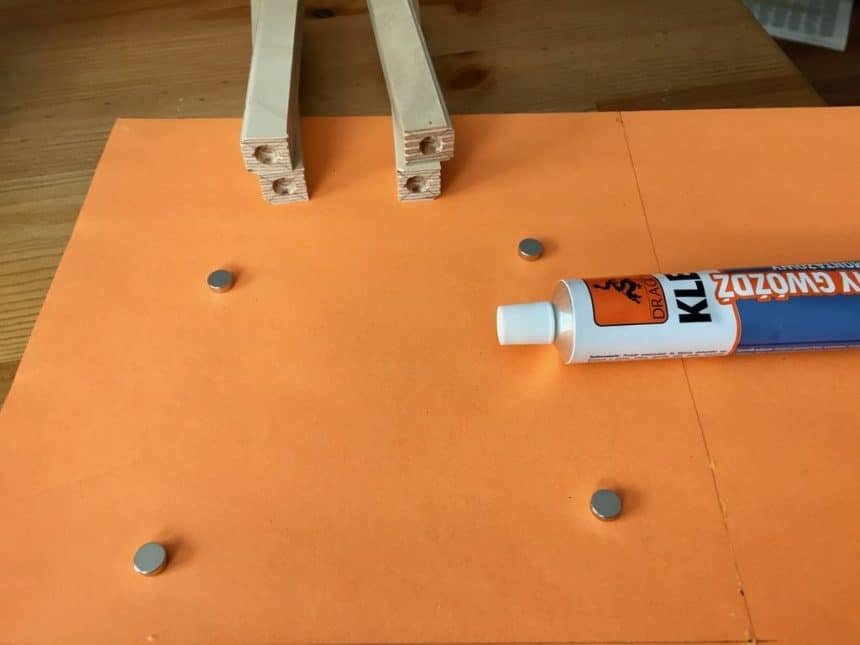
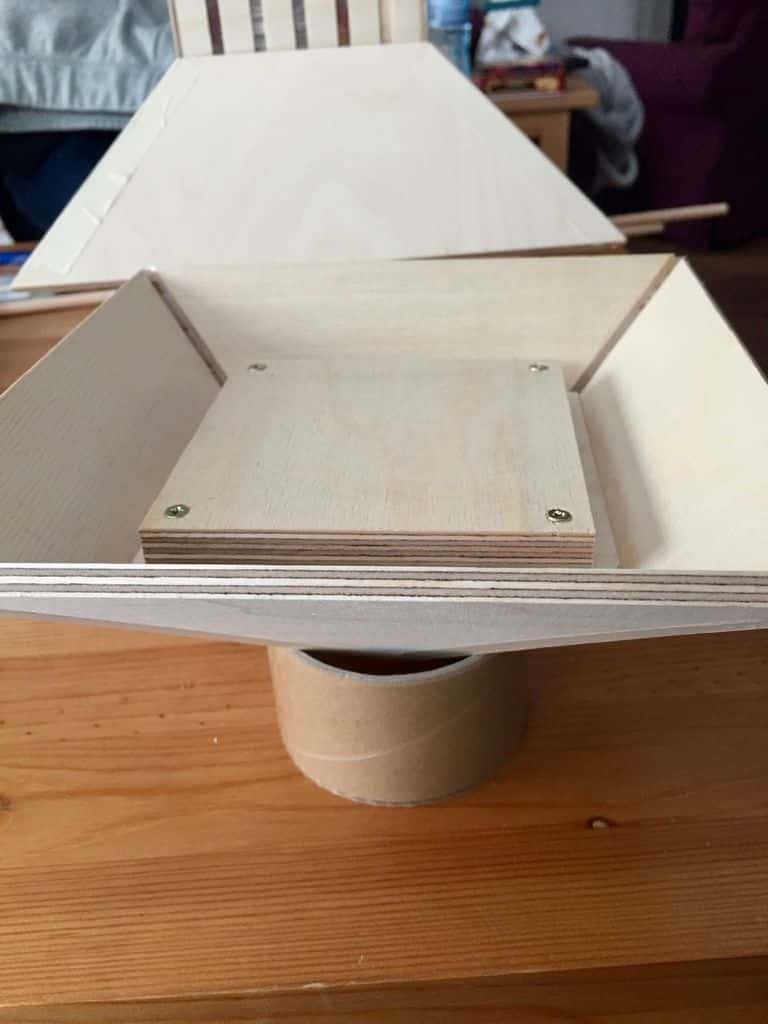
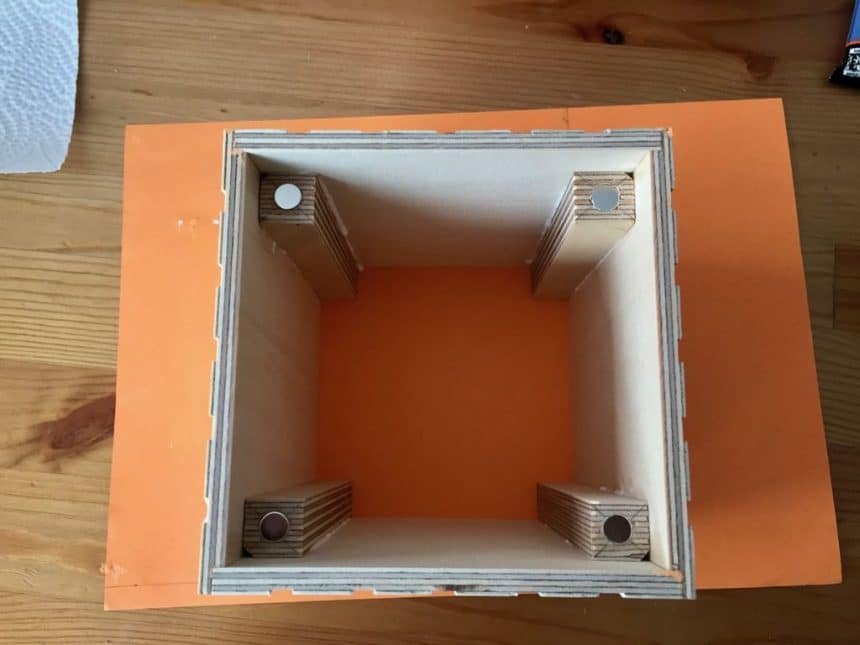
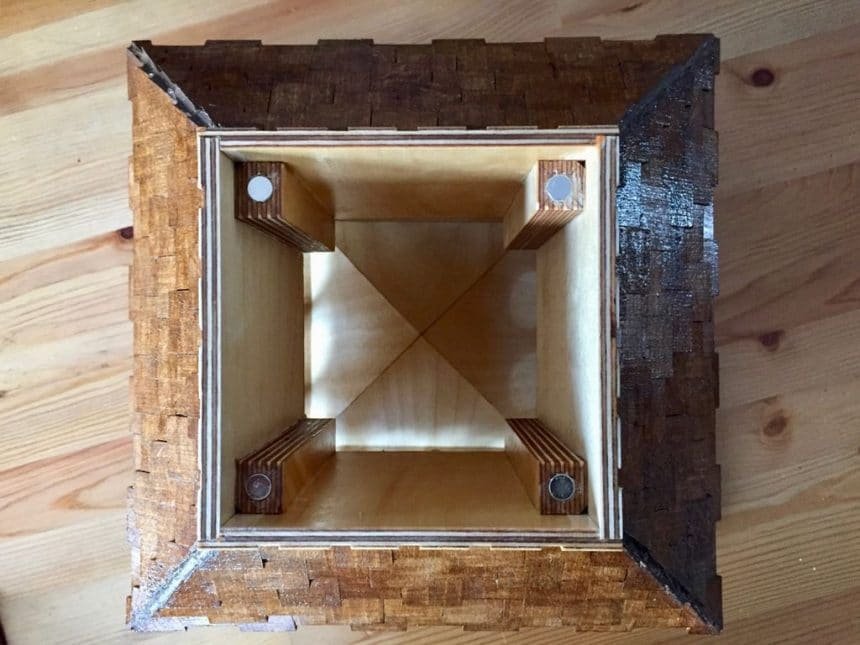
The bird seeds will be filed in through the upper roof. Therefore I need a closing system. I want to use magnets. I use some spare plywood of 15mm thickness to cut out four bars. They should have the length of the first floor walls minus the thickness of part 2. That means 130mm – 15mm = 115mm.
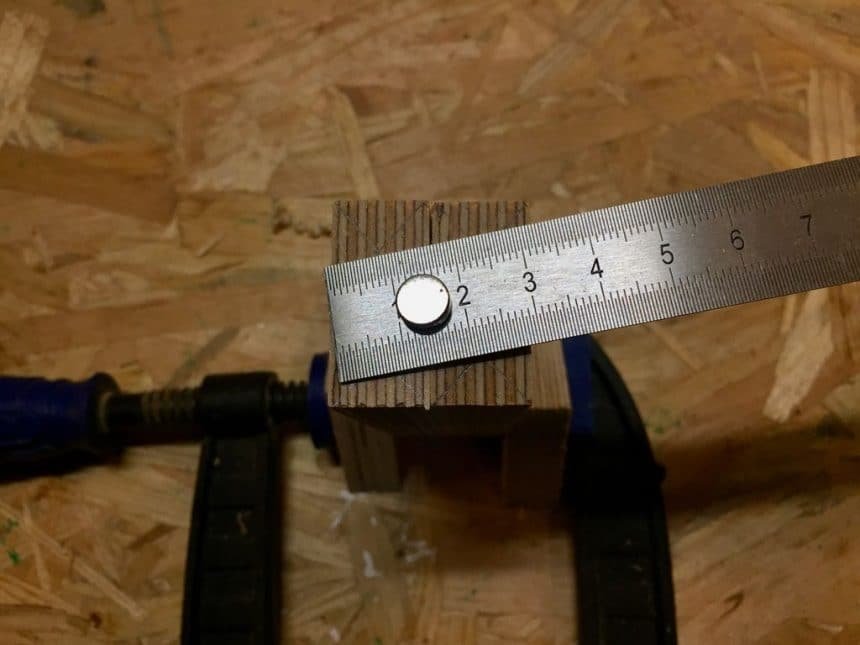
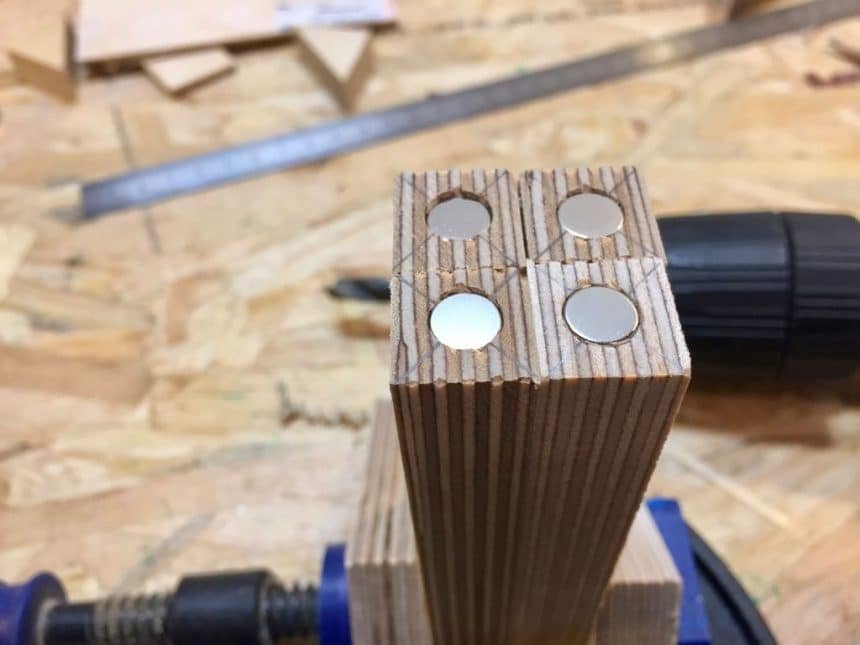
I drill a small hole in each bar for the magnets. The inserted magnets should be even with the surface. I use my router with a small 45° cutter to break one edge of each bar. That make it easier to fit them into the corners of the first floor. I use glue to fixate the magnets in their holes.
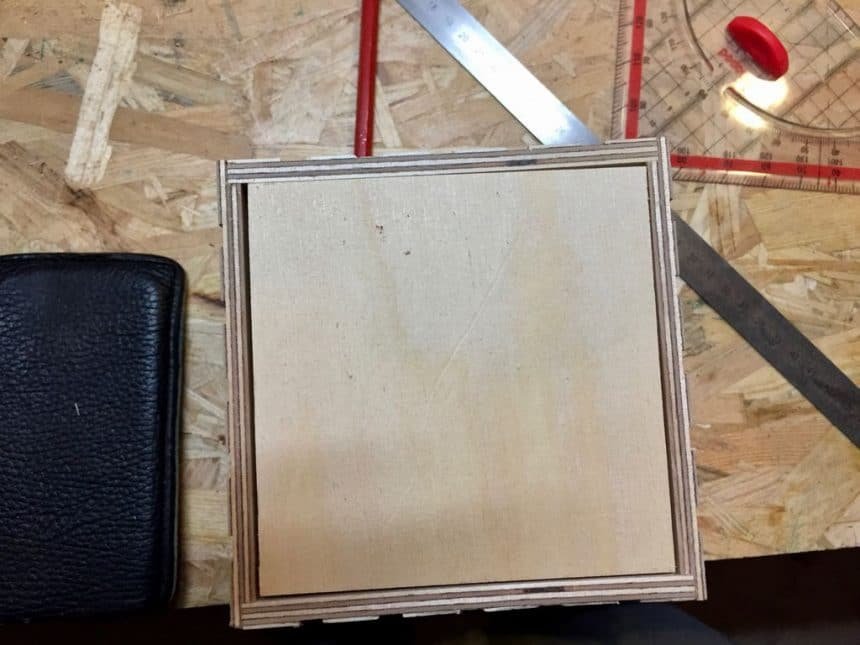
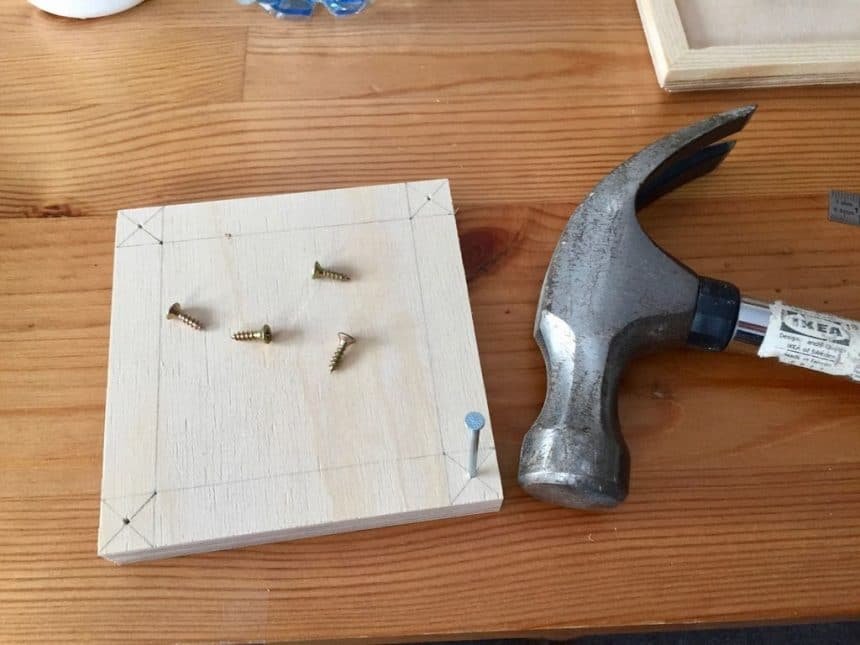
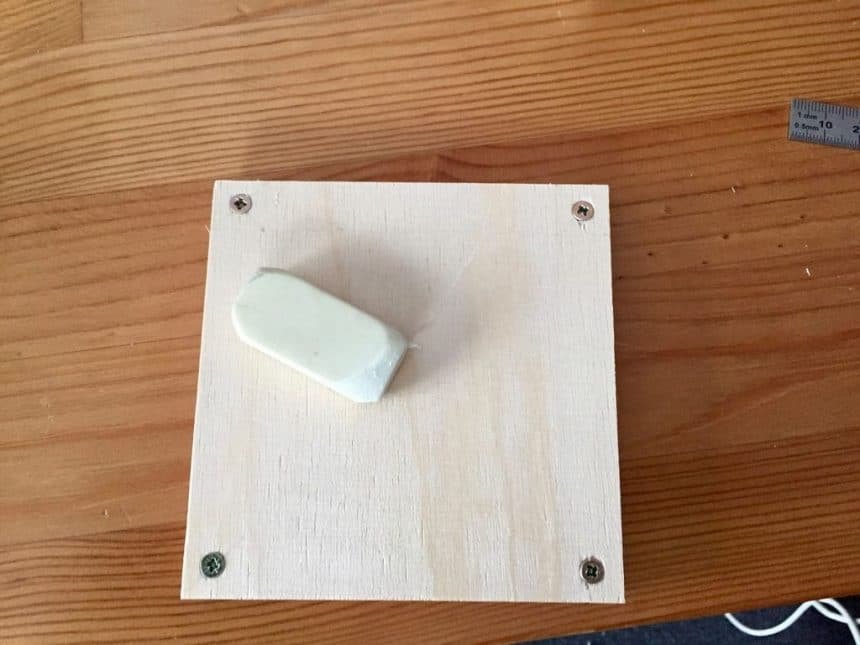
I mark the dimensions of the bars on part 2 and find the center of each corner square. I insert four little screws. It’s important, that the screws are magnetic. You can erase your pencil markings with a rubber.
Cool, magnetic fastening: Done!
Finally, I can glue something 😀 I start with the upper roof. I use a tape role as a frame. I insert plenty wood glue in the gaps between the triangles. Then comes the roof plate. It’s important that the plate is perfectly balanced and parallel to the roof edges. In the exact middle comes part 2. When the glue is dry, you can peel off the masking tape.
Next step is to finish the ground-floor. Therefore I glue the walls together and glue the ceiling right on the walls. I use some weight to hold the ceiling down till the glue is dry.
Last usage of the router. To have a wider gluing area for the lower roof, I break the edges of the upper side of the wall. Therefore I use 45° cutters, but just on the side without the holes.
Now it’s time for the lower roof to be glued together. I fill plenty of glue into the gaps between the trapezes. I use the first floor to see if everything fits. But be careful that the walls do not stick to the roof. This comes later.
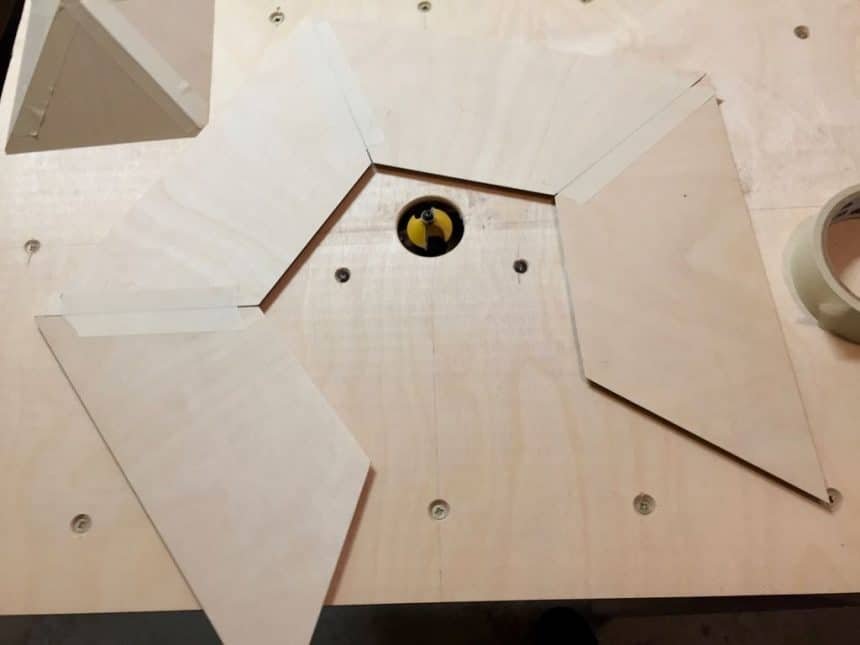
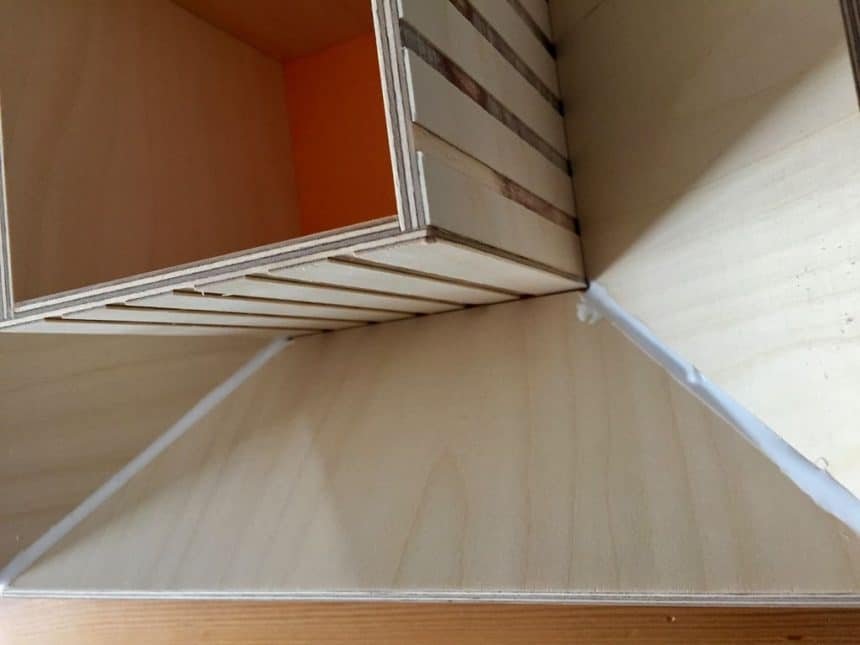
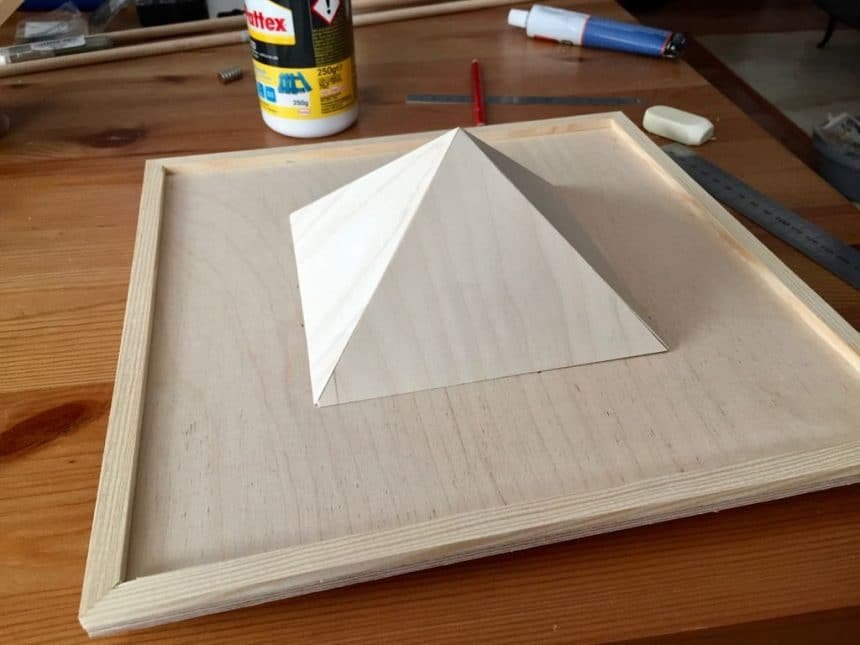
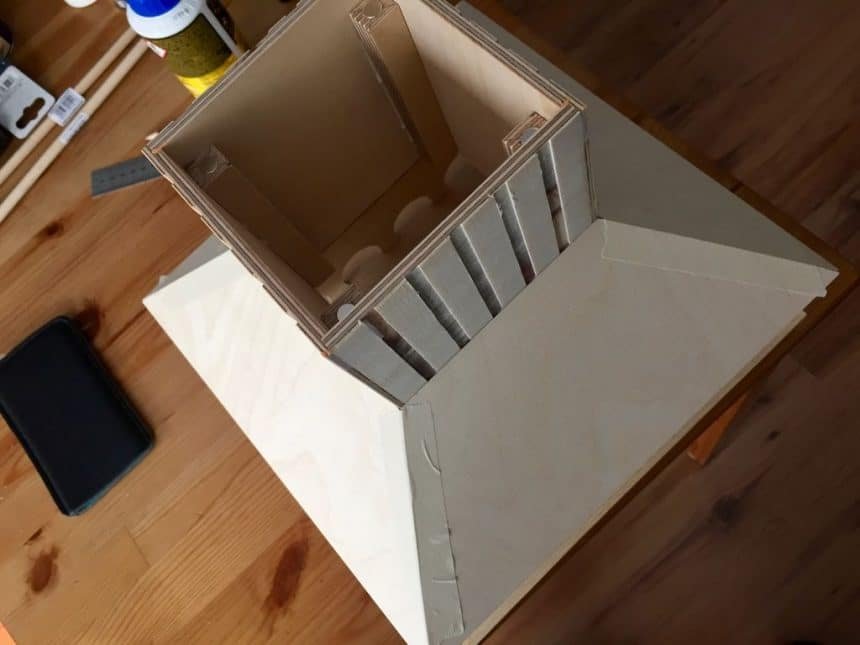
I use the markings from the center finding action before to fit the inner pyramid perfectly into the center of the base. I apply glue to fixate it. I glue the rims as well.
I insert the screw hooks into the holes I’ve made before. They should be equally screwed into the wood. I insert the bars and fixate them with two O-rings each. I’ll pull out the bars later on for lacquering.
Now I can glue the first-floor walls together. Finally, I can fixate the bars with the magnets in the corners.
We are getting close to the end :D. I glue the first floor onto the ground-floor. Then comes the lower roof. You can mark the end of the lower roof on the walls of the first floor to know where you should apply the glue. Do not glue the ground plate, the picture is just to see the final result
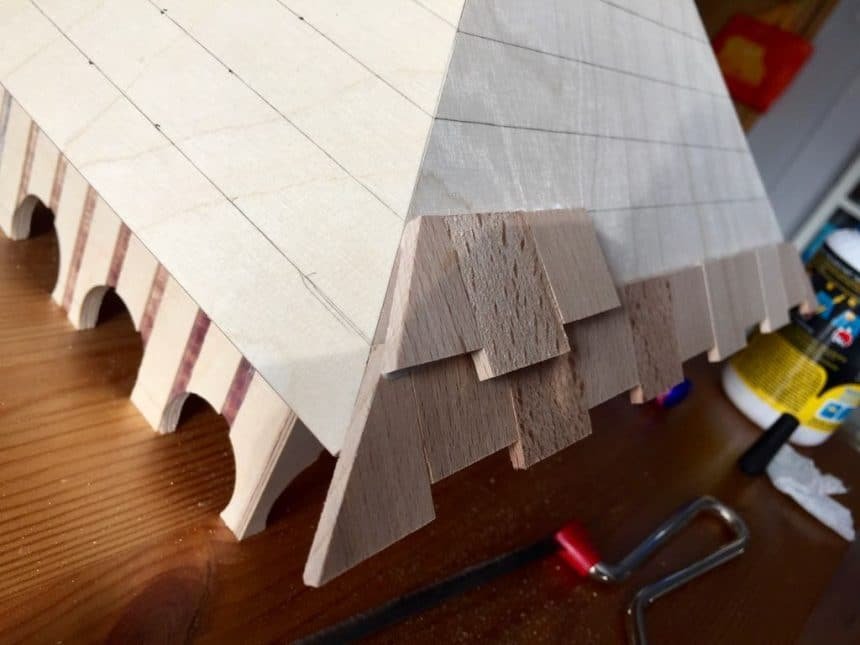
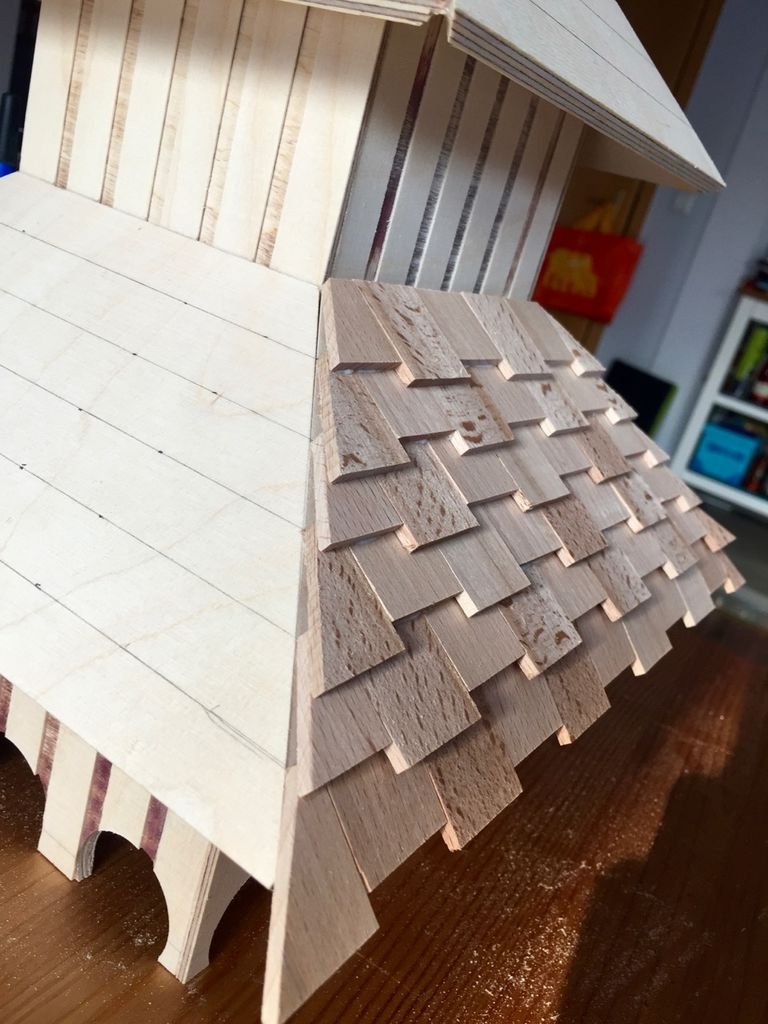
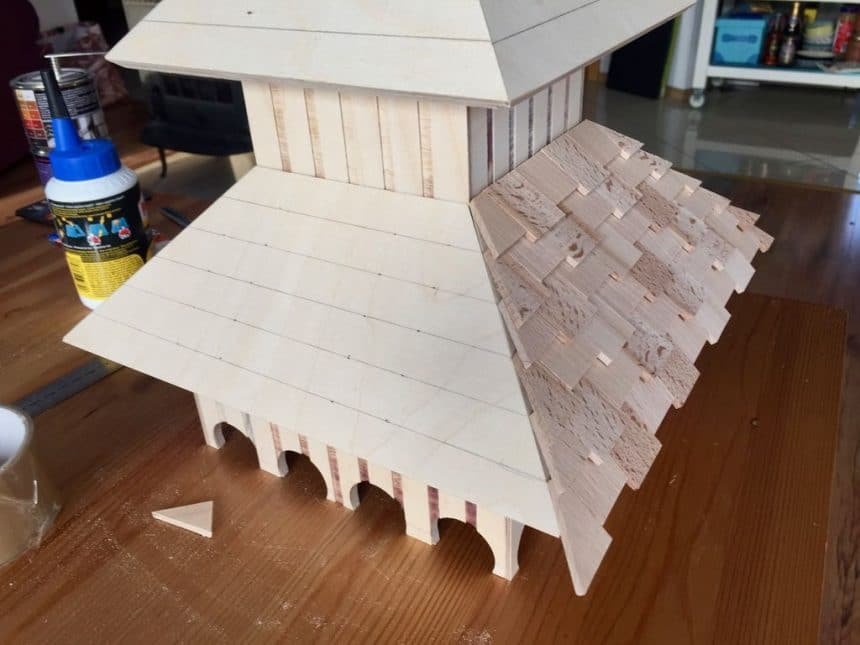
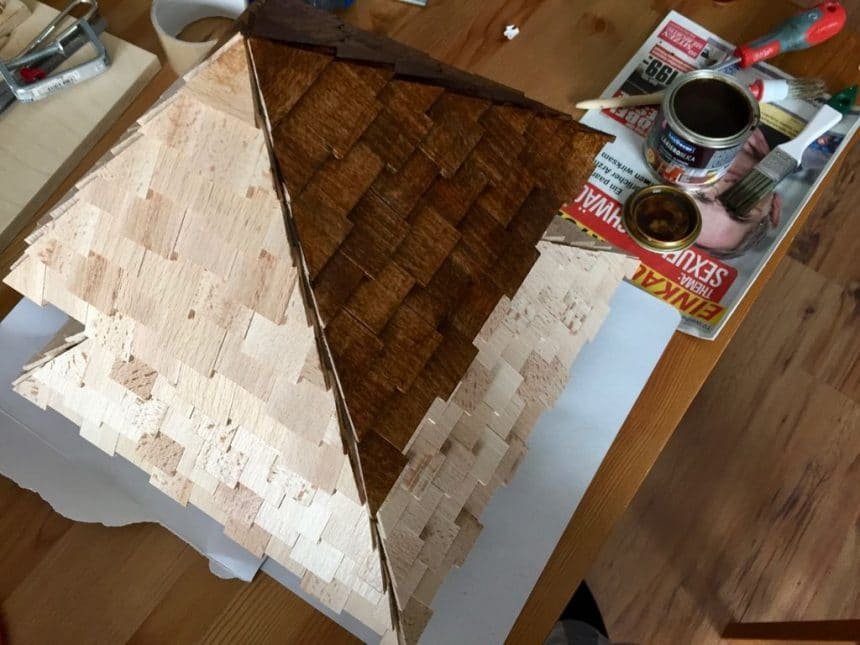
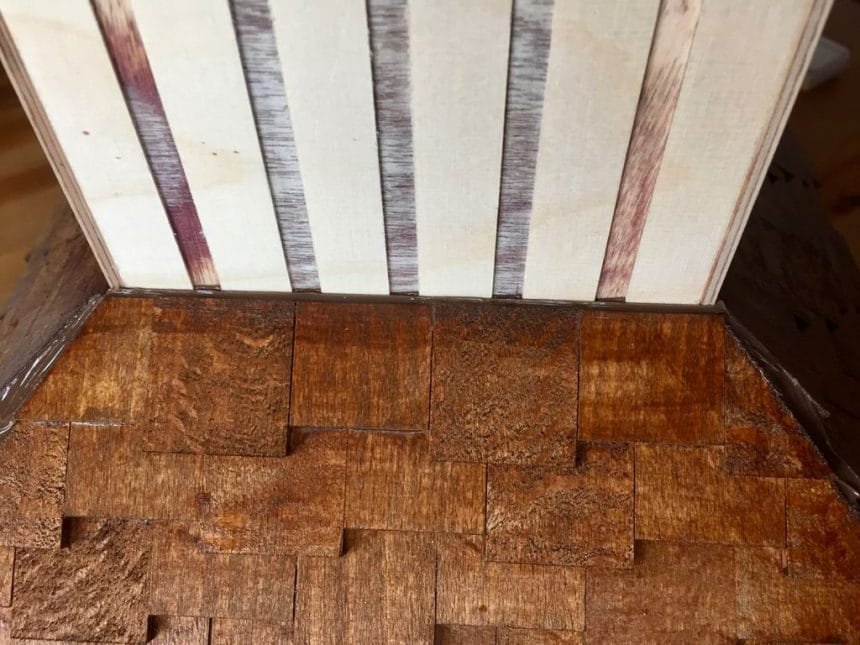
Everything is dry. I can start with the roofing tiles. This depends totally on you. You can use roofing felt, metal sheets or simply lacquer. I want to have small tiles made of wood. Therefore I cut small pieces out of my wooden strip (30mm x 100mm x 2mm). I use two different sizes, 30mm x 30mm x 2mm and 25mm x 30mm x 2mm, in alternating sequence. I mark the roofs with a pencil to see where the tiles will go. They have a roundabout 20mm distance to each other. Just make sure they are equally spread.
I simply glue them to the roof and to each other, starting on the lowest row. I use a small saw for cutting the edges. The rows overlap a bit.
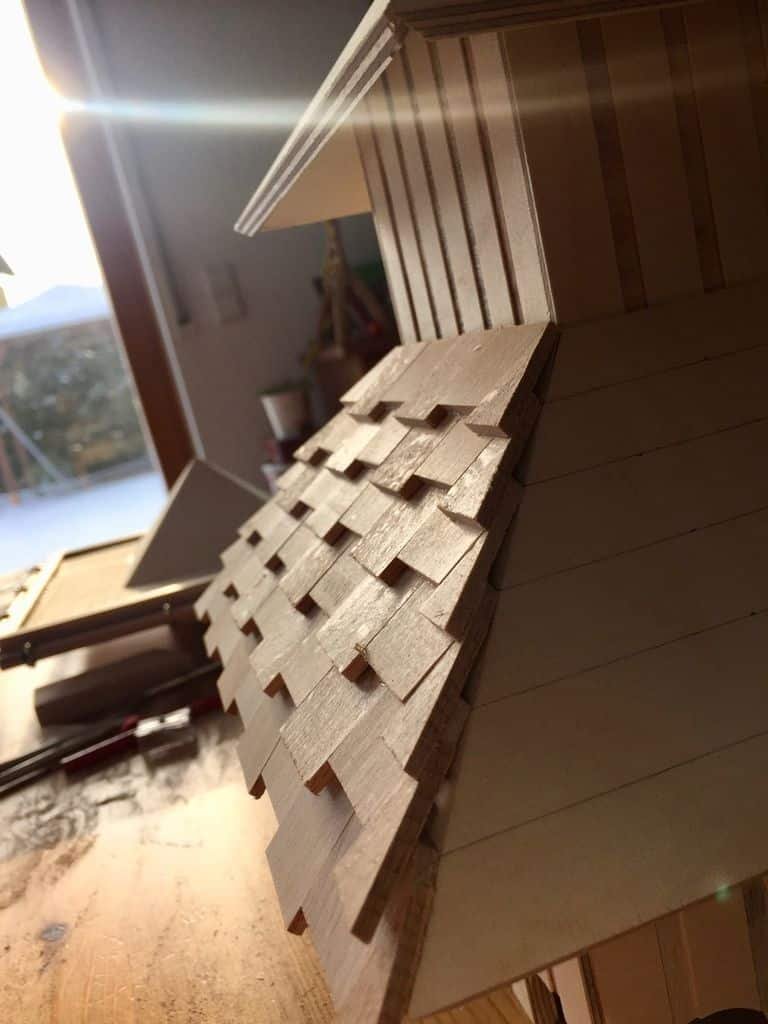
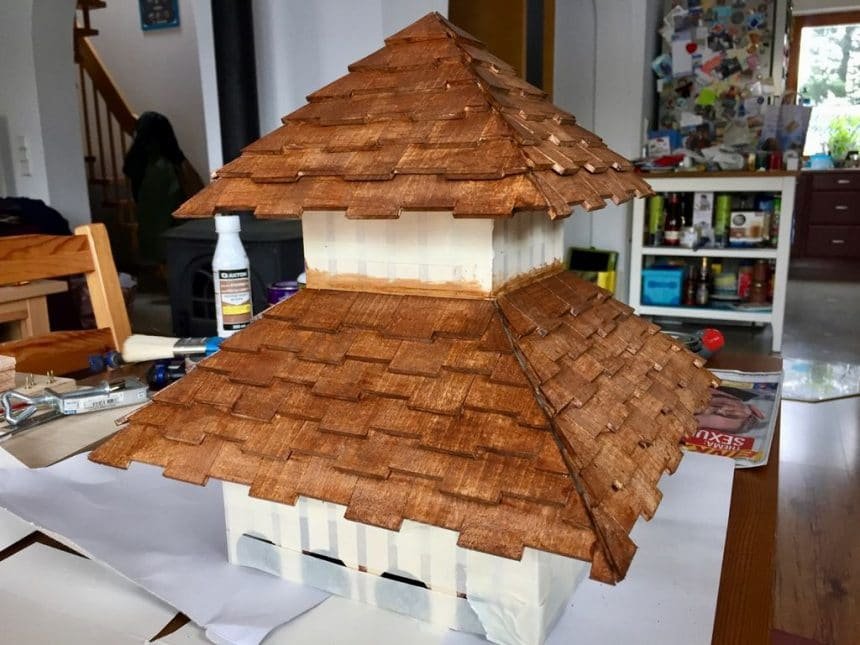
Phew, that was a lot of work. I’m glad you made it to this step :D. Now it’s easy. I use masking tape to cover the walls and protect them from the color. I use stain to darken the tiles a bit. You can use paint or simply leave the tiles as they are (maybe you have already used a different wood with a different color). Do as you like to.
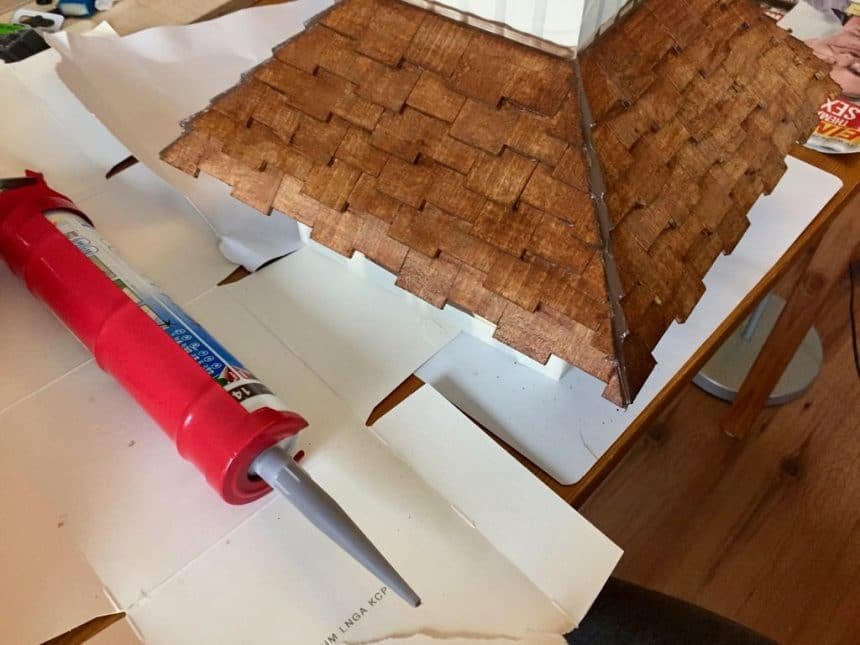
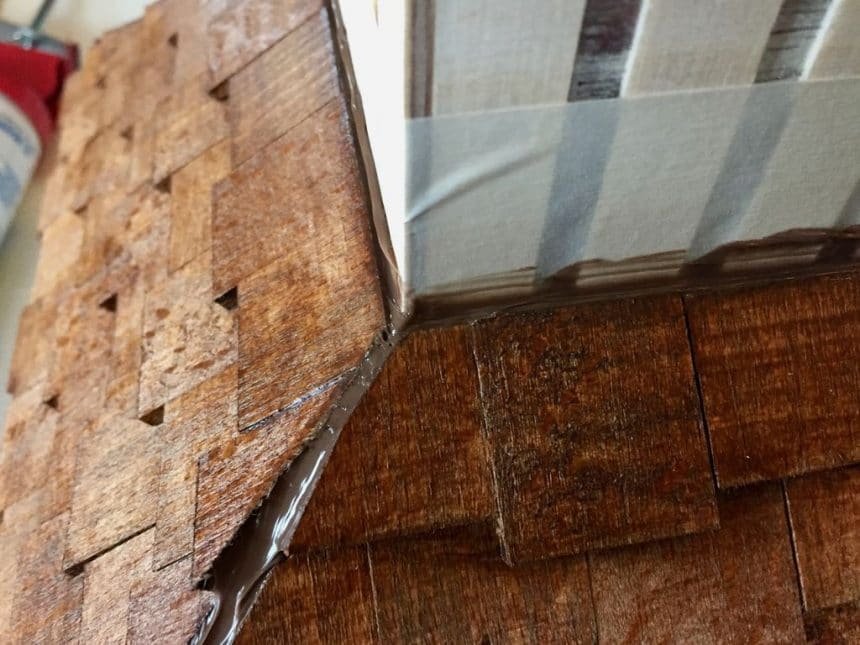
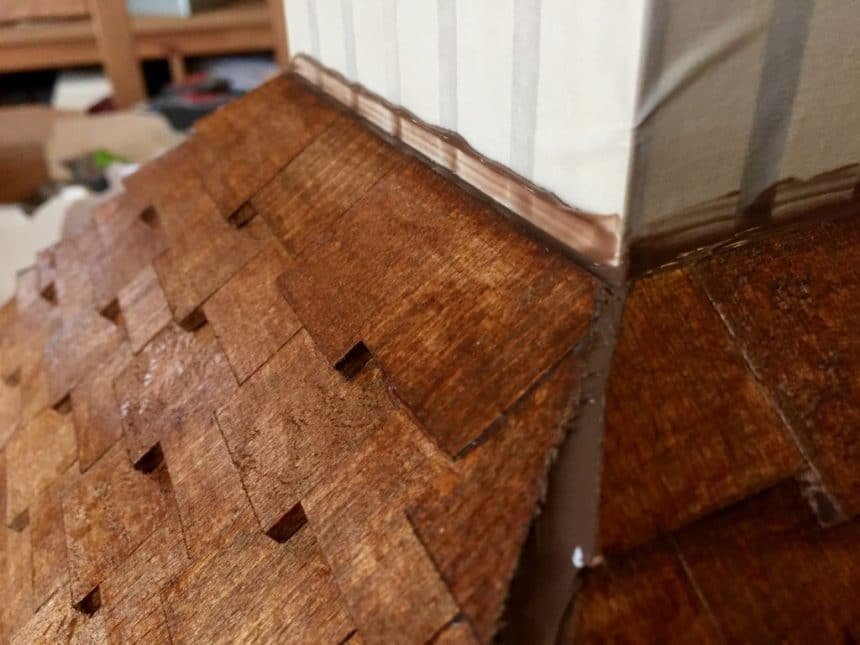
I use brown colored silicone to fill the gaps in the roofs. There are 8 gaps on the edges and four between the lower roof and the first floor. I use masking tape to cover the walls. You will get a clean edge when you peel off the tape.
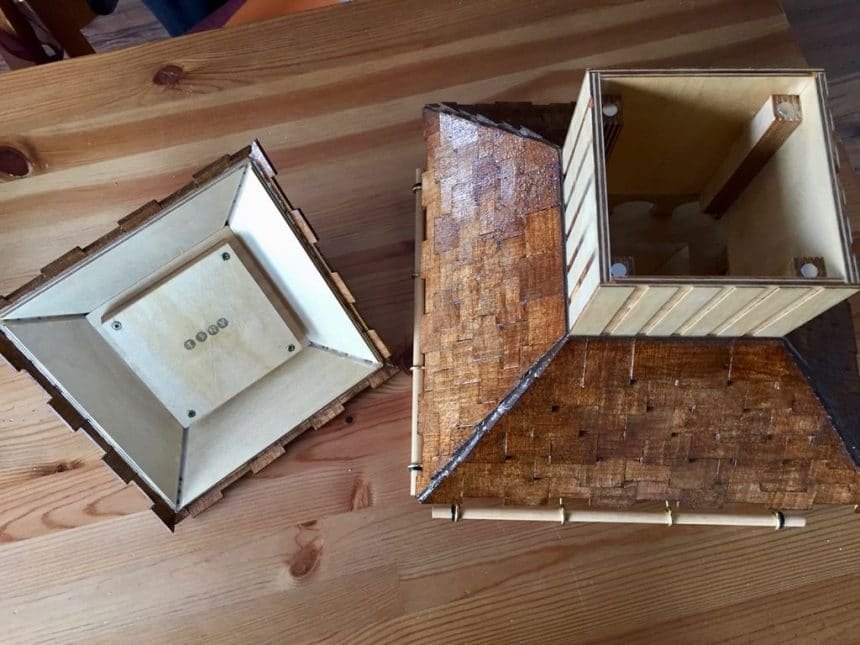
Yeah almost done. I apply two layers of waterproof lacquer to all surfaces, also the inside. That’s why I hadn’t glued the house to the base plate yet. The roofs will get a third layer for weather protection. When everything is dry, I glue the house to the base and reinsert the bars into the hooks. I use the O-rings to fixate the bars and I use pliers squeeze the hooks a bit into the bars, that makes them steady as a rock. UhUh I think we are done here
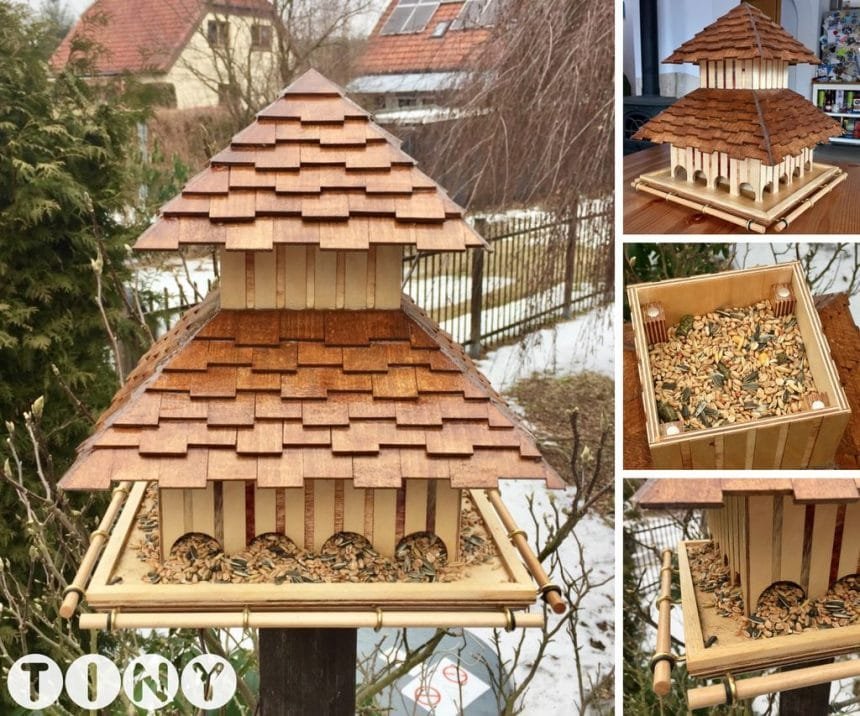
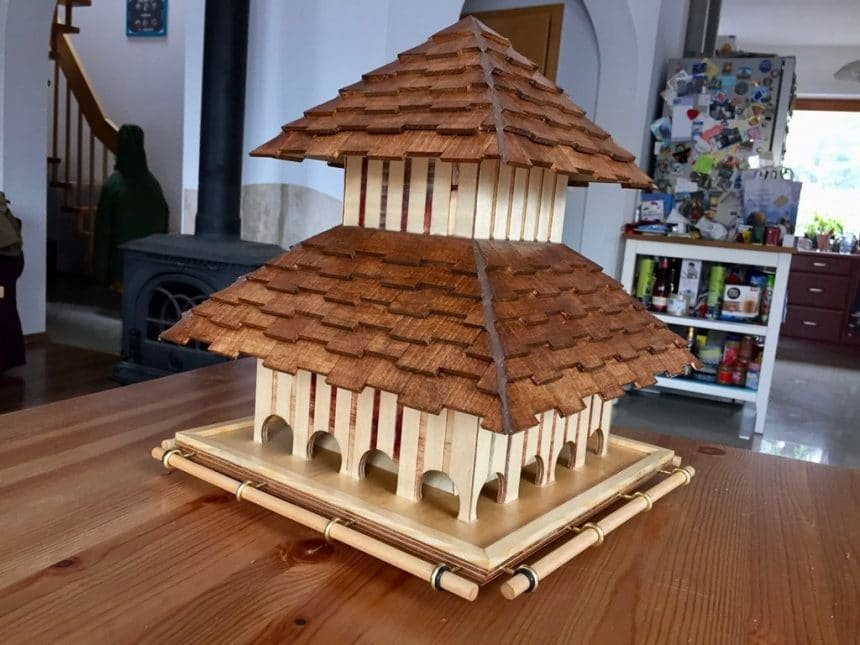
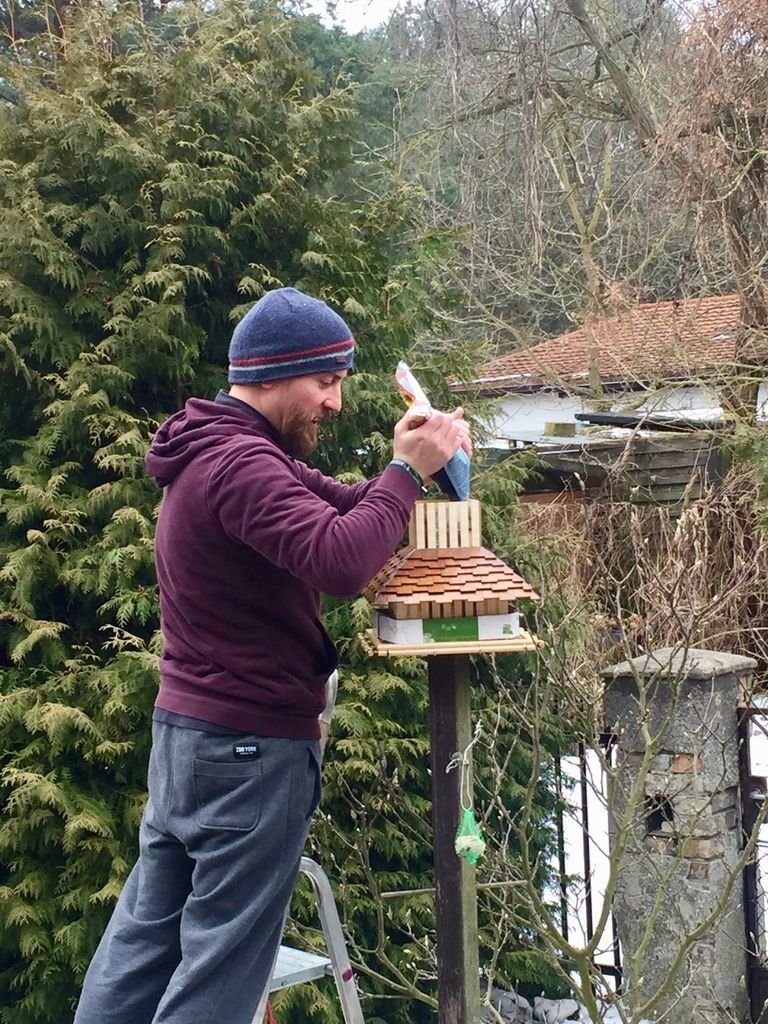
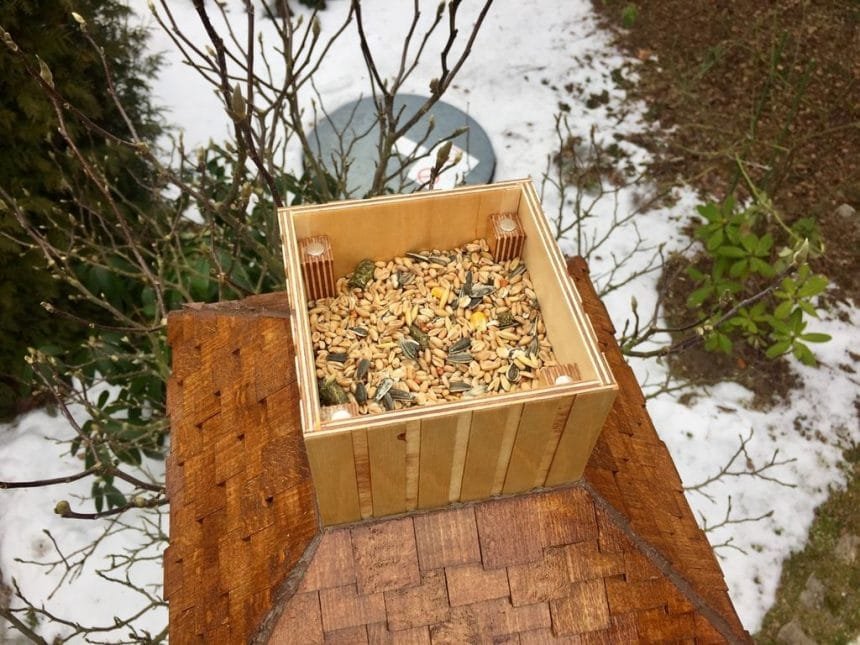
Yeah looks like it! We are done! Let’s take it outside to the birdies. It’s time to fasten the hanger screw into the pole and screw on the house. I use a small piece of cardboard to cover the holes while I fill in the seeds. I did it before without it and the seeds were overshooting. But there is no problem with the cover. I’m impressed, the households almost 4kg of bird seeds. That should be enough for weeks 😀
I spend the first half of the day looking through the window. It took a while till the message was spread to the birdies. Some days later we had a lot of visitors to our fly-in dinner. They never leave a tip 😀
I hope you will enjoy building this. Please let me know your experiences and improvements. Please put photos in the comments