How to sew a classic jumper

classic jumper
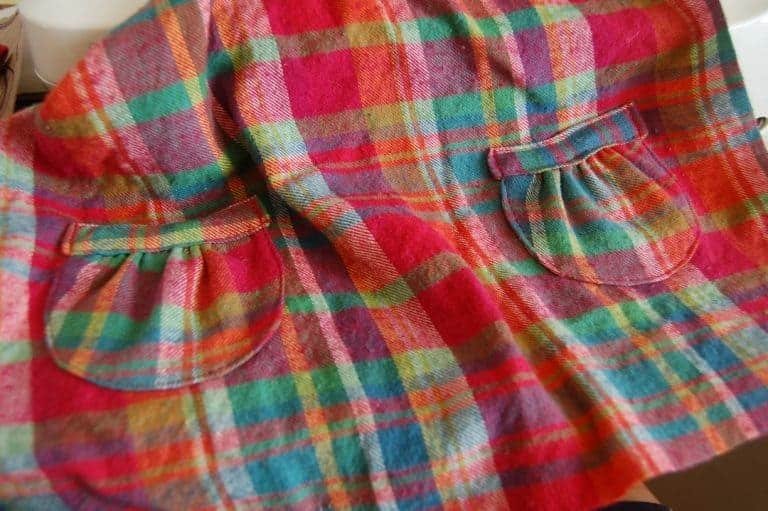
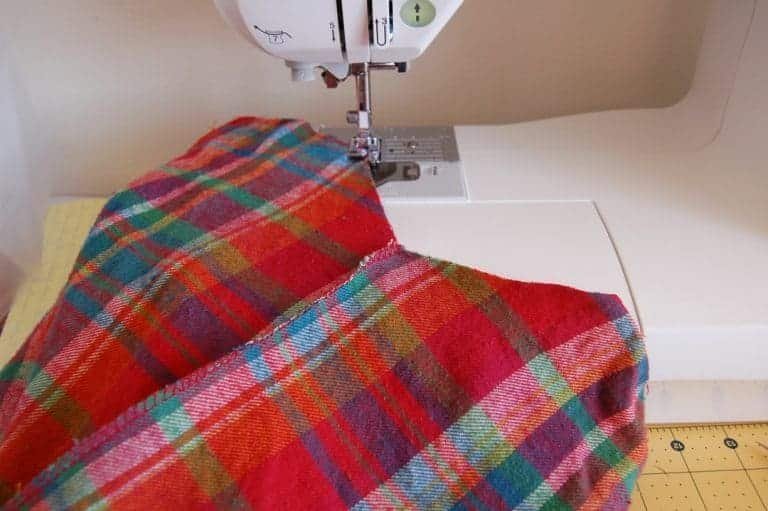
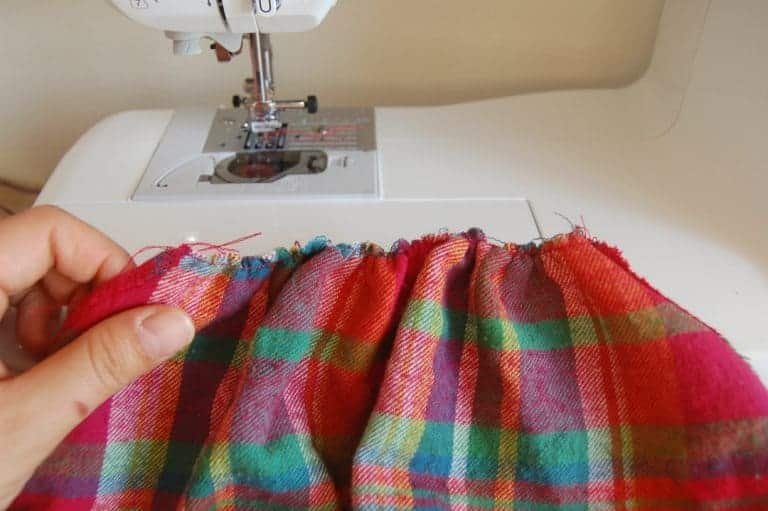
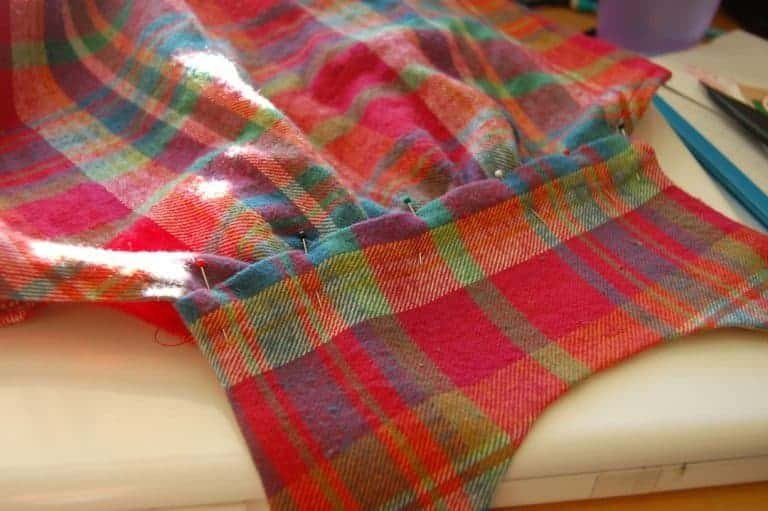
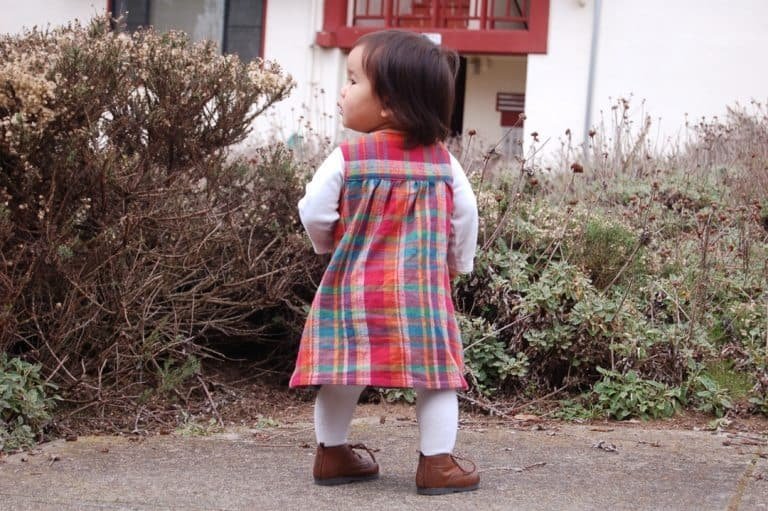
I’d been wanting to make a jumper for Yuki for some time. It’s just such a fun and classic style. And there is this super colorful plaid flannel (that I’m kind of obsessed with), that I thought would add a bit of a non-traditional, yet still, a holiday, feel to this piece. Here is the sketch of the jumper I wanted to make.
 classic jumper  classic jumper  classic jumper  classic jumper
You will need:
Main fabric
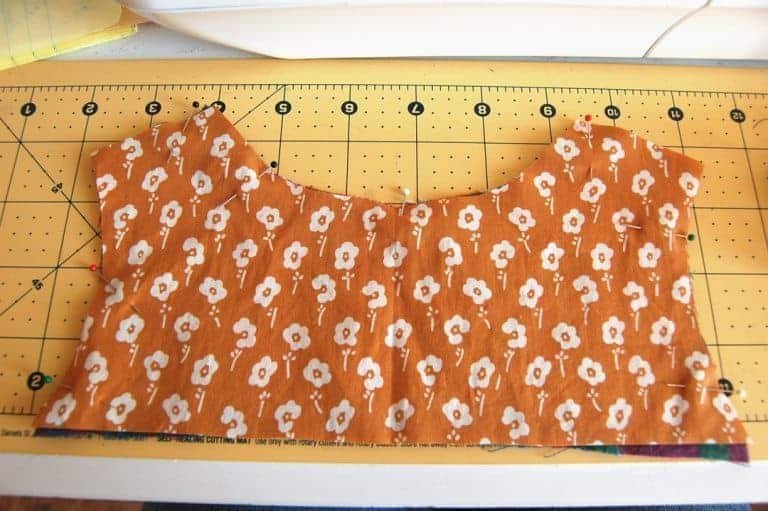
A little bit of fabric for lining
2 buttons
For this 12-18 month size jumper, I probably used 3/4-1 yard of the main fabric and 1/4 yard of the lining material.

 classic jumper

So first you need to draft your pattern. I used a small jumper to get the pattern shapes and a dress that fits Yuki to get the pattern size. If you need help drafting a pattern, there are plenty of great resources out there like this one or this one.
 classic jumper  classic jumper
The red lines are alterations I made as I was sewing when I realized the size/fit was all wrong. If you’re using this to get general shape ideas, make note of those changes!
The pieces you’ll need are:
Bodice front (1 main, 1 lining)
Bodice back (1 main, 1 lining)
Body front
Body back
Pocket (2 main, 2 lining)
Pocket edge (2 main)
 classic jumper
Let’s start sewing!
First, we’ll do the pockets. Take one main fabric pocket and one lining pocket and pin them together right sides together. Do the same with the other pocket fabrics and sew the curved edge together. Keep the top (straight edge) open! Flip them right side out and press.
 classic jumper  classic jumper
Now we’re going to gather the top of the pocket. If you need help with gathering, here’s a great gathering tutorial. I do it the way Dana calls the “proper” way, except I usually only do 1 line instead of 2 or 3, like you’re supposed to.
Sew a straight line across the top edge of the pocket with your machine set to the longest stitch. Do not backstitch at the end or beginning! Pull on one of the threads to gather the top edge of the pocket.
 classic jumper  classic jumper
For the pocket edge, fold it in half along the long side with the right side in. Sew up the short sides and leave the long edge open. Flip it right side out and press.
 classic jumper  classic jumper
Then fold the edge in about a 1/4 inch and press. Now you have this little pocket to stuff the top of your pocket into Confusing enough?
 classic jumper
Slide the top of the pocket into the opening and sew around the edge.
 classic jumper  classic jumper
why does one pocket look bigger than the other in this picture?
Position your pockets onto the front body piece and top stitch around the pocket. Make sure to leave the top of the pocket open and also sew back and forth several times at each end. The top corners of pockets get pulled the most, so these extra stitches will make sure the pockets are securely attached.
 classic jumper  classic jumper  classic jumper
Now lay the front and back body pieces together with right sides together and pin up the sides. Sew up the sides and then press these seams open.
 classic jumper
With the side seams opened up, serge or zig zag stitch along the arm hole. Fold the edge down a 1/4 inch, press and sew. If you can’t serge or zig zag, just fold the armhole edge down a 1/4 inch and then another 1/4 inch, then sew (like you would a hem).
 classic jumper  classic jumper  classic jumper
Now we’re going to gather the top part of the body piece. Just like before, set your machine to the longest stitch and sew a straight line across the top of both the front and back of the body piece. Pull one thread to gather the fabric (both front and back). Set the body of the dress aside while we work on the bodice.
 classic jumper
 classic jumper
Pin the bodice pieces together: main fabric and lining of the front bodice piece and the main fabric and lining of the back bodice piece, right sides together.
 classic jumper
Sew around bodice pieces, leaving the bottoms (straight edges) open. Trim excess fabric, corners and clip curves. Turn right side out and press.
 classic jumper  classic jumper  classic jumper
(I also added a label at this point, in the center of the back bodice piece. I just used an iron on transfer that I printed on my inkjet printer).
Turn about a 1/4 inch of the bottoms in (the same way we did with the pockets) and press.
 classic jumper
Now you’re going to slide the gathered edges of the body into the bodice pieces (just like we did with the pockets)! Make sure to put the front of the jumper into the front bodice piece and the back of the jumper into the back bodice. Pin and sew along the straight edge and Continue top stitching around the entire bodice piece (both front and back).
 classic jumper  classic jumper  classic jumper
You’re almost done!! Sew button holes in the back bodice piece and buttons onto the front bodice piece.
 classic jumper
Hem up the bottom by folding up a 1/4 inch and pressing, then folding another 1/4 inch, pressing again and top stitching. You’re done!!!
 classic jumper
I hope this wasn’t too confusing. I’m still learning how to write and photograph for tutorials, so I know this wasn’t perfect, but I’m working on it! In the meantime, don’t hesitate to contact me if you have any questions!
I love the jumper style because it’s so versatile. Depending on the fabric and how you layer it, it can be appropriate for pretty much any season or occasion!
 classic jumper
(It is getting harder and harder for me to keep this one still for photos!)
 classic jumper  classic jumper  classic jumper
Pair it with a little coat and she’s all ready for the holidays!
courtesy: youandmie