
Lately, we’ve looked at quite a few simple ways to add beads to embroidery stitches as part of the Stitch Fun! series here on Needle in Thread.
In this exploration of embroidery with beads, if you could take away just one lesson from the various tutorials, I’d want it to be this:
It’s easy to add beads to practically any embroidery stitch.
Sometimes, we think embroidery is Much More Complicated than it really is. And adding another element to it – like beads – can seem daunting. But the key is to try – play with your stitches and see what you can come up with! Really, there’s not a lot to it, when it comes to adding beads to any embroidery stitch.
Case in point: adding beads to cast-on stitch. I’ll show you how simple it is!

For this tutorial, I’m using linen for the ground fabric, 8 DMC Perle cotton for the thread, size 11/0 seed beads, and a milliner (or straw) needle that I think is a size 8.
With cast-on stitch, a milliner needle is the best option, because the size of the eye and the shaft are the same, making it easier for the needle to pass through the wraps and, in this case, the beads.
Before you start stitching, it’s a good idea to make sure that your thread and needle will pass easily through the beads. I usually test mine by threading the needle the way I plan to use it and passing a few beads onto the needle and over the eye. If the needle and thread pass through easily, I’m good to go! If they don’t, I have to rethink either my thread, my needle, my beads, or a combination of any or all of the above.

Here are the typical needle and thread configuration for the beginning of the cast-on stitch. The thread comes to the front at point A, the needle is taken down at a point (B) away from that (the distance from A to B is the length of the cast-on stitch), and the tip of the needle is brought out again at point A, above the thread, and in the same hole.
The needle is left on the surface (as shown above) while the stitches are cast onto the tip of the needle.
Again, if you’re unsure of how to cast on the stitches, watch the video!

Cast a stitch onto the needle. Just one. All by itself.

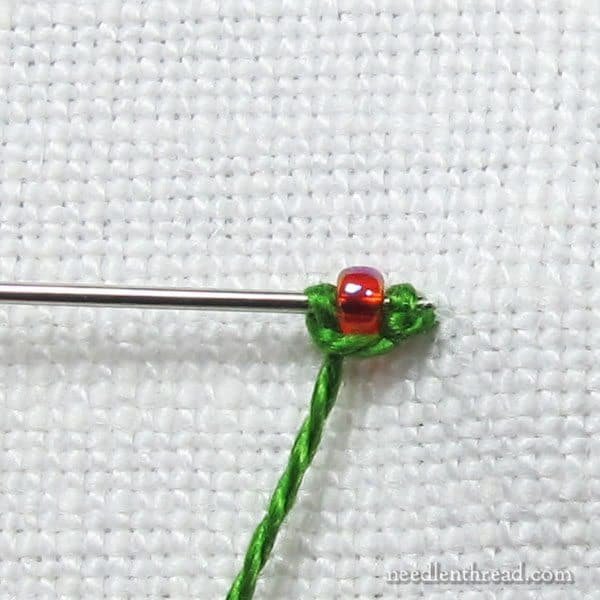
Then stick a bead onto the needle.
This is the hardest step because you can’t scoop the bead up with the tip of your needle. You have to put it on directly with your fingers. Watch the tip!

Then cast another stitch onto the needle, so that you have a little cast-on-stitch bead sandwich.
Continue alternating beads and cast-on stitches onto the needle, ending with a cast-on stitch.

The length of the stuff filling the tip of your needle should be approximately the length between A and B on the fabric, if you want the stitch to lie flat on the fabric.
If you want the stitch to arch (for example, in making cast-on stitch flowers or roses) then the length of the stuff on the needle should be longer than the distance between A and B. How many stitches and beads you fill on the tip of the needle, in relation to how much smaller the distance between A and B is, will determine how much of an arch your stitch has.
In this case, we’ll just make a simple cast-on stitch that lies flat on the fabric, but definitely, experiment with arches and loops in cast-on stitch with beads – they look great!

Pull the needle and thread through the cast-on stitches and beads.
As you pull through, the whole stitch will pull over to cover the space between points A and B. Tighten the stitch and take the needle and thread to the back of the fabric at point B, to end the stitch.


courtesy: needlenthread